
Homeowners often overlook the importance of maintaining a tight seal around their exterior doors until the cold winter air starts whistling through the cracks. Properly installed weatherstripping can significantly reduce your energy bills by keeping the conditioned air inside where it belongs. At Handydads we believe that every DIY enthusiast should master the art of weather sealing to ensure year round comfort. This project is one of the most cost effective ways to improve your home insulation without needing a major renovation. By following this guide you will learn how to identify gaps and choose the right materials for a professional finish.
Project Snapshot
- Time Required: 1-2 hours
- Difficulty Level: Easy
- Estimated Cost: $20 to $50
- Energy Savings: High
Tools and Materials
- High quality weatherstripping rolls
- Measuring tape
- Heavy-duty scissors or utility knife
- Mild detergent and cleaning cloth
- Rubbing alcohol
- Door sweep
- Small hammer and finish nails (optional)
Step-by-Step Instructions
Begin by cleaning the door frame thoroughly with a damp cloth and a mild detergent to remove any dirt or grease. A clean surface is absolutely critical for the adhesive on the new weatherstripping to bond correctly over the long term. If there is old crumbling foam or rubber present use a putty knife to scrape it away completely. Handydads experts recommend drying the area with a microfiber towel to ensure no moisture is trapped behind the new seal. Taking this extra time at the start prevents the frustration of the stripping falling off just a few weeks later.
Use a measuring tape to determine the length of the top and sides of the door frame. Accuracy is the most important part of this process to ensure there are no gaps for air to escape. You should measure twice to confirm the numbers before you commit to cutting any of your materials. Note the measurements on a piece of paper so you do not forget them while you are working. Handydads suggests adding an extra half inch to each measurement just to be safe during the initial trim.
Lay your weatherstripping on a flat surface and mark the lengths you measured in the previous step. Use sharp heavy-duty scissors or a utility knife to make clean straight cuts through the material. Be sure to cut the ends at a slight angle if you are overlapping corners for a tighter fit. If you are using a V-strip style seal ensure you are cutting it so the fold faces the correct direction. Professional results always start with clean cuts that align perfectly with the dimensions of the door.
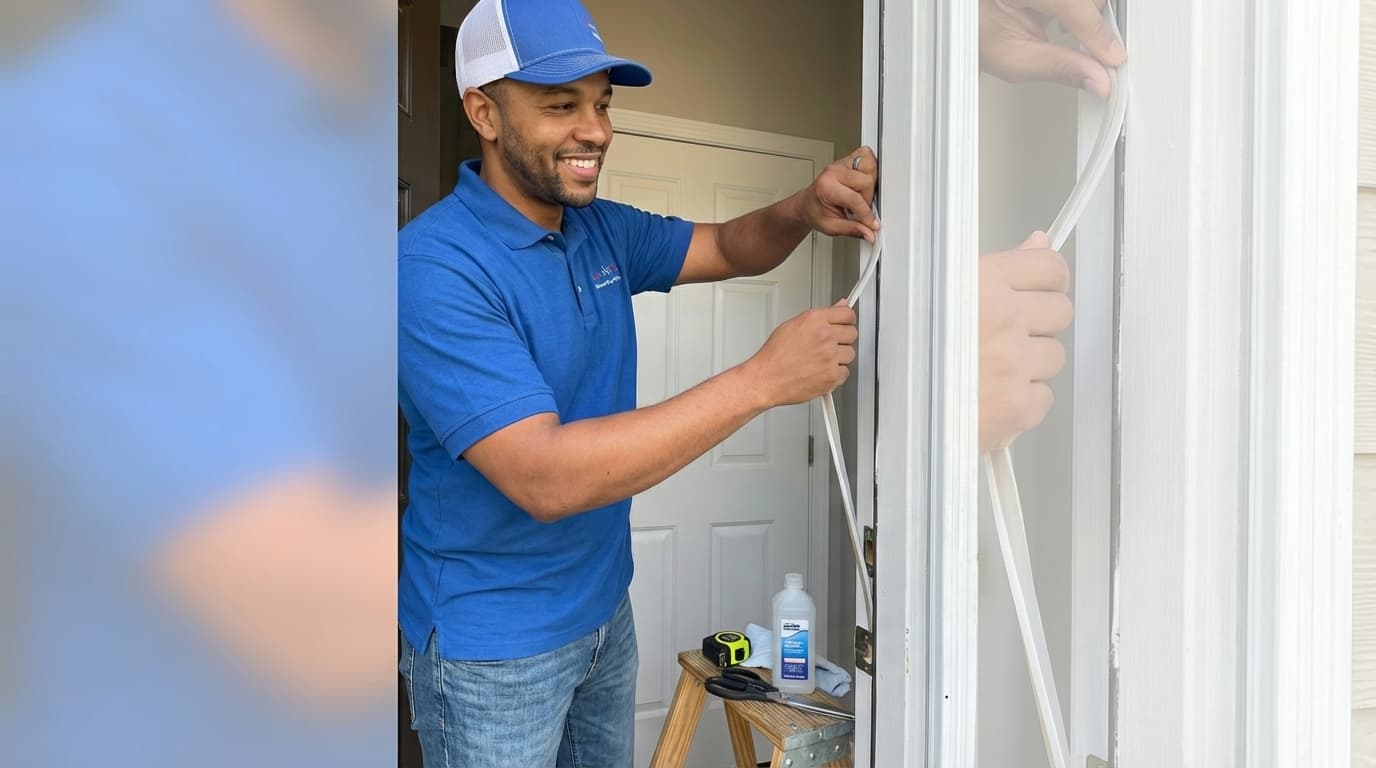
Peel back a few inches of the adhesive backing and start at the top corner of the door frame. Press the material firmly into the stop as you work your way down the side of the door. Run your thumb over the entire length of the strip several times to ensure the adhesive has made full contact. For nail-on types of weatherstripping you will want to space your nails about 6 inches apart for a secure hold. Handydads recommends starting with the top piece first and then moving to the vertical sides for the best results.
Close the door slowly and observe how the new seal compresses against the door surface. Look for any visible light coming through the edges which would indicate a gap that still needs attention. The door should close with a slight amount of resistance but it should still latch easily without forcing it. If the door is too difficult to close you may need to adjust the position of the stripping slightly. Proper sealing ensures that your heating and cooling systems do not have to work overtime to compensate for drafts.
From the Toolbox
I once visited a house where the owner complained about a ghost in the hallway because the curtains were always moving. After a quick inspection I realized the phantom was actually a massive draft coming from an old wooden door with no bottom seal. We installed a simple door sweep and the draft disappeared instantly much to the relief of the homeowner. It is amazing how such a small piece of rubber or foam can change the entire atmosphere of a room. Handydads thrives on solving these little mysteries that make a house feel like a home.
Top 5 Mistakes
Many DIYers jump into this project without realizing how precision affects the final outcome. One common error is choosing the wrong thickness of foam which can prevent the door from latching properly. Failing to prepare the surface with alcohol will almost always lead to the adhesive failing prematurely. Another issue involves stretching the material while applying it which causes it to shrink back later and leave gaps. Avoiding these simple pitfalls will ensure that your Handydads project remains durable for many years to come.
- Measuring incorrectly and leaving small gaps at the corners.
- Applying new material over old dirty adhesive residue or dust.
- Choosing foam that is too thick for the specific door clearance.
- Forgetting to seal the bottom of the door with a sturdy sweep.
- Stretching the rubber seals during the initial installation process.
Tool and Material Recommendations
Selecting high quality materials is the key to a long lasting seal for your home. We recommend using silicone or EPDM rubber weatherstripping because it remains flexible in extreme temperatures. A high quality door sweep with a built-in drip cap is also a great investment for exterior doors. For the best adhesion a dedicated surface cleaner or rubbing alcohol is necessary for the preparation phase. Handydads suggests looking for products with a 10-year warranty to ensure you do not have to repeat this task next season.
Quick Tips and Hacks
- Use a hair dryer to slightly warm the adhesive if you are working in cold weather.
- Check for light leaks at night by having someone shine a flashlight from the outside.
- Always cut the weatherstripping slightly longer than needed to ensure a tight fit in the corners.
- Apply a small amount of clear caulk to the ends of the stripping for extra durability.
- Test the door latch several times to make sure you have not created too much resistance.