
Installing a ceiling fan is a fantastic way to improve the comfort and energy efficiency of any room in your house. These fixtures help circulate air during the hot summer months while also assisting with heat distribution during the colder seasons. When you choose to work with Handydads you ensure that your home improvements are handled with the utmost care and attention to detail. This project requires some basic electrical knowledge but can be completed successfully by following the proper safety protocols. A well installed fan not only adds value to your property but also creates a more inviting atmosphere for your family and guests.
Project Snapshot
The difficulty level for this home improvement project is considered moderate for most homeowners. You should expect the entire process to take approximately two to three hours from start to finish. The overall impact on your room comfort and aesthetic appeal is exceptionally high. This project requires basic skills in electrical wiring and heavy fixture mounting. It is important to have a helper nearby if you are working with a particularly large or heavy fan model.
Tools and Materials
You will need a new ceiling fan kit that matches the style and size of your room perfectly. An approved metal electrical box specifically rated for ceiling fans is essential for long term safety. Make sure you have both a Phillips head screwdriver and a flat head screwdriver available on your workbench. A professional wire stripper and a reliable voltage tester are necessary for managing the electrical connections properly. You will also require a sturdy step ladder that allows you to reach the ceiling comfortably during the installation process.
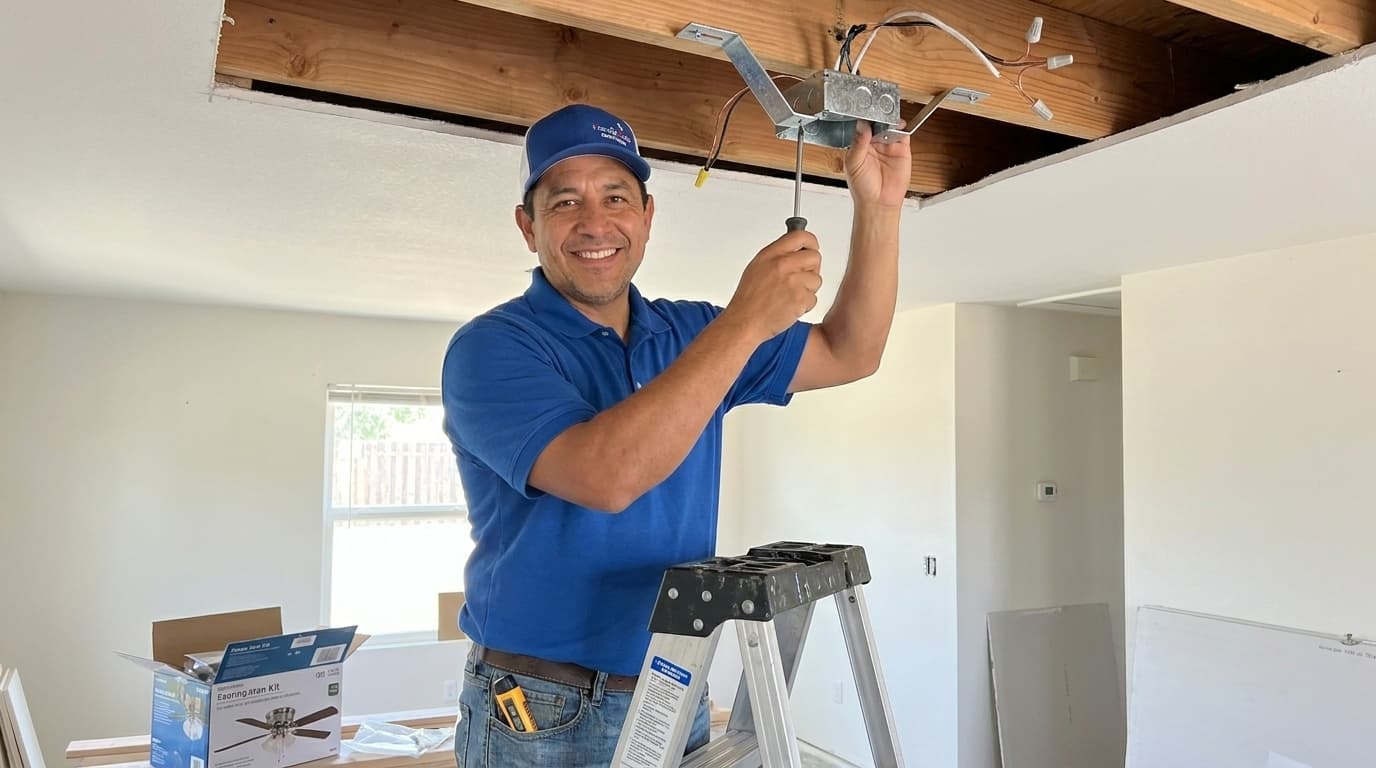
Step-by-Step Instructions
First you must turn off the power at the main circuit breaker to ensure a safe working environment. Use your voltage tester to verify that no electricity is flowing to the existing light fixture or junction box. Remove the old light fixture by unscrewing the mounting hardware and disconnecting the wire nuts. If the existing junction box is not fan rated you must replace it with a heavy duty brace and box designed to support the weight and vibration of a fan. Assemble the fan motor housing and downrod according to the specific manufacturer instructions provided in your kit. Lift the fan assembly and hang it on the mounting bracket before connecting the matching colored wires with secure wire nuts. Carefully tuck the wires into the box and attach the canopy to hide the electrical connections. Finally attach the fan blades and light kit before turning the power back on to test your new installation.
From the Toolbox
One of our lead technicians at Handydads once visited a home where a homeowner tried to hang a heavy fan on a standard plastic light box. The fan started wobbling violently the moment it was turned on because the support structure simply could not handle the centrifugal force. We quickly stepped in to install a proper metal brace that gripped the ceiling joists securely. It was a great reminder that the hidden components behind the drywall are often more important than the fixture itself. The family was thrilled to finally have a safe and quiet breeze in their living room without any safety concerns.
Top 5 Mistakes
Failing to use a fan rated junction box is a common error that can lead to the fixture falling over time. Not turning off the power at the breaker creates a significant risk of electrical shock for the person doing the work. Forgetting to balance the blades causes annoying wobbling and unnecessary noise during high speed operation. Connecting the wrong wires together can occur because the colors in older homes may not match modern standards. Over-tightening the mounting screws can often damage the ceiling material or even the fan motor housing itself.
Tool and Material Recommendations
Always look for a ceiling fan that carries the Energy Star certification for the best possible energy efficiency. We recommend using a non contact voltage tester to confirm the wires are dead before you start touching them. A high quality wire stripping tool will make the electrical connections much cleaner and more reliable for years to come. Invest in a sturdy fiberglass ladder that provides a stable and non conductive platform for overhead electrical work. Use high quality electrical tape to secure your wire nuts for an extra layer of safety and vibration resistance.
Quick Tips and Hacks
You can use a small piece of painter tape to mark which wire goes to the light and which goes to the fan clearly. Dust the fan blades thoroughly before installation to keep your workspace clean and prevent allergens from spreading immediately. If the fan wobbles slightly after installation you should try using the balancing kit that usually comes in the box. Set the fan motor to rotate counterclockwise in the summer months to create a cooling downdraft for the room. Keep the remote control in a dedicated wall bracket so it never gets lost in the furniture or couch cushions.