
Installing a ceiling fan is a fantastic way to improve the comfort and energy efficiency of any room in your home. Handydads understands that many homeowners feel intimidated by electrical projects but this task is quite manageable with the right guidance. A new fan helps circulate air during the summer months while also helping to push warm air down during the winter. You will find that this upgrade adds both aesthetic value and functional performance to your living space. Taking the time to do it yourself ensures that the job is done correctly and according to your specific preferences.
Project Snapshot
Understanding the scope of this project is the first step toward a successful installation in your home. This task is generally considered intermediate because it involves working with electrical wiring and heavy components. Handydads estimates that most homeowners can complete the job within two to three hours from start to finish. You do not need specialized trade skills but you should feel comfortable standing on a ladder for an extended period. Gathering all your components before you begin will help ensure the process moves along smoothly.
- Difficulty: Intermediate
- Time: 2 to 3 hours
- Tools: Screwdriver, Wire strippers, Voltage tester
Tools and Materials
Having the right tools ready to go will make this DIY project much more enjoyable and efficient. Handydads recommends using a sturdy step ladder that allows you to reach the ceiling comfortably without overextending. You will also need a reliable set of screwdrivers and wire strippers to handle the electrical connections properly. A non-contact voltage tester is an absolute requirement to ensure your safety throughout the entire process. Organizing your materials on a nearby table can prevent you from losing small screws or wire nuts during assembly.
- Ceiling fan kit
- Screwdriver set
- Wire strippers
- Non-contact voltage tester
- Step ladder
- Electrical tape
- Wire nuts
Step-by-Step Instructions
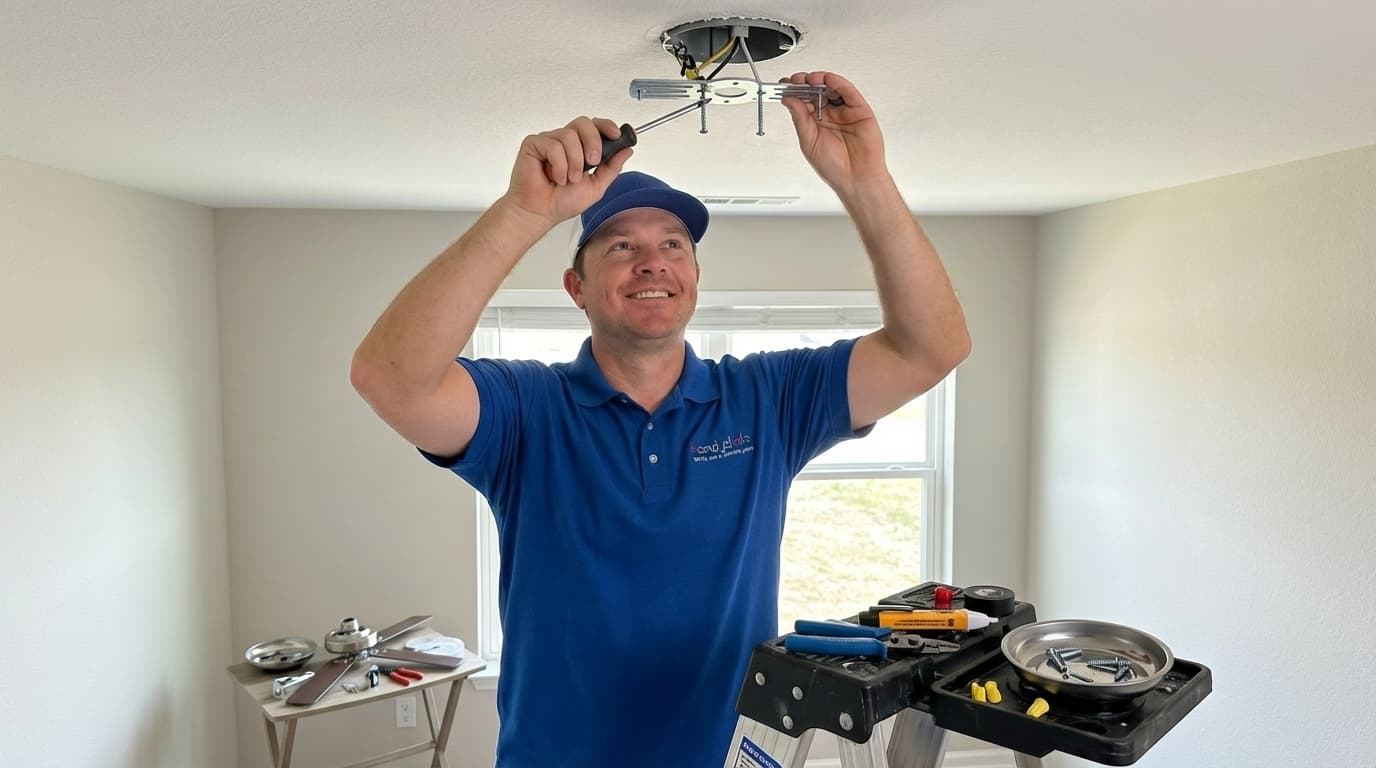
Before you begin the physical installation process you must gather all necessary components and prepare the workspace. Handydads recommends clearing the area under the fixture to provide ample room for your ladder and tools. You should read through the specific manufacturer manual to familiarize yourself with the unique wiring colors or mounting hardware. Safety is the primary concern so double checking that the power is disconnected is a vital first step. Once you have prepared the site and verified the electrical status you can follow these specific steps to complete the task.
- Always begin by turning off the power at the main circuit breaker and using a voltage tester to ensure the wires are dead.
- Remove the old light fixture carefully and verify that the electrical box is rated for the weight of a ceiling fan.
- Secure the new mounting bracket to the electrical box using the heavy-duty screws provided in your fan kit.
- Assemble the motor unit and the downrod while following the specific manufacturer guidelines included in the box.
- Lift the motor assembly to the ceiling and hook it onto the bracket so that you can work on the wiring with both hands free.
- Connect the house wires to the fan wires using wire nuts and wrap them in electrical tape for a secure connection.
- Attach each fan blade securely to the motor and finish by installing the light kit and glass globes.
From the Toolbox
I remember helping a neighbor who tried to install a fan without checking the box rating first. The fan started wobbling significantly after just a few days because the old plastic light box could not support the weight and vibration. Handydads always recommends checking the ceiling box for a fan rated stamp before you even buy the new unit. We spent the afternoon replacing the old box with a proper brace which solved the problem and kept the ceiling intact. It was a great lesson in why preparation is just as important as the actual installation.
Top 5 Mistakes
Avoiding common pitfalls is the best way to ensure your ceiling fan operates safely and quietly for many years. Handydads has seen many homeowners skip the step of verifying the weight capacity of their existing ceiling box. You must also ensure that the wire connections are tight and wrapped with electrical tape to prevent them from vibrating loose. Ignoring the blade height can lead to accidents if the fan is mounted in a room with a low ceiling. These mistakes are easy to avoid if you pay close attention to the details of the installation process.
- Not using a fan rated electrical box.
- Failing to turn off the power at the main breaker.
- Wiring the fan and light to the same switch without checking options.
- Forgetting to balance the fan blades properly.
- Mounting the fan too low for room safety.
Tool and Material Recommendations
Choosing high quality components is essential for a project that involves both electrical work and moving parts. Handydads recommends looking for fans from reputable manufacturers that offer long warranties on their motors. You should also invest in a reliable non-contact voltage tester to keep yourself safe throughout the installation. Using professional grade screwdrivers will prevent you from stripping the heads of the mounting screws. Having the right equipment on hand before you start will make the entire process much more efficient.
- Hunter or Hampton Bay ceiling fans
- Klein Tools non-contact voltage tester
- Werner 6-foot fiberglass step ladder
- Milwaukee multi-bit screwdriver
- Ideal Industries wire nuts
Quick Tips and Hacks
There are several small tricks that can make this installation go much smoother for a novice DIY enthusiast. Handydads suggests using a piece of wire or a hook to hang the motor if the bracket does not have a built-in feature. You can also use a magnetic parts tray to keep all the small screws and washers from rolling away during assembly. Checking the balance of the blades with a simple coin test can save you from annoying wobbles later on. Keeping these simple strategies in mind will help you achieve a professional result with minimal frustration.
- Use a magnetic tray for small screws.
- Tape wire nuts for extra security.
- Switch fan direction seasonally for efficiency.
- Use a pillowcase to clean dusty blades.
- Have a helper nearby for ladder safety.