
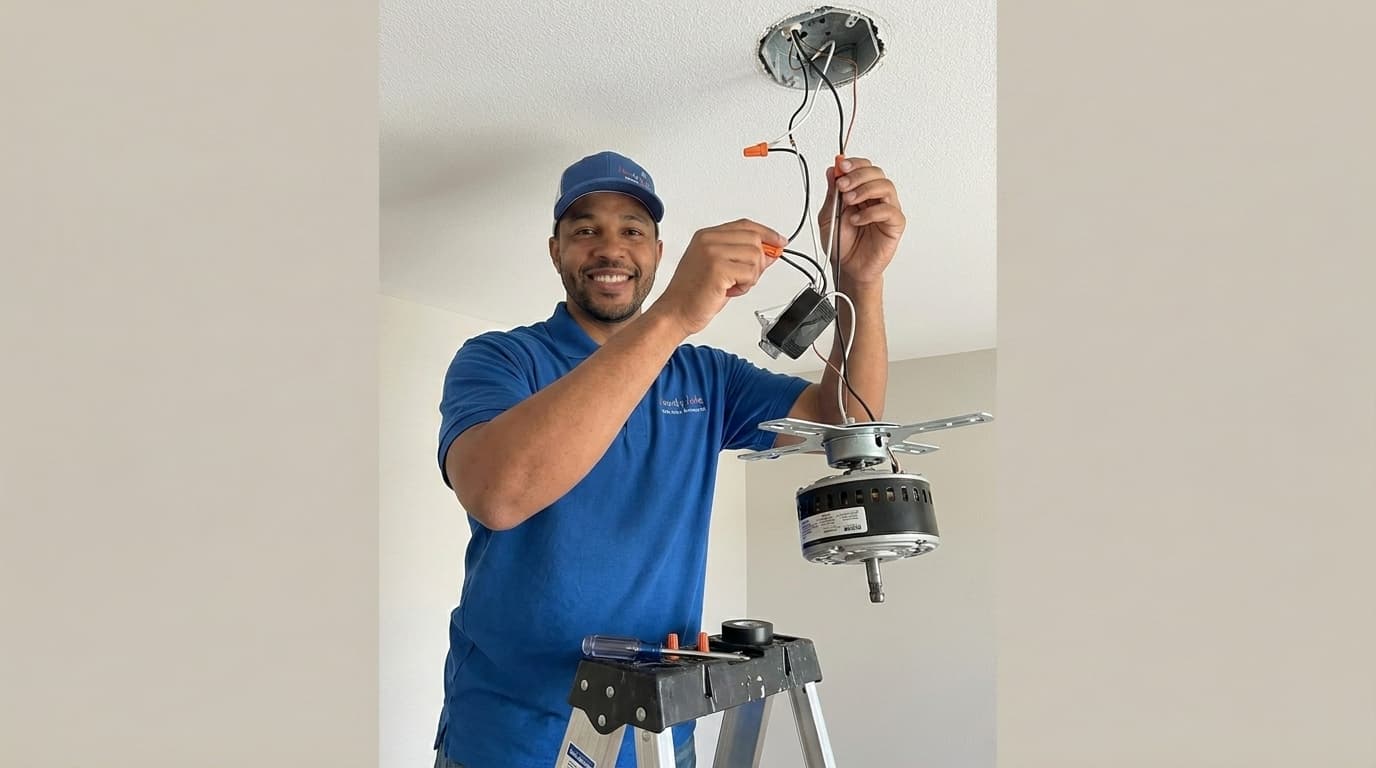
Ceiling fans are a fantastic addition to any room because they provide energy efficient cooling and improve air circulation throughout the year. Installing a new fan might seem like a daunting task for many homeowners but it is actually a very manageable DIY project with the right guidance. At Handydads we believe that every homeowner can master these types of home improvements with a bit of patience and the correct tools. Before you begin you should always ensure that you have a fan rated electrical box installed in your ceiling to support the weight and vibration of the unit. Following the proper safety protocols will ensure that your new fixture operates smoothly and safely for many years to come.
Project Snapshot
- Difficulty Level: Moderate
- Time Commitment: 2 to 3 Hours
- Tools Needed: Screwdriver and Voltage Tester
- Project Outcome: Improved Comfort
Tools and Materials
- Ceiling fan kit with remote control unit
- Phillips and flathead screwdrivers
- Wire strippers and wire cutters
- Non contact voltage tester
- Sturdy step ladder
- Electrical tape and wire nuts
Step-by-Step Instructions
Switching off the electrical power at the main breaker panel is the most critical first step for any electrical installation project. You should never rely solely on the wall switch to cut power because wires inside the box could still be hot and dangerous. Once the power is off use a non contact voltage tester to verify that no electricity is flowing through the wires. After confirming safety you can proceed to remove the existing light fixture and disconnect the old wiring carefully. Make sure to support the old fixture as you unscrew it so it does not fall and pull on the electrical cables.
Installing the mounting bracket is the next phase where you secure the fan to the ceiling electrical box. Ensure that your box is specifically rated for ceiling fans because standard light boxes cannot handle the weight or the constant vibration of a spinning motor. Attach the bracket using the heavy duty screws provided with your fan kit and tighten them firmly into the ceiling structure. While the bracket is being secured you can assemble the fan motor and downrod on a flat surface like a table or the floor. Be sure to pull the motor wires through the downrod assembly so they are ready for connection once the unit is hung in place.
Lift the assembled fan motor and hook it onto the mounting bracket which allows you to work on the wiring hands free. This is the stage where you will insert the remote control receiver into the bracket and connect the corresponding colored wires. Typically you will connect the black house wire to the black receiver wire and the white house wire to the white receiver wire. You must also connect the fan motor wires to the other side of the receiver according to the manufacturer instructions provided. Use high quality wire nuts and wrap them with electrical tape for an extra layer of security and insulation before finishing.
Once the wiring is tucked neatly into the canopy you can slide the canopy up and screw it into place to hide the bracket and wires. The next step involves attaching the fan blades one by one using a screwdriver and making sure every screw is tightened to prevent future wobbling. If your fan includes a light kit you will plug it into the motor housing and secure it with the provided hardware according to the manual. Finally install the light bulbs and the glass shades before turning the power back on at the main breaker panel. Test the remote control to ensure all speeds and lighting functions are working exactly as intended by the manufacturer.
From the Toolbox
I remember a service call where a client complained that their ceiling fan was making a loud knocking sound every time it turned on. Upon inspection I discovered that the previous installer had used a standard plastic light box instead of a fan-rated metal brace. The weight of the fan had actually started to pull the box through the drywall which created a very hazardous situation for the family. We quickly replaced the box with a proper heavy duty expansion brace that gripped the ceiling joists securely. The homeowner was relieved to have a silent and safe fan that would not fall on their dining table during dinner.
Top 5 Mistakes
Avoiding common pitfalls will save you a lot of time and frustration during your ceiling fan installation process. One of the biggest mistakes is failing to use a fan rated electrical box which can lead to the fan falling or vibrating excessively. Another frequent error is forgetting to tighten the blade screws completely which results in annoying clicking or humming noises during operation. Many people also struggle with the remote receiver wiring by crossing the input and output wires which can blow the receiver unit instantly. It is also important not to skip the balancing step if your fan comes with a balancing kit to ensure smooth rotation at high speeds. Finally always remember to shut off the power at the breaker instead of just the wall switch for maximum safety.
Tool and Material Recommendations
Choosing the right equipment makes a significant difference in the longevity and performance of your new ceiling fan. We recommend looking for fans that include a high quality remote system from reputable brands like Hunter or Hampton Bay for better reliability. A good non contact voltage tester from Klein Tools is an essential safety device that every DIYer should have in their toolbox. For the installation itself a sturdy Werner step ladder will provide the stability you need to work comfortably at ceiling height. Using a magnetic Phillips head screwdriver will also help you manage the small screws without dropping them into the motor housing or onto the floor.
Quick Tips and Hacks
There are several clever tricks that can make your ceiling fan installation go much smoother and faster. You can use a piece of wire or a coat hook to hang the motor from the bracket if your fan does not have a built in hook feature. It is also helpful to tape the remote control to the wall bracket immediately so it does not get lost during the final stages of the project. If you find that your fan wobbles slightly after installation you can use a coin or a specialized balancing clip to find the heavy blade. Always check the direction of the motor so that it spins counter clockwise in the summer to push air down for a cooling effect. Keeping the motor housing clean from dust will prevent overheating and extend the life of your new fixture.