
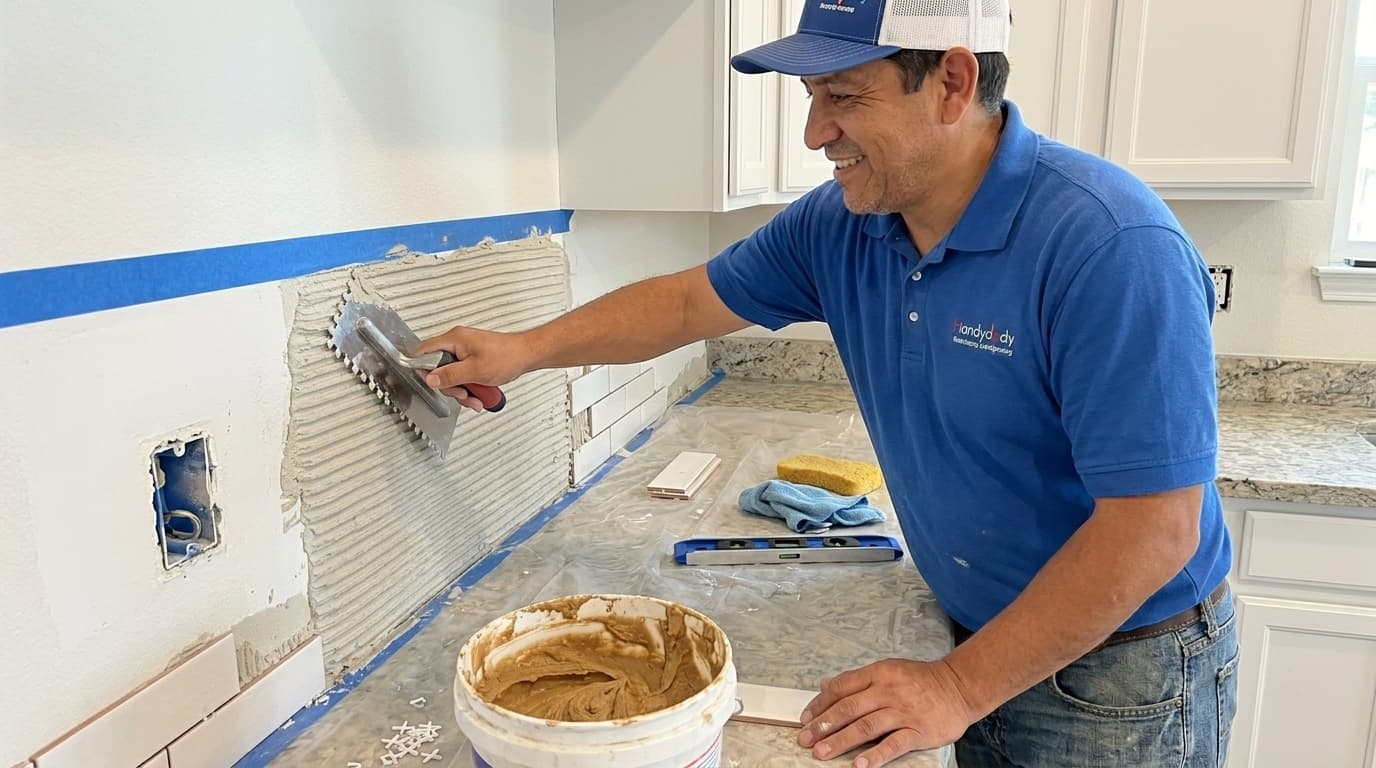
Installing a ceramic tile backsplash is one of the most effective ways to upgrade the look and feel of your kitchen. This project not only protects your walls from moisture and stains but also adds a significant amount of visual appeal to the space. Many homeowners feel intimidated by tiling, but the process is manageable when you break it down into logical steps. Handydads recommends taking your time with the layout to ensure that everything looks symmetrical and professional when finished. With the right tools and a bit of patience, you can achieve a high quality look that lasts for many years to come.
Project Snapshot
- Difficulty: Moderate
- Time: One to two days
- Impact: High kitchen transformation
- Skills: Measuring, cutting, and basic masonry
- Best for: Homeowners looking to refresh their kitchen aesthetics without a full remodel.
Tools and Materials
- Ceramic tiles of your choice
- Thinset mortar and grout
- Notched trowel and rubber grout float
- Tile spacers and a level
- Wet saw or manual tile cutter
- Bucket, sponge, and microfiber cloth
- Painter's tape and plastic drop cloths
Step-by-Step Instructions
Start by preparing the wall surface which involves cleaning it thoroughly and removing any outlet covers or switch plates. You should use a degreaser if the wall is near a stove to ensure the adhesive bonds correctly. Plan your layout by finding the center point of the wall and dry fitting tiles to avoid small slivers at the edges. Handydads suggests marking a reference line with a level to ensure your rows stay perfectly horizontal. This preparation phase is the most critical part of achieving a professional result in your kitchen.
Mix your thinset mortar according to the manufacturer's instructions until it reaches a thick peanut butter consistency. Apply the mortar to the wall using a notched trowel held at a forty-five degree angle to create consistent ridges. Work in small sections so the adhesive does not skin over before you have a chance to place the tiles. Press the tiles firmly into the mortar and wiggle them slightly to collapse the ridges and ensure full coverage. Use plastic spacers between every tile to maintain even grout lines throughout the entire project area.
Measure and cut tiles as needed using a wet saw for a clean edge around outlets and corners. Make sure to account for the width of the spacers when you are measuring your final pieces for the edges. Once all the tiles are set in place, allow the mortar to cure for at least twenty-four hours before moving to the next step. Remove all the plastic spacers carefully and wipe away any excess thinset that may have squeezed through the joints. This waiting period ensures that the tiles are locked in place and will not shift during grouting.
Mix your grout and apply it using a rubber grout float held at a forty-five degree angle to the wall. Press the grout firmly into the joints using a diagonal motion to ensure they are completely filled from top to bottom. Let the grout sit for about ten to twenty minutes before wiping the surface with a damp, but not dripping, sponge. Work in a circular motion to remove the excess grout without pulling it out of the joints themselves. After a few hours, a slight haze will appear which you can easily buff away with a clean microfiber cloth.
From the Toolbox
I remember helping a neighbor install their first subway tile backsplash on a rainy Saturday afternoon. They were worried about the tiles sagging, but Handydads taught them the importance of using a temporary ledger board for support. As we worked through the afternoon, the kitchen slowly transformed from a bland space into a modern culinary masterpiece. Seeing the look of pride on their face once the grout was dry made the entire effort worthwhile. It is these small victories in home improvement that truly turn a house into a home.
Top 5 Mistakes
- Failing to properly clean and degrease the wall surface before starting the installation process.
- Not using a level to ensure the first row of tile is perfectly straight and even.
- Applying too much thinset at once which leads to it drying before the tiles are set.
- Skipping the step of sealing the grout which can lead to permanent staining over time.
- Neglecting to use a ledger board when tiling behind a range where there is no countertop for support.
Tool and Material Recommendations
To get the best results, Handydads recommends using a high quality modified thinset that provides extra stickiness for vertical applications. A diamond blade wet saw is the preferred tool for making precise cuts around complex obstacles like electrical outlets. Choose a grout color that either matches your tile for a seamless look or contrasts it to highlight the pattern. Always keep a large supply of clean sponges on hand because you will need to change your water frequently during the cleanup. Investing in a set of knee pads can also make the lower sections of the wall much more comfortable to work on.
Quick Tips and Hacks
Use blue painter's tape to mark the center line on your wall for a perfect starting point. Keep a bucket of clean water nearby to wash your sponge frequently while cleaning the grout haze. If you have a complex cut around a pipe, use a cardboard template to get the shape right before cutting the tile. Handydads suggests using a white pencil to mark dark tiles so you can see your cut lines clearly. Always wear safety glasses when using a tile cutter or saw to protect your eyes from flying debris.