
Adding a new tile backsplash is one of the most effective ways to upgrade the look and feel of your kitchen without a full renovation. Handydads recommends this project for homeowners who want to protect their walls while adding a touch of personal style to their cooking space. You will find that tile comes in many different colors and patterns to match any home decor style perfectly. Before you begin the process, it is essential to ensure your walls are clean and properly prepared for the adhesive to stick correctly. Taking the time to plan your layout will result in a professional appearance that enhances your home value significantly.
Project Snapshot
This project generally takes a full weekend to complete because you must allow time for the adhesive and grout to dry properly. It is a moderately difficult task that requires careful measurement and some patience with a wet saw or tile nippers. Handydads suggests having a helper nearby to assist with holding larger tiles or mixing the thin-set mortar while you work. Most kitchen backsplashes cover the area between the countertop and the bottom of the upper cabinets for a clean look. Once finished, your kitchen will look more modern and become much easier to clean after preparing messy meals.
Tools and Materials
You will need a variety of specific tools to ensure the job is done correctly from start to finish. Essential items include a wet tile saw, a notched trowel, a rubber grout float, and a large sponge for cleaning. For materials, you must purchase your chosen tile, thin-set mortar, grout, and matching caulk for the edges. Handydads also recommends having a level, measuring tape, and painter tape to protect your countertops during the installation process. Make sure you have enough spacers to maintain consistent gaps between the tiles as you move along the wall.
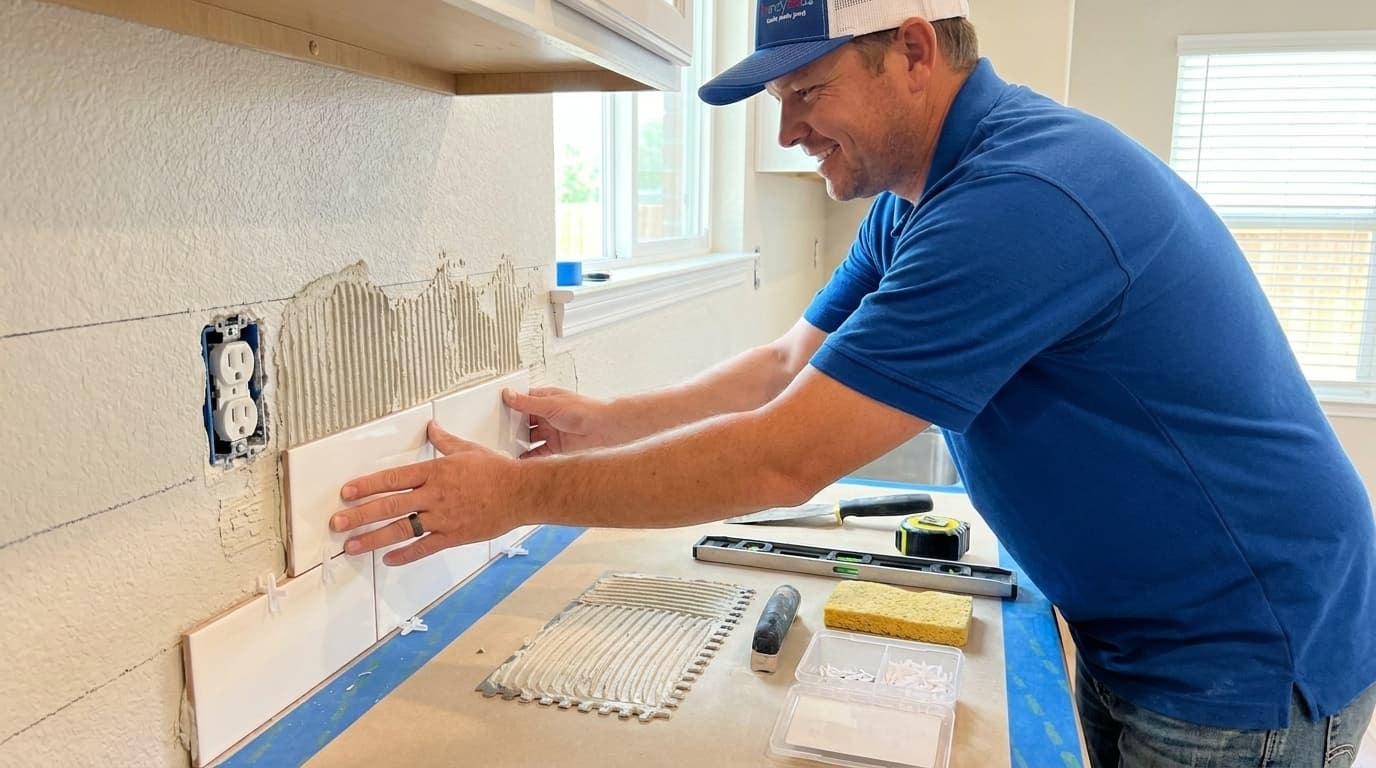
Step-by-Step Instructions
First, start by cleaning the wall surface thoroughly and removing all outlet covers to create a flat work area. Use your level to find the lowest point of your cabinets and draw a reference line across the wall to keep your tiles straight. Handydads recommends applying a small amount of thin-set mortar to the wall with your notched trowel at a forty-five degree angle. Press your first tile into the mortar firmly and use spacers to keep it level with the countertop or your reference line. Continue this process across the wall, cutting tiles as needed to fit around outlets or into corners before the mortar sets.
From the Toolbox
One time Handydads helped a homeowner who had tried to install a backsplash without using any spacers at all. The tiles started to sag and the lines became crooked within the first hour of the project starting. We had to carefully remove the wet tiles and clean the wall before starting the process over the right way. It was a great learning experience for the homeowner to see how much of a difference small plastic spacers can make. Now their kitchen looks like it belongs in a high-end magazine thanks to a little bit of patience and the right technique.
Top 5 Mistakes
One common mistake is failing to layout the tiles beforehand to see how they will fit at the ends of the wall. Many people also forget to seal their grout, which leads to staining and water damage over time in a busy kitchen. Handydads often sees homeowners mixing too much mortar at once, causing it to dry out before it can be applied to the wall. Another error is not cleaning the excess grout off the tile surface quickly enough, which creates a permanent haze that is difficult to remove. Finally, neglecting to use caulk at the joint where the tile meets the countertop can lead to cracking as the house settles.
Tool and Material Recommendations
When choosing your tile, consider using glass or ceramic options for a surface that is very easy to wipe down. Handydads suggests using a pre-mixed grout if you are worried about achieving the right consistency with a powdered product. A high-quality wet saw can be rented from most local hardware stores if you do not want to purchase one for a single project. Make sure your notched trowel size matches the recommendations on the tile packaging to ensure proper adhesion. Selecting a sealer that is specifically rated for kitchen use will provide the best protection against grease and food splashes.
Quick Tips and Hacks
You can use a ledger board to support tiles if you are starting a row above a range where there is no countertop. Handydads finds that using a white pencil to mark dark tiles makes it much easier to see your cut lines clearly. If you are working with mosaic sheets, use a pair of tile nippers for small or intricate cuts around obstacles like pipes. Applying a coat of painter tape to the edges of your cabinets will prevent mortar from sticking to your expensive woodwork. Always keep a bucket of clean water and a fresh sponge nearby to wipe away mistakes before they have a chance to harden.