
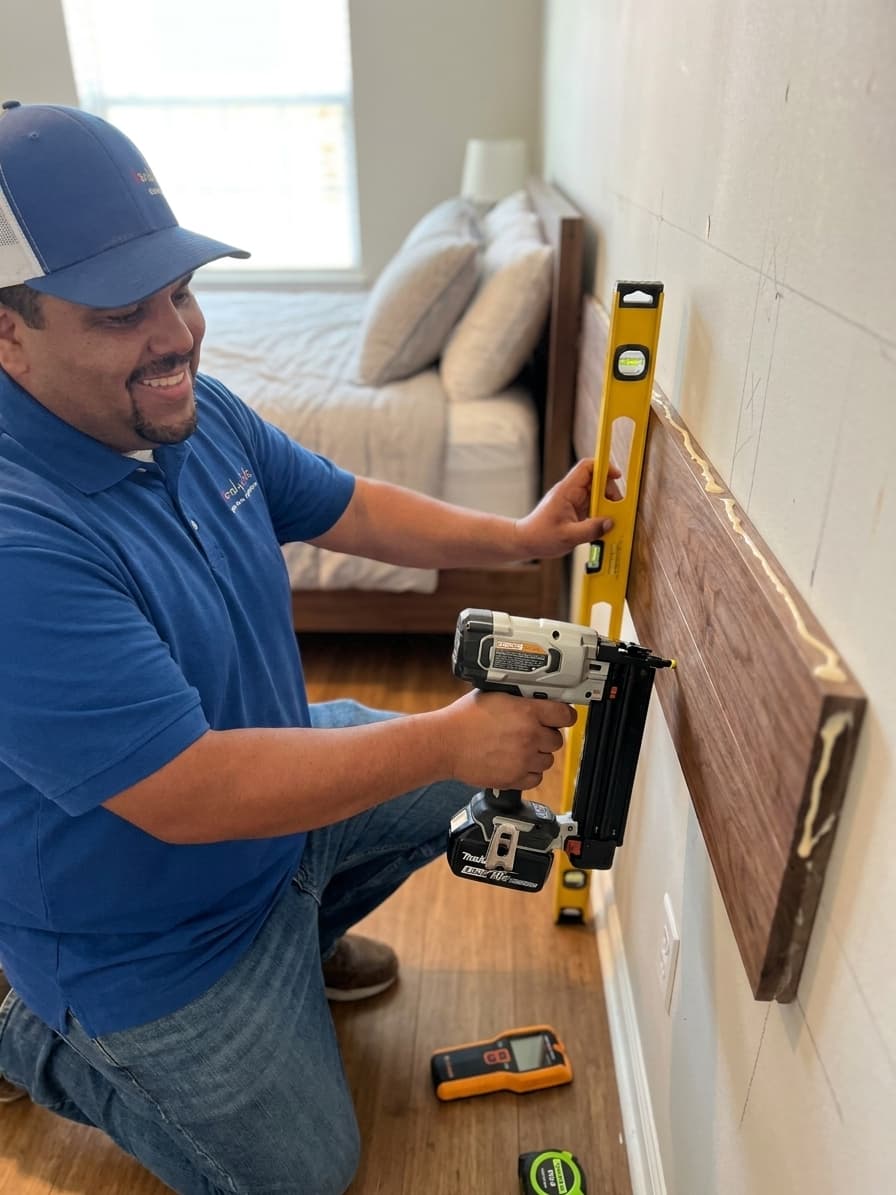
Handydads is excited to show you how a wood accent wall can completely redefine the visual appeal of any room in your home. This project offers a fantastic way to introduce texture and warmth without committing to a full scale renovation of your entire living area. Most homeowners can complete this installation over a single weekend with just a few common power tools and basic supplies from a local store. By selecting the right wood species and finish, you can create a customized look that reflects your personal style and enhances your home value. We believe that proper preparation is the key to a successful outcome that looks professional and stands the test of time. Follow our detailed instructions below to get started on your next favorite home improvement task today.
Project Snapshot
- Time Commitment: One full weekend
- Skill Level: Intermediate
- Tools Required: Miter saw, level, brad nailer
- Estimated Impact: Significant room transformation
- Best Locations: Bedrooms, living rooms, and home offices
Tools and Materials
Gathering the correct supplies before you start is essential for maintaining your momentum throughout the building process. You will need a variety of measuring tools and cutting equipment to ensure that every plank fits perfectly against the wall. Handydads recommends using a powered brad nailer because it allows for quick fastening without the risk of damaging the wood surface with a hammer. Safety should always be your top priority so make sure you have protective eyewear and a dust mask ready for the cutting phase. Having all these items organized in your workspace will help you avoid unnecessary trips to the hardware store while you are working.
- Miter saw or circular saw
- Pneumatic or cordless brad nailer
- High quality wood glue
- Electronic stud finder
- Long level and measuring tape
- Wood planks or shiplap boards
- Finishing nails and wood filler
- Sandpaper and tack cloth
Step-by-Step Instructions
You must begin by measuring the dimensions of the wall to determine exactly how much lumber you will need to purchase for the project. Handydads recommends buying at least ten percent more material than your calculations suggest to cover any mistakes or unusual cuts. Clear the room of furniture and remove any outlet covers or trim pieces that might interfere with the wood installation process. Use your stud finder to locate every vertical stud behind the drywall and mark them clearly with a pencil from the floor to the ceiling. This preparation ensures that your planks are anchored securely to the framing of the house rather than just the thin gypsum board. Sanding the wall surface slightly will also help the wood glue create a much stronger bond during the assembly phase.
After your preparation is complete, it is time to measure and cut your first row of wood planks using a sharp miter saw blade. Always start your installation from the top or the bottom of the wall to ensure that any partial boards are hidden near the baseboards or ceiling. Apply a thin bead of wood glue to the back of each board before pressing it firmly against the wall and checking for level. Use your brad nailer to drive nails through the wood and into the studs at an angle for maximum holding power. It is vital to check for level on every single row to prevent a crooked appearance that will become more obvious as you move up the wall. Take your time around windows and doors to ensure your cuts are precise and leave a small gap for natural wood movement.
From the Toolbox
We recently helped a local homeowner who wanted to turn their guest bedroom into a cozy mountain retreat using dark walnut planks. The client was worried that the project would be too dark for the small space, but we suggested a specific lighting layout to compliment the wood. We spent the day carefully matching the grain patterns across the main wall to create a seamless and high end look for the room. By the time the final row was nailed into place, the room felt like a luxury cabin instead of a standard suburban bedroom. They were so happy with the results that they invited us back to install matching floating shelves the very next month. It is these kinds of transformations that make our work at Handydads so rewarding for everyone involved.
Top 5 Mistakes
One of the most frequent errors we see is when people forget to acclimate their wood to the room for at least forty eight hours. Wood is a natural material that expands and contracts based on the temperature and humidity levels inside your specific home environment. If you skip this step, you may find that your beautiful accent wall begins to warp or pull away from the wall shortly after installation. Another major mistake is failing to paint the original wall a dark color if you are using dark wood planks for the project. Small gaps between boards are inevitable, and white drywall peaking through can ruin the illusion of a solid wood surface. Finally, never assume that your floor or ceiling is perfectly level when you are starting your very first row of planks.
Tool and Material Recommendations
Choosing high quality tools and materials can make the difference between a frustrating project and a smooth DIY experience. We suggest investing in reliable brands that are known for their durability and precision in home improvement applications. Using the right adhesive and fasteners will ensure that your accent wall stays securely attached for many years to come. A sharp saw blade is particularly important for preventing splinters and jagged edges on your expensive wood planks. Handydads has tested many different products over the years to find the ones that provide the most consistent results for our clients.
- DeWalt 20V Max Brad Nailer for cordless convenience
- Titebond II Premium Wood Glue for a lasting bond
- Stabila 48 inch Level for professional accuracy
- Irwin Marples Miter Saw Blade for clean cuts
- Zircon StudSensor for finding framing members
Quick Tips and Hacks
Incorporating a few simple tricks can help you achieve a more polished look for your finished accent wall project. Small adjustments in your technique can save you a lot of time and effort during the most difficult parts of the installation. Using templates and spacers is a great way to maintain consistency across the entire surface of the wall. You should always keep your workspace clean and organized to prevent accidents and keep your tools within easy reach. These professional secrets from Handydads will help you overcome common obstacles and enjoy the process of upgrading your home.
- Use a scrap piece of wood as a tapping block to protect the edges of your planks.
- Create a paper template for outlet cutouts to ensure a perfect fit every time.
- Color the edges of your boards with a matching marker to hide small seams.
- Keep a damp cloth handy to quickly wipe away any excess wood glue.
- Use a laser level to project a straight guide across the entire wall surface.