
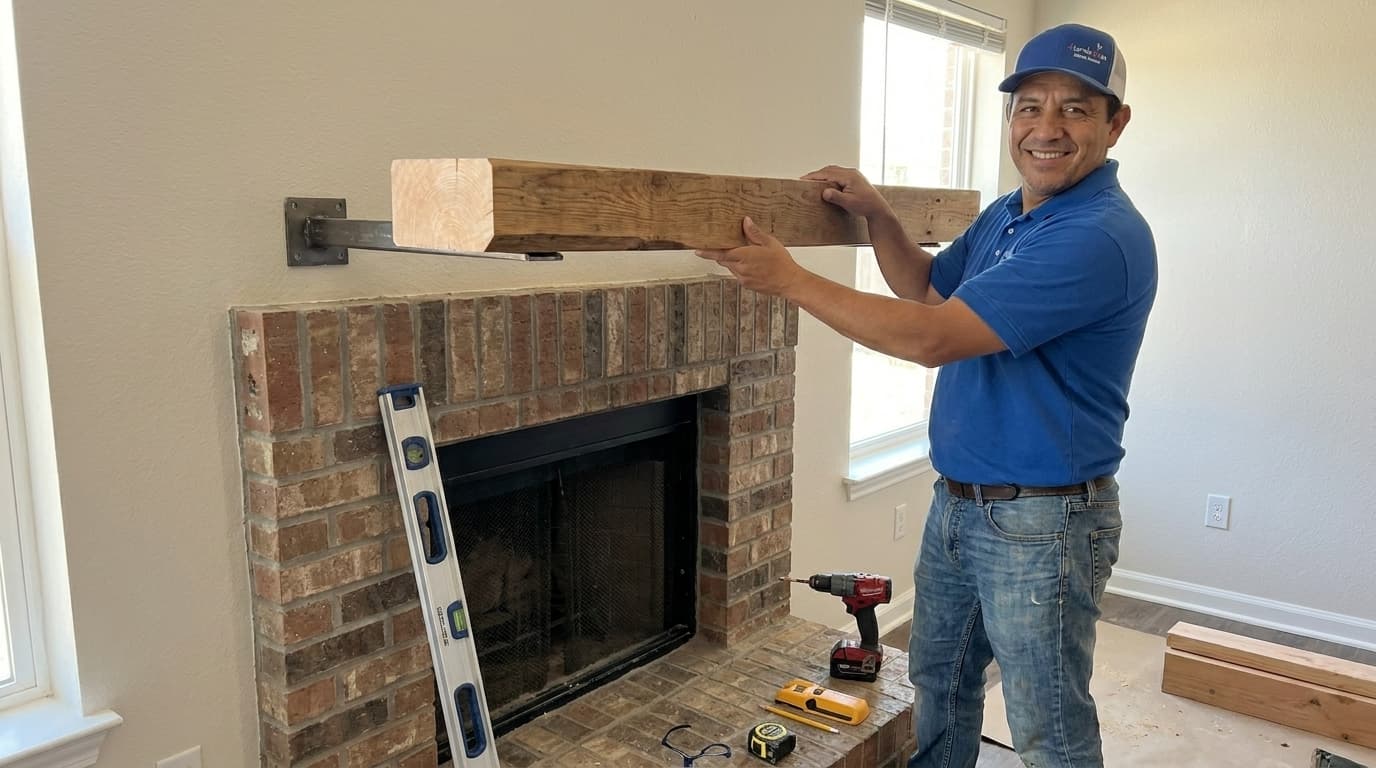
Adding a floating mantel is one of the most effective ways to transform the focal point of your living room without a full renovation. This project provides a sophisticated look that highlights your fireplace while offering a sturdy ledge for decor and seasonal displays. At Handydads we believe that every homeowner can achieve professional results by following a few simple structural guidelines and using the right mounting hardware. You will need to ensure that the mantel is securely attached to the wall studs to support its own weight and anything you place on top of it. Taking the time to properly measure and level your installation will result in a beautiful addition that serves as a conversation starter for years to come.
Project Snapshot
- Time: 2 to 3 hours
- Difficulty: Intermediate
- Goal: Secure and level fireplace enhancement
Tools and Materials
- Solid wood mantel beam
- Heavy duty floating bracket or lag bolts
- Electronic stud finder
- Power drill and various drill bits
- Four foot level
- Measuring tape and pencil
- Safety glasses and dust mask
Step-by-Step Instructions
First you must locate the wall studs above your fireplace using a reliable stud finder. Mark the center of each stud clearly with a pencil to ensure your mounting hardware has the strongest possible anchor point. Measure the height from the floor or the firebox to determine exactly where you want the bottom of the mantel to sit. Ensure you follow all local fire safety codes regarding the distance between the heat source and combustible materials. Once your marks are ready you can align your mounting bracket and secure it into the studs using heavy duty screws.
Next you will need to prepare the mantel itself if it did not come with pre-drilled holes for the mounting rods. Carefully measure the distance between the rods on the bracket and transfer those measurements to the back of your wood beam. Use a drill press or a steady hand with a power drill to create the receiving holes for the bracket rods. It is helpful to drill these holes slightly wider than the rods to allow for minor adjustments during the final fit. Apply a small amount of wood glue inside the holes if you want a permanent installation or leave them dry for future removal.
Slide the mantel onto the mounting bracket rods and push it firmly against the wall surface. Check the level one more time to ensure the beam has not shifted during the sliding process. If your kit includes locking screws you should drive them through the top or bottom of the mantel into the bracket to prevent sliding. Clear away any dust or debris from the area and inspect the seams where the wood meets the wall. Now your new floating mantel is ready to be decorated with your favorite home accessories.
From the Toolbox
One of our Handydads team members recently helped a family who had a beautiful brick fireplace but a very dated thin mantel. The original piece was barely holding up a single picture frame and looked out of place against the massive chimney. We spent the afternoon installing a thick reclaimed wood beam that immediately changed the entire atmosphere of the room. The homeowner was amazed at how much larger the fireplace looked just by scaling the mantel correctly. It was a reminder that small structural changes can have a massive impact on the overall aesthetic of a home.
Top 5 Mistakes
- Failing to anchor the mantel directly into the wall studs which leads to sagging.
- Ignoring the local building codes for minimum fireplace clearance and creating a fire hazard.
- Using a small torpedo level instead of a long level for the initial bracket installation.
- Forgetting to pre-drill pilot holes which can cause the solid wood beam to split.
- Overloading the mantel with heavy objects before checking the maximum weight capacity of the bracket.
Tool and Material Recommendations
A high quality magnetic stud finder is essential for accuracy on various wall types. Heavy duty steel floating shelf brackets provide the best support for solid wood beams. Long wood screws or lag bolts are necessary to ensure the bracket stays flush against the wall surface. Use a four foot level to guarantee the mantel is perfectly horizontal across its entire span. High strength wood glue can be applied to the internal mounting rods for an extra secure fit.
Quick Tips and Hacks
Use painter tape to mark your stud locations so you do not leave pencil marks on your finished wall. If your fireplace is made of stone or brick you will need a masonry bit and lead anchors to secure the mantel. Always check local building codes for the minimum distance required between the top of the firebox and the bottom of the mantel. Pre-drilling your holes will prevent the wood from splitting when you drive in the mounting screws. Have a second person help you lift the mantel into place to avoid straining your back or damaging the bracket.