
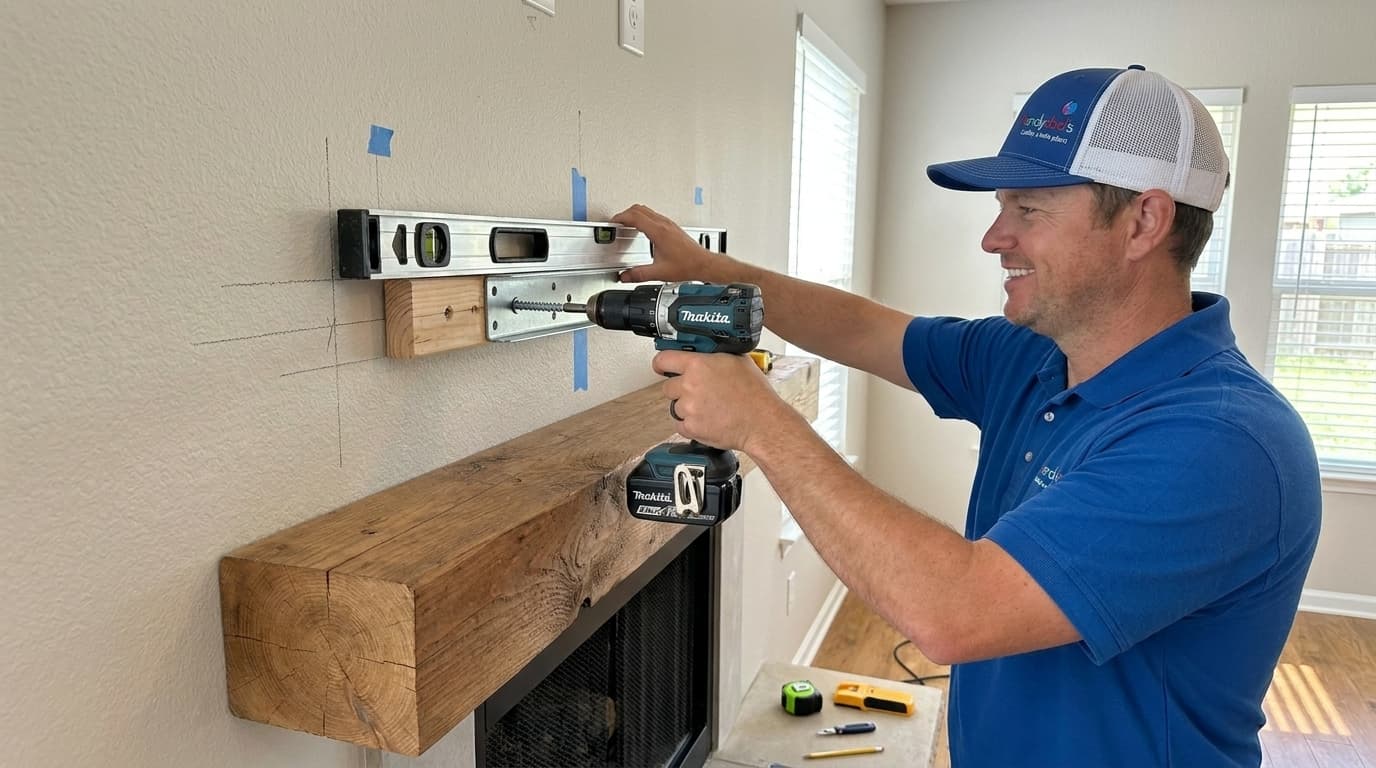
Creating a focal point in your living room often starts with the fireplace and a beautiful floating mantel can truly transform the space. At Handydads we understand that homeowners want both style and functionality when it comes to their home improvement projects. Installing a heavy timber or hollow box mantel requires careful planning to ensure it is both level and securely attached to the wall studs. This project is a fantastic way to update an old fireplace without the need for a complete renovation or expensive masonry work. By following these steps you can achieve a professional look that adds value and character to your favorite gathering spot.
Project Snapshot
- Difficulty: Moderate
- Time: 2-4 hours
- Impact: High
Tools and Materials
- Stud finder
- Power drill and bits
- 4-foot level
- Tape measure
- Floating mantel kit or timber
- Heavy duty lag bolts
- Wood glue or construction adhesive
- Finish screws and wood putty
Step-by-Step Instructions
Start by using a high quality stud finder to locate the vertical supports behind your drywall or masonry surface. It is vital to mark these locations clearly with a pencil or painters tape so you know exactly where your weight bearing hardware will go. Most mantels require at least two or three studs to support the weight of the wood and any decor you plan to place on top. Handydads recommends checking for any electrical wires or gas lines that might be running behind the wall before you begin drilling. Once you have identified the center of each stud you can move on to determining the perfect height for your installation.
Determining the height of your mantel involves balancing aesthetic preferences with safety codes regarding heat clearance from the firebox. Use a tape measure to mark the desired height on the wall and then use a long level to draw a straight reference line across the studs. You should also consider the height of any decorations or televisions that will live above the mantel to ensure the space does not feel crowded. It is helpful to have a partner hold the mantel at different heights so you can visualize the final look from across the room. Make sure your reference line is perfectly horizontal because even a slight tilt will be very noticeable once the project is finished.
If you are using a hollow box mantel you will likely need to install a wooden cleat or mounting bracket directly into the studs. Drill pilot holes through your mounting hardware and into the studs to prevent the wood from splitting and to ensure a tight fit. Secure the bracket using heavy duty lag bolts or structural screws that are long enough to penetrate at least two inches into the framing. Handydads suggests double checking the level of the bracket after the first screw is driven to make any necessary minor adjustments. A solid foundation here is what prevents the mantel from sagging over time or pulling away from the wall.
Lift the mantel into place to test the fit over the mounting bracket or lag bolts that you have installed. This dry fit phase allows you to see if there are any gaps between the mantel and the wall surface that might need to be addressed with shims. If everything looks aligned you can apply a bead of construction adhesive to the top of the bracket for extra security before the final installation. Slide the mantel onto the supports and press it firmly against the wall to ensure the adhesive makes good contact. It is much easier to fix alignment issues now rather than after you have applied the final fasteners or glue.
Complete the installation by driving finish screws through the top or bottom of the mantel into the internal support bracket. You should countersink these screws so the heads sit slightly below the surface of the wood for a cleaner look. Fill the remaining holes with a matching wood putty or decorative plugs to hide the hardware from view. Once the putty has dried you can lightly sand the area and apply a touch of stain or paint to match the rest of the mantel. Finally give the mantel a firm tug to ensure it is rock solid and ready to hold your favorite home decor items.
From the Toolbox
I remember helping a neighbor install a reclaimed oak beam that weighed nearly eighty pounds. We spent more time measuring the exact height of the television above it than actually drilling the holes for the mounting hardware. It took three of us to hold it steady while the lag bolts were tightened into the masonry behind the drywall. Handydads always suggests having an extra set of hands for heavy lifting tasks like this one because it makes the process safer and more enjoyable. Seeing the final result with the stockings hung during the holidays made all that heavy lifting worth the effort.
Top 5 Mistakes
- Failing to anchor the mantel directly into the wall studs which leads to sagging.
- Neglecting to check the local fire codes for minimum clearance above the fireplace opening.
- Using fasteners that are too short to handle the weight and leverage of the beam.
- Installing the mantel without using a level which results in a slanted appearance.
- Forgetting to pre-drill pilot holes which can cause the wood or the studs to split.
Tool and Material Recommendations
- DeWalt Brushless Drill: Provides the torque needed for driving long lag bolts into studs.
- Stanley FatMax Tape Measure: Excellent for taking precise measurements across wide fireplaces.
- Spax Structural Screws: These offer superior holding power without the need for a separate washer.
- Zircon StudSensor: A reliable tool for finding the exact edges of wood and metal studs.
Quick Tips and Hacks
- Use a cardboard template the size of your mantel to test different heights before drilling.
- Apply blue painters tape to the wall to mark stud locations without leaving permanent marks.
- If your wall is uneven use a small amount of caulk to fill the gap between the mantel and the wall.
- Check for level across the front and the depth of the mantel to ensure items won't roll off.