
Adding a floating wood mantel to your fireplace can instantly transform the aesthetic of your living room. Handydads experts know that this project provides both a functional shelf and a beautiful focal point for your home. You do not need to be a professional contractor to achieve a high quality look if you follow the right steps. This guide will walk you through the entire process of securing a heavy beam to your wall studs for a safe and level finish. Preparing your workspace and gathering the right tools is the first step toward a successful home improvement project.
Project Snapshot
This project typically takes between two and three hours to complete from start to finish. It is considered an intermediate level task because it requires precise measurements and the use of power tools. The primary goal is to securely mount a decorative beam to the structural studs of your home. You should have a helper available to assist with lifting the mantel into place safely. Handydads recommends wearing safety glasses while drilling into masonry or drywall surfaces.
Tools and Materials
You will need a high quality stud finder to locate the wood framing behind your drywall. A power drill with a set of wood and masonry bits is essential for creating pilot holes and driving fasteners. Make sure you have a level that is at least twenty-four inches long to ensure the mantel is straight. A socket wrench set will be necessary for tightening the heavy duty lag bolts into the wall. The materials list includes your floating mantel kit, construction adhesive, and painter-s tape for marking.
Step-by-Step Instructions
Finding the exact center of your wall studs is critical for a floating mantel installation. Handydads recommends using a high quality stud finder to mark several points along the wall where you intend to mount the bracket. You should mark both edges of the stud to ensure your lag bolts hit the center of the wood. Double check your measurements against the mounting holes on your mantel bracket to ensure a perfect alignment. Missing a stud can result in a sagging or falling mantel which is a major safety hazard for your family.
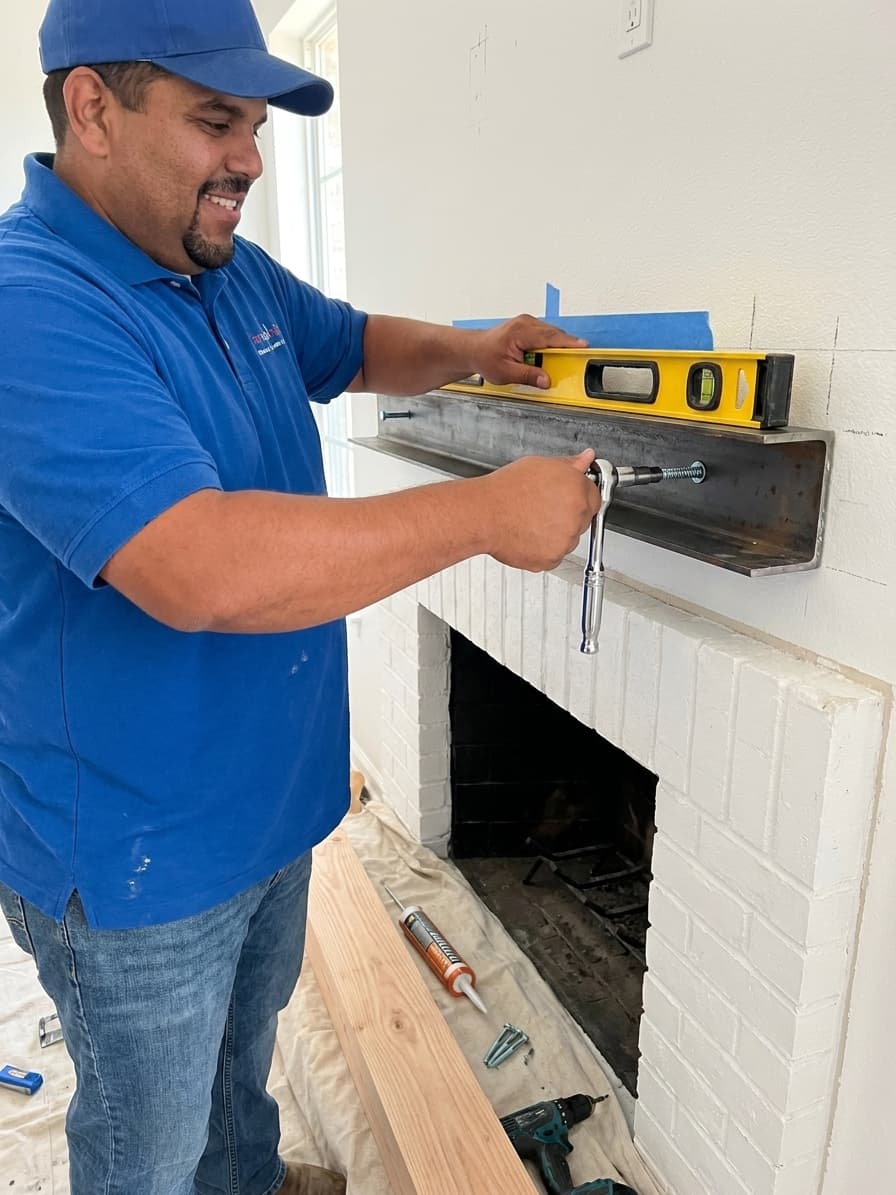
Once your studs are located you will need to hold the mounting bracket against the wall and check it with a level. Use a pencil to mark the pilot holes through the bracket onto the wall surface. Handydads suggests drilling small pilot holes first to make driving the lag bolts much easier and to prevent the wood studs from splitting. Secure the bracket firmly using the provided lag bolts and a socket wrench or drill driver. Verify the bracket is perfectly level one last time before tightening everything down completely.
Many floating mantel kits come with pre-drilled holes that slide directly onto the wall bracket arms. You should check the fit of the mantel by sliding it onto the bracket without any adhesive first. If the fit is too tight you may need to lightly sand the interior of the holes or the bracket arms. Handydads advises cleaning the back of the mantel to remove any sawdust or debris before the final installation. This dry run ensures that you will not encounter any surprises when you apply the final mounting hardware.
Apply a small amount of construction adhesive or wood glue inside the mantel holes if specified by the manufacturer. Slide the mantel onto the bracket arms until it is flush against the wall surface. Many kits include small set screws that go through the top or bottom of the mantel into the bracket to lock it in place. Handydads recommends tightening these screws firmly but being careful not to strip the wood. Wipe away any excess glue immediately with a damp cloth to maintain a clean and professional look for your new shelf.
From the Toolbox
I remember helping a neighbor install a massive oak beam that he had salvaged from an old barn. We spent hours measuring and leveling because the beam was naturally slightly bowed and uneven. Handydads always emphasizes that older wood has character but requires a bit more patience during the installation process. We ended up using extra long lag bolts to ensure it would hold the weight of his holiday decorations. Seeing the finished product above a roaring fire made all the hard work worth it in the end.
Top 5 Mistakes
- Not hitting the center of the studs which causes the mantel to pull away from the wall.
- Forgetting to use a level which results in a slanted shelf that looks very unprofessional.
- Using the wrong size lag bolts that cannot support the weight of the heavy wood beam.
- Installing the mantel too close to the firebox which can create a serious fire hazard.
- Skipping the dry fit process and finding out the bracket does not align after glue has been applied.
Tool and Material Recommendations
- Magnetic Stud Finder
- Brushless Power Drill
- Twenty-four Inch Level
- Heavy Duty Construction Adhesive
- Zinc Plated Lag Bolt Set
Quick Tips and Hacks
Use painter-s tape on the wall to mark stud locations without leaving permanent pencil marks on your paint. If your wall is slightly uneven you can use thin wood shims behind the bracket to create a perfectly flat mounting surface. Always check your local building codes for the required clearance height between the firebox and a combustible mantel. Rub a bit of wax on the bracket arms to help the mantel slide on more smoothly if the fit is very tight. Keep a second person nearby to help hold the heavy beam while you secure the final set screws to the bracket.