
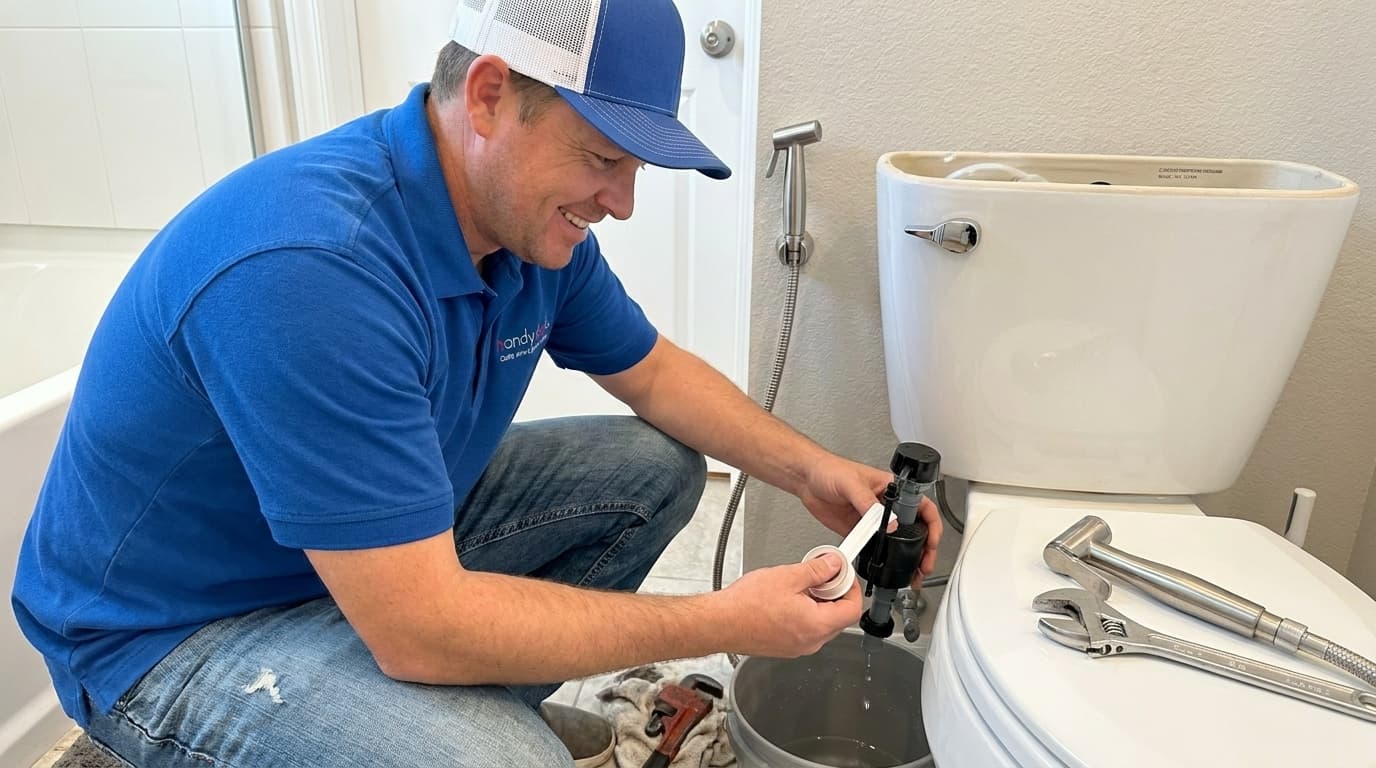
Handydads is here to guide you through one of the most practical bathroom upgrades you can perform in your own home. Installing a handheld bidet sprayer offers a more hygienic and environmentally friendly alternative to traditional paper products. This specific project is perfect for beginners because it requires minimal tools and utilizes your existing plumbing connections. You will find that adding this feature increases the functionality of your bathroom while providing a modern touch to your space. Our step-by-step approach ensures that you can complete the job quickly and avoid any potential water damage or leaks.
Project Snapshot
This project is classified as an entry level plumbing task that most homeowners can handle with confidence. You should expect the installation to take approximately twenty to thirty minutes from start to finish. The required tools are standard items that you likely already have in your household toolbox or garage. This upgrade is compatible with almost all standard two-piece toilets found in modern residential homes. Handydads suggests reviewing your current supply line condition before starting to ensure everything is in good working order.
Tools and Materials
To begin this project you will need a high quality handheld bidet sprayer kit which includes the spray head and hose. You must also have a metal T-valve adapter that fits your specific toilet fill valve and supply line. An adjustable wrench is necessary for tightening the various connections without damaging the finish on the hardware. Plumbers tape, also known as Teflon tape, is essential for creating a watertight seal on all threaded joints. Finally, keep a small bucket and a few rags nearby to catch any residual water that may escape during the disconnection process.
Step-by-Step Instructions
Start by locating the water shut-off valve behind your toilet and turning it clockwise until it is fully closed. Flush the toilet and hold the handle down to drain as much water as possible from the tank. Place your small bucket under the fill valve connection and use your wrench to disconnect the water supply line. Wrap several layers of plumbers tape around the threads of the toilet fill valve before screwing on the T-valve adapter. Attach the water supply line to the bottom of the T-valve and the bidet hose to the side outlet of the valve. Connect the sprayer head to the other end of the hose and mount the holster bracket to the side of the tank or the wall.
From the Toolbox
During a recent service call, the Handydads team encountered a bathroom with very limited floor space where a traditional bidet wouldn't fit. We suggested a wall mounted handheld sprayer as a space saving alternative that still offered premium features. The homeowner was worried about the complexity of the plumbing, but we showed them how simple the T-valve installation really is. Once the water was turned back on and the sprayer was tested, they couldn't believe they hadn't made the switch sooner. It is these small, efficient changes that truly transform how a home functions for the people living there.
Top 5 Mistakes
Many people make the mistake of over-tightening the plastic nuts which can lead to cracks and eventual leaks. Failing to use plumbers tape on the metal threads often results in slow drips that can damage your bathroom flooring. You should never skip the step of draining the toilet tank because the weight of the water will cause a mess when you open the valve. Some installers forget to check the rubber washers inside the hose ends which are critical for a proper seal. Lastly, avoid pulling the hose too tight during installation as this can put unnecessary stress on the T-valve connection over time.
Tool and Material Recommendations
Handydads recommends choosing a sprayer made from stainless steel or brass rather than plastic for long term durability. Look for a kit that includes a reinforced braided hose to prevent any bursting under high water pressure. A T-valve with a built-in shut-off lever is a great feature that allows you to turn off the water to the sprayer when not in use. Ensure that your mounting bracket is sturdy and comes with the necessary hardware for either tank or wall installation. High quality ceramic disc valves inside the sprayer head will provide a smooth operation and prevent dripping after each use.
Quick Tips and Hacks
You can use a small amount of dish soap on the rubber washers to help them seat perfectly within the hose connections. If you have low water pressure in your home, look for a sprayer model specifically designed to boost flow. Always wrap your plumbers tape in a clockwise direction so that it stays in place when you screw on the fittings. Keep a spare set of rubber washers in your junk drawer just in case one goes missing during a future cleaning. Handydads suggests placing a paper towel under the connections for twenty-four hours to easily spot any tiny leaks that might develop.