
Handydads is here to help you upgrade your home security with a modern touch. Installing a keyless entry deadbolt is one of the most convenient DIY projects you can tackle over the weekend. You will no longer need to fumble for keys while carrying groceries or worry about losing your house key. Most modern electronic locks are designed to fit into standard door holes which makes the installation process quite straightforward. This project not only improves your safety but also adds a high tech look to your front entryway.
Project Snapshot
This project is perfect for homeowners who want to modernize their entryways without a major renovation. The estimated time for completion is roughly one hour depending on your comfort level with basic hand tools. You will not need any specialized electrical knowledge because these units are battery operated and self contained. This upgrade is a beginner friendly task that provides an immediate boost to your daily convenience. Handydads recommends reading the specific manufacturer instructions before starting to ensure total success.
Tools and Materials
To get started you will need a few basic items from your household toolbox. You will need a standard Phillips head screwdriver and a measuring tape to verify your door dimensions. It is also helpful to have some masking tape to hold components in place during the assembly phase. You will need a pencil for marking and a set of high quality alkaline batteries as most kits do not include them. Finally ensure you have the new keyless deadbolt kit which should contain the latch, strike plate, and mounting hardware.
Step-by-Step Instructions
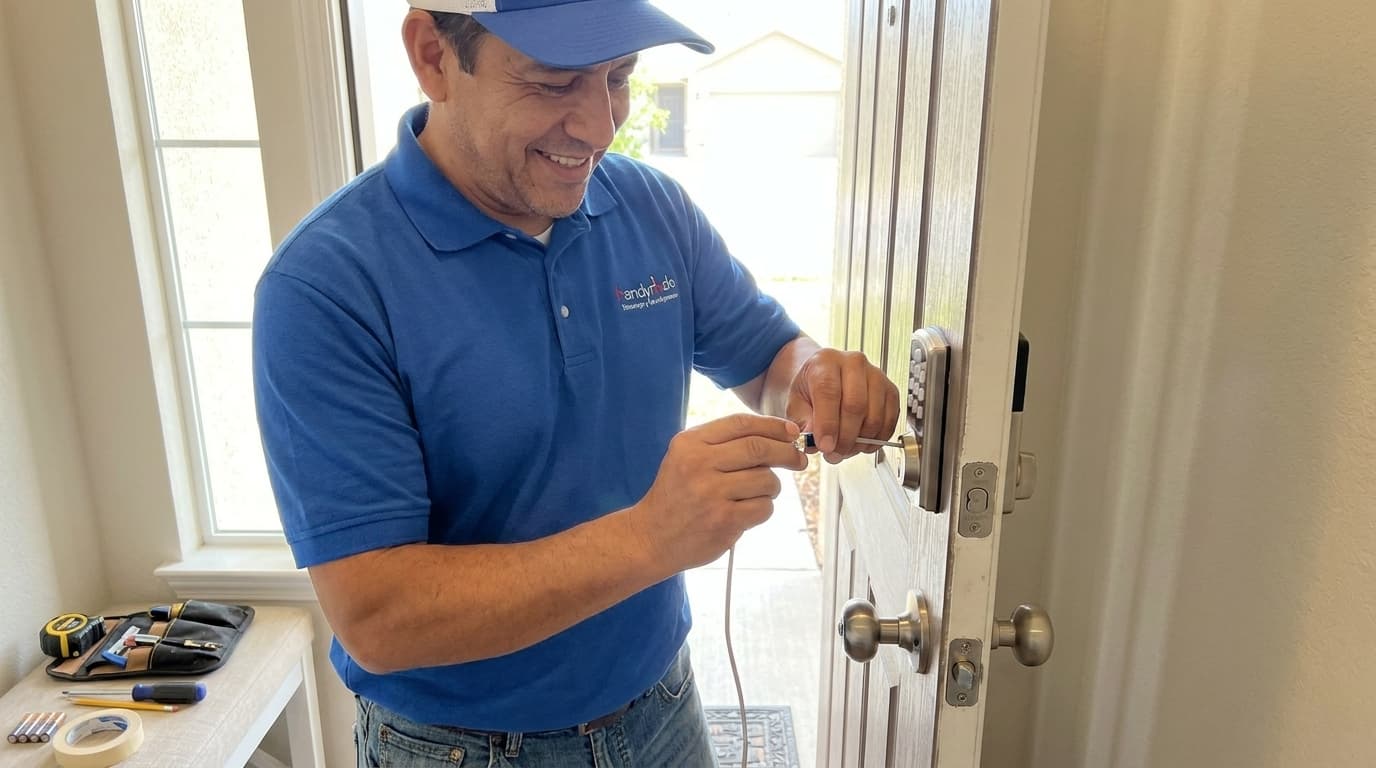
The first step in the process involves removing your existing deadbolt hardware carefully from the door. Use your screwdriver to take out the interior screws and pull the two halves of the old lock apart. Once the old hardware is removed you should measure the backset to ensure the new bolt will fit properly. Slide the new latch into the hole on the edge of the door and secure it with the provided screws. Feed the data cable from the exterior keypad through the hole and connect it to the interior mounting assembly. Finish by installing the batteries and following the programming guide to set your personal security codes.
From the Toolbox
Last summer a neighbor called Handydads because they were tired of getting locked out of the house. We arrived and helped them select a high quality electronic lock that featured a touchscreen interface. Within thirty minutes the old mechanical lock was replaced and the family was programming their favorite four digit codes. They were so happy because their kids could now enter the house safely after school without needing a physical key. It was a simple change that provided massive peace of mind for the entire household.
Top 5 Mistakes
Many people make the mistake of forgetting to check the door backset measurement before they purchase a new lock. Another common error is overtightening the mounting screws which can actually cause the motor to bind or fail. Some homeowners forget to install fresh high quality alkaline batteries and use old ones instead which leads to early failure. Misaligning the bolt with the existing strike plate on the door frame can also lead to locking issues. Finally you must be very careful not to pinch the thin electrical wires between the mounting plates during the final assembly.
Tool and Material Recommendations
Choose a deadbolt with a BHMA Grade 1 rating for the best possible security for your family. Look for models that offer temporary guest codes so you can provide access to visitors or contractors. Always use a manual screwdriver instead of a power drill to avoid stripping the delicate mounting screws. A high quality brand like Schlage or Kwikset usually offers the best durability and long term customer support. Keep a spare physical key hidden securely or with a trusted neighbor just in case the batteries die unexpectedly.
Quick Tips and Hacks
Use a piece of masking tape to hold the exterior keypad in place while you work on the interior side alone. Always test the lock with the door open several times before you try closing it for the first time. Apply a small amount of graphite lubricant to the bolt if you feel any resistance during the manual operation. Check the battery levels every six months during your routine home maintenance to ensure you are never locked out. Ensure the door is fully closed and latched before the motor tries to extend the deadbolt to avoid burning out the motor.