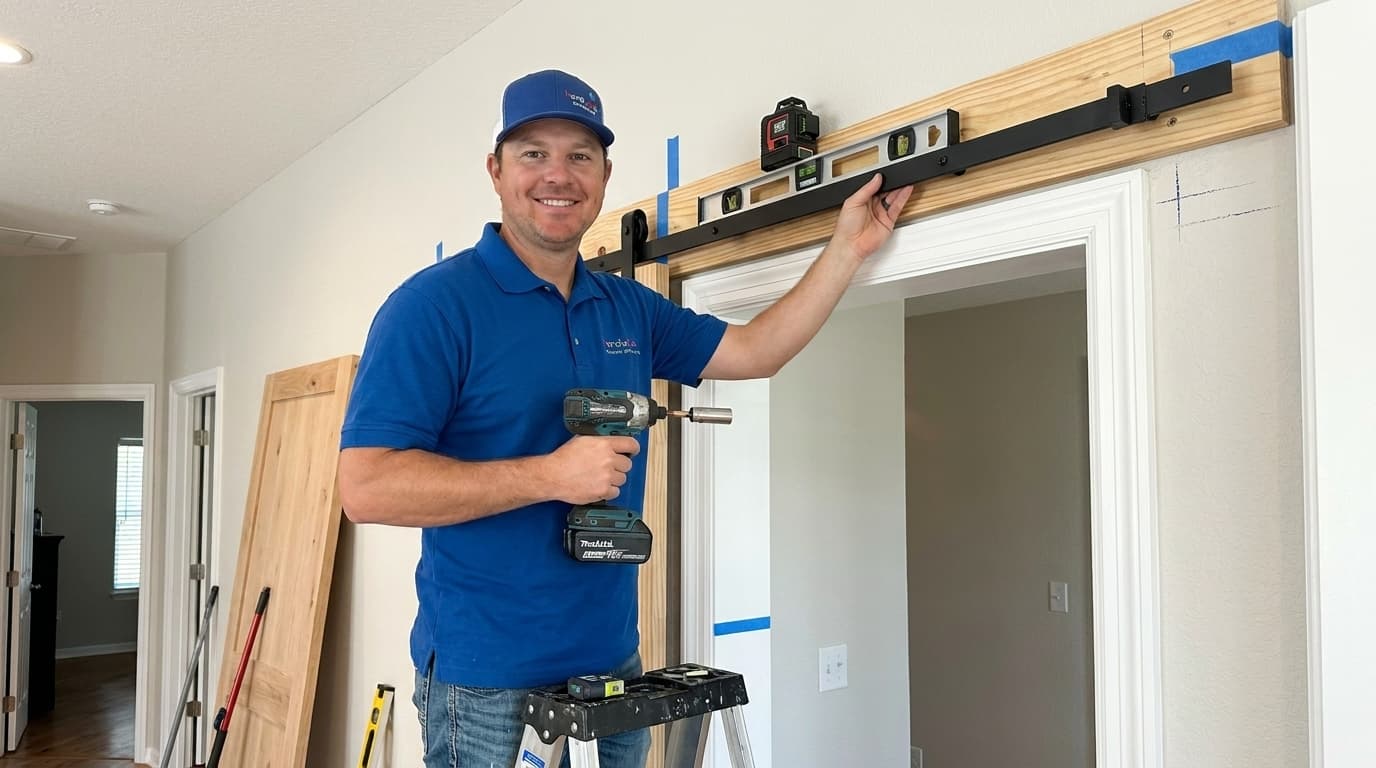
Upgrading your home interior often starts with a functional and stylish door solution that saves space. Handydads recommends a sliding barn door for rooms where a traditional swinging door might feel too bulky or restrictive. This project is surprisingly straightforward if you have the right tools and a solid plan for securing the hardware. You will find that adding this architectural element immediately changes the vibe of your hallway or master suite. Most homeowners can complete this installation in a single afternoon with just a little bit of patience and attention to level lines.\n\n## Project Snapshot\nInstalling a modern sliding barn door typically takes about three to four hours for a single door setup. This project is rated as moderate in difficulty because it requires finding studs and ensuring everything is perfectly level. You will find that the visual impact and space saving benefits are well worth the effort required. It is a great project for two people since the door slabs can be quite heavy to lift onto the track. Handydads suggests clearing a large workspace to prepare the door before you begin the actual mounting process on the wall.\n\n## Tools and Materials\nTo complete this project successfully, you will need a few essential items from your local hardware store. Start with a high quality sliding door hardware kit that includes the track, rollers, and spacers. You will also need a solid core door slab that is slightly wider than your current opening to ensure full coverage. Handydads suggests having a drill with various bits, a level, a stud finder, and a socket wrench on hand. Finally, make sure you have a piece of lumber for the header board and some paint or stain to match your home decor.\n\n## Step by Step Instructions\nFirst, you must locate the wall studs above your door opening using a reliable electronic stud finder. Handydads recommends marking these locations clearly so you can align your header board for maximum structural support. Once the studs are found, you will cut a mounting board to the length of your track and secure it into the studs with heavy duty wood screws. This board provides a flat surface and ensures the track is far enough from the wall to clear any existing trim. After the header is secure, you can proceed to mount the metal track while checking for a perfectly level alignment at every stage.\n\nNext, prepare your door slab by attaching the roller hangers according to the manufacturer's specific measurements. It is vital to ensure these are perfectly vertical so the door hangs straight and does not rub against the wall. Once the rollers are on, you can lift the door onto the track and immediately install the anti jump disks to secure it. Finally, install the floor guide to keep the bottom of the door in line and prevent it from swinging outward during use. Test the motion several times to ensure it glides smoothly and adjust the stoppers on each end of the track as needed.\n\n## From the Toolbox\nI remember helping a neighbor who tried to hang a heavy oak door directly into drywall without a header board. Within three days, the weight of the door started pulling the track away from the wall and creating dangerous cracks. Handydads stepped in to reinforce the wall with a solid pine header board anchored directly into the studs. Once we reinstalled the track onto the header, the door glided smoothly without any structural concerns. It was a great reminder that even the most beautiful door is only as good as the support system behind it.\n\n## Top 5 Mistakes\nOne of the most frequent errors is failing to use a level during the track installation process. Even a slight tilt can cause the door to slide open or closed on its own without any input. Another mistake is skipping the header board and trying to mount the track directly into drywall anchors which cannot hold the weight. Some people also forget to install the anti jump disks which keep the door from jumping off the track if it is moved too quickly. Handydads warns that failing to properly measure the floor guide placement can lead to the door swinging outward and damaging the wall.\n\n## Tool and Material Recommendations\nSelecting the right materials is the key to a door that lasts for years without needing adjustments. We recommend choosing a steel track system with a weight capacity that exceeds your door slab by at least fifty percent. For the door itself, a solid wood slab provides better sound insulation and a more premium feel than hollow core alternatives. Use a 1x6 or 2x6 piece of kiln dried lumber for your header board to prevent warping over time. Handydads also suggests investing in a laser level if you want the absolute most precise installation possible for your new project.\n\n## Quick Tips and Hacks\nIf your floor is not perfectly level, you can adjust the rollers slightly to compensate for the gap. Use a piece of blue painter's tape on the wall to mark your layout lines without leaving permanent pencil marks. You can add a soft close mechanism to your track kit for a more sophisticated and quiet closing experience. Handydads suggests putting a small bead of clear silicone inside the floor guide to reduce any rattling noise during operation. Always keep a small touch up pen nearby to fix any scratches that might occur during the heavy lifting and installation phases.
