
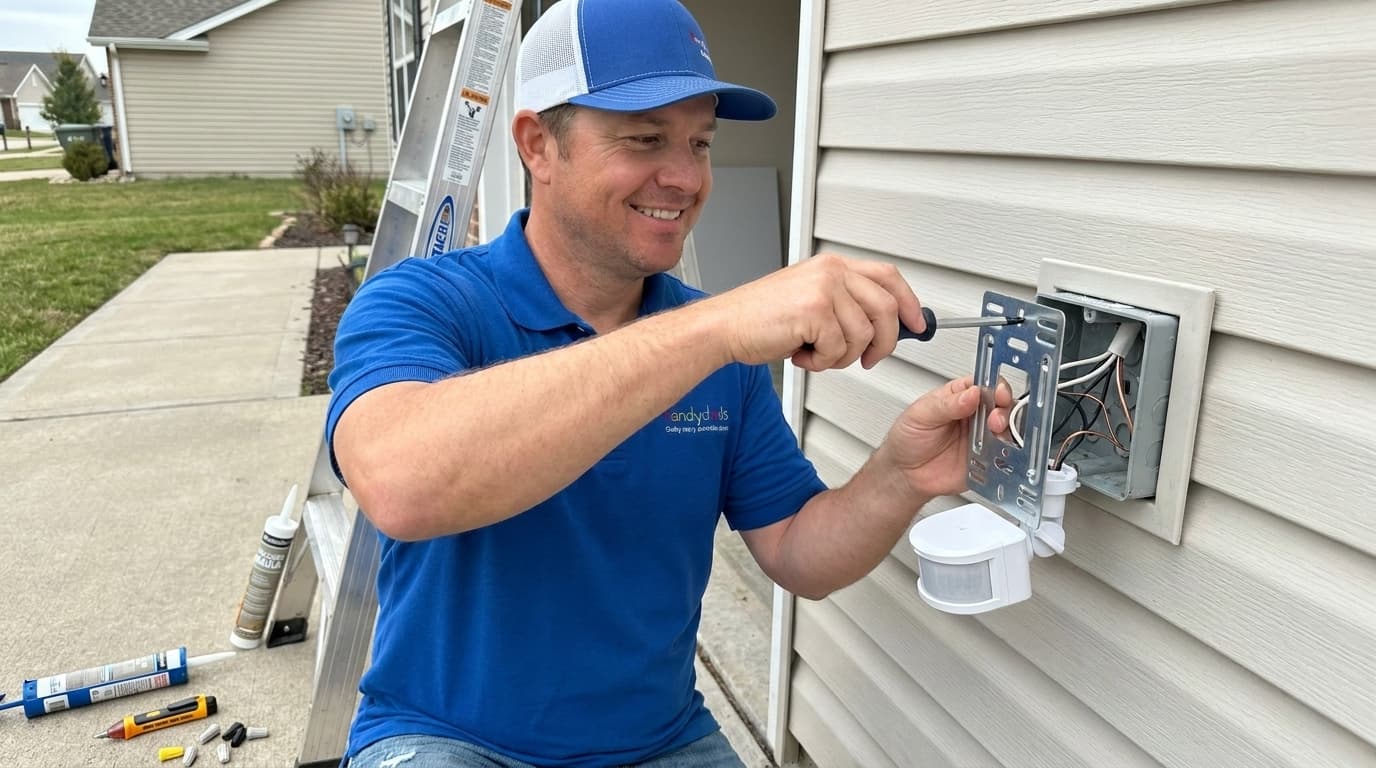
Handydads knows that home safety starts with a well lit exterior that deters unwanted visitors and prevents accidental trips in the dark. Installing a motion sensor security light is a project that provides immediate peace of mind for any homeowner looking to improve their property. This task requires some basic electrical knowledge but can be completed successfully by following the right sequence of steps. You will need to ensure the power is off before starting any work to maintain a safe working environment. By the end of this guide you will have a functional lighting system that responds to movement and brightens your walkways.
Project Snapshot
- Time: 2 hours
- Difficulty: Intermediate
- Impact: High Security
- Tool Level: Basic Electrical
- Location: Exterior Walls
Tools and Materials
- Motion sensor light kit
- Non contact voltage tester
- Screwdrivers
- Wire strippers
- Silicone caulk
- Ladder
- Wire nuts
Step-by-Step Instructions
First you must locate the breaker panel and turn off the circuit providing power to the exterior light. Use a reliable non contact voltage tester to confirm that no electricity is flowing through the wires before you touch them. Carefully remove the existing light fixture by unscrewing the mounting hardware and disconnecting the old wire nuts. You should inspect the junction box for any damage or debris that might interfere with the new installation. If the box is in good condition you can proceed to attach the new mounting plate provided in your security light kit.
Next you will need to prepare the wiring by stripping back about half an inch of insulation from the ends of the house wires. Connect the white neutral wire from the house to the white wire on the light fixture using a secure wire nut. Repeat this process by connecting the black hot wire from the house to the black wire on the fixture. Wrap the bare copper ground wire around the green screw on the mounting bracket and tighten it firmly. Ensure all connections are tight and tucked neatly back into the junction box before you mount the light.
The final stage involves mounting the light body to the bracket and securing it with the decorative nuts or screws. Apply a thin bead of clear silicone caulk around the top and sides of the mounting plate to prevent moisture from entering the electrical box. Once the fixture is secure you can turn the power back on at the breaker panel and begin the calibration process. Adjust the motion sensor head so it points toward the areas you want to monitor while avoiding high traffic streets. Set the timer and sensitivity dials according to your preference to ensure the light functions exactly when you need it.
From the Toolbox
I remember a late night service call for a family that felt uneasy after a neighborhood spree of car break-ins. Handydads arrived the next morning to install high quality motion sensors around their entire perimeter. We spent time calibrating the sensitivity so the local neighborhood cat would not trigger the lights every five minutes. The homeowners felt an immediate sense of relief once they saw the bright floodlights activate as they walked up their driveway. It is rewarding to see how a simple electrical upgrade can transform the way a family feels inside their own home.
Top 5 Mistakes
Forgetting to turn off the power at the main breaker box is a dangerous error that can lead to electrical shock. You must always verify that the circuit is dead before attempting any DIY electrical work at home. Another common mistake that Handydads sees is failing to seal the mounting plate with waterproof caulk which allows rain to damage the internal wiring. Overlooking the sensor range can lead to your lights turning on every time a car drives past your house on a busy street. Finally stripping too much insulation from the copper wires can create a fire hazard if the bare wires happen to touch each other inside the box.
Tool and Material Recommendations
A high quality LED motion sensor light is the best choice for energy efficiency and long term durability in outdoor conditions. You should also invest in a reliable non contact voltage tester to ensure your safety throughout the electrical installation process. A tube of clear outdoor rated silicone caulk is essential for creating a watertight seal around the fixture base. Handydads recommends using a sturdy fiberglass ladder that is rated for the height of your roofline or mounting location. Comfortable wire strippers with multiple gauge settings will make the process of preparing your electrical connections much easier and more precise.
Quick Tips and Hacks
Check the bulbs regularly to ensure the system is operational because a burnt out bulb defeats the purpose of a security light. Test the motion sensor every few months by walking across the detection zone to confirm the sensitivity is still correctly adjusted. Ensure the sensor is not blocked by trees or shrubs that might grow over time and obstruct the line of sight. Use LED bulbs to save on energy and reduce the frequency of climbing a ladder to replace dead lights. Adjust the duration setting so the light stays on long enough for you to get to the door safely after the sensor is triggered.