
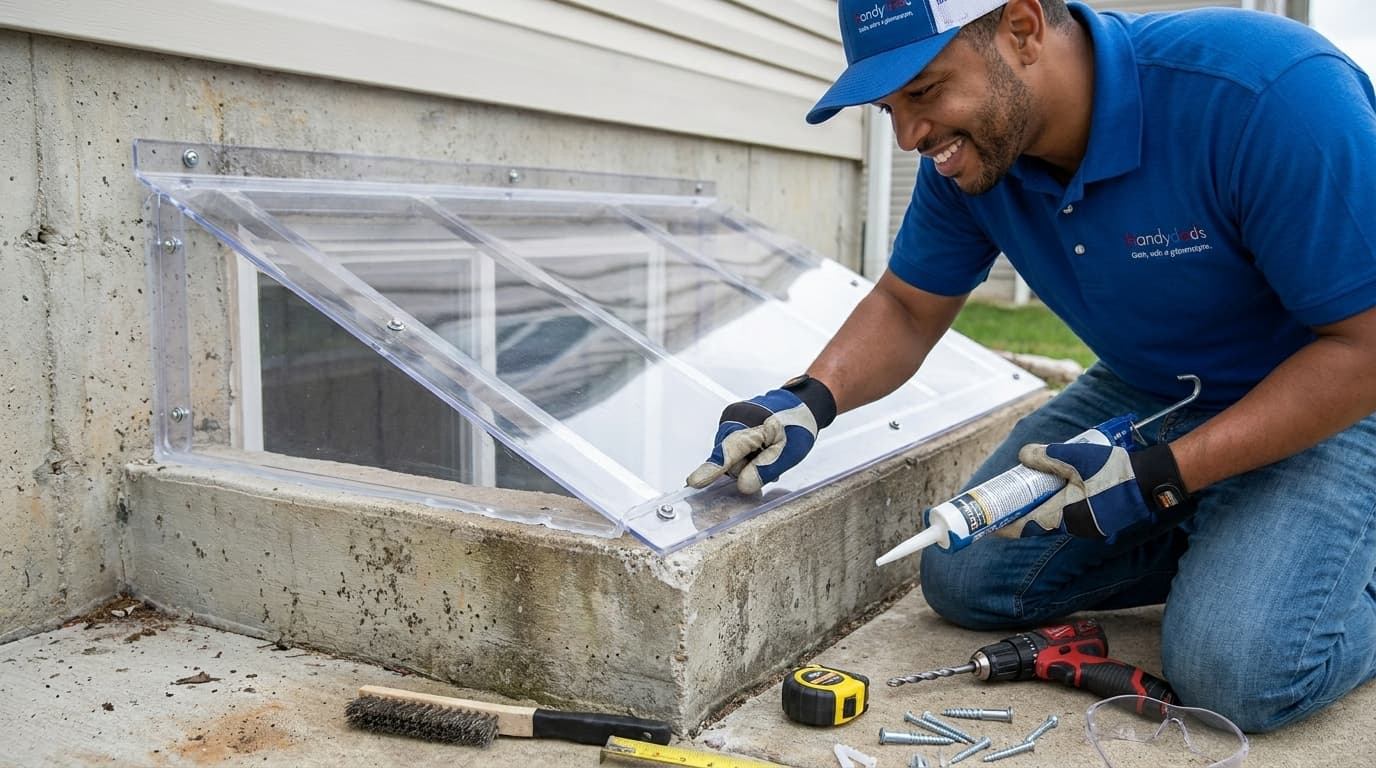
Installing a window well cover is a critical task for any homeowner who wants to maintain a dry and safe basement environment. These covers act as a first line of defense against heavy rain, falling leaves, and wandering wildlife that might fall into the opening. At Handydads we recommend using high quality polycarbonate materials because they offer superior durability and light transmission compared to cheap plastic alternatives. Proper installation ensures that your window well remains clear of debris that could otherwise cause drainage issues or window leaks during a storm. Taking the time to secure these covers now will save you from the headache of cleaning out messy wells or dealing with costly water damage in the future.
Project Snapshot
Before you start this installation it is helpful to understand the basic requirements and expected outcomes of the project. This project is generally considered a weekend task that can be completed by most DIY enthusiasts with basic tools. At Handydads we believe that knowing the time commitment and difficulty level helps you prepare your workspace effectively. You will be working with masonry and power tools so safety should always be your primary concern during the process. Reviewing this snapshot will give you a clear roadmap of what to expect as you move through the installation steps.
- Time: 1-2 hours per well
- Difficulty: Moderate
- Tools: Drill, masonry bits, tape measure
- Materials: Window well cover, stainless steel fasteners, silicone caulk
Tools and Materials
Gathering all your tools and materials before you begin will make the installation process much smoother and more efficient. You do not want to be halfway through drilling into your foundation only to realize you are missing a specific bit or sealant. Handydads recommends organizing your workspace so that everything you need is within easy reach while you are working near the ground. Using the correct grade of materials is essential for a long-lasting result that can withstand the outdoor elements. This list includes everything necessary to achieve a professional finish that will protect your home for years.
- Power drill with hammer setting
- Masonry drill bits
- Measuring tape
- Polycarbonate window well cover
- Stainless steel screws and anchors
- Clear outdoor silicone sealant
- Stiff wire brush for cleaning
- Safety glasses and work gloves
Step-by-Step Instructions
Begin by measuring the width and depth of your existing window well to ensure the new cover fits perfectly over the edges. You should measure from the outer rim of the well to the foundation wall to get the most accurate dimensions for your purchase. It is helpful to take photos of the well shape because some are circular while others are rectangular or U-shaped. At Handydads we suggest choosing a cover that has a slight overhang to prevent water from dripping down the sides. Once you have the measurements you can purchase a pre-made cover or order a custom one for unique sizes.
Clean the rim of the window well and the foundation wall thoroughly before you attempt to attach any hardware or clips. Use a stiff wire brush to remove dirt, rust, or loose concrete that might prevent a secure fit for your new cover. You want a smooth surface so that the sealant or mounting brackets can bond correctly without any gaps. If the window well is made of metal check for any sharp edges or bent sections that need to be straightened before proceeding. This preparation step is vital for ensuring that the cover remains stable even during high winds or heavy snowfall.
Position the cover over the well and mark the locations where the mounting clips or screws will be attached to the foundation. Use a masonry drill bit that matches the size of your anchors to create pilot holes in the concrete or brick wall. Be careful to hold the drill level so that the holes are straight and do not crack the surrounding masonry material. After drilling the holes you should blow out the dust with a small air pump or a straw to ensure the anchors seat properly. This step requires patience and precision to align the cover exactly where it needs to sit for maximum protection.
Attach the mounting hardware to the wall and secure the window well cover using the provided stainless steel fasteners. Handydads recommends using stainless steel because it resists rust and corrosion in the damp environment typically found near the ground. Tighten the screws enough to hold the cover firmly in place but avoid over-tightening which could crack the polycarbonate material. Check that the cover sits flush against the house to prevent small animals or insects from squeezing into the well. Once the hardware is installed you should test the cover to make sure it is stable and does not rattle when touched.
Apply a bead of clear outdoor silicone sealant along the edge where the cover meets the foundation wall of your home. This extra layer of protection prevents water from seeping behind the cover and running down the interior wall of the window well. Smooth the sealant with a gloved finger to create a clean and professional appearance that will last for several years. Inspect the entire perimeter of the installation to ensure there are no missed spots or gaps where moisture could enter. Now that the sealant is dry your basement window is fully protected from the elements and your home value is enhanced.
From the Toolbox
Last summer we visited a home where the owner had discovered a family of frogs living in an unprotected window well. The deep well had become a trap for the local wildlife and was filled with several inches of soggy leaves and stagnant water. We spent the morning cleaning out the debris and safely relocating the frogs to a nearby garden area before installing a new cover. The homeowner was relieved to have a solution that prevented animals from getting stuck while also keeping the well clean. This simple project transformed a messy problem area into a clean and maintenance-free part of the exterior. Our team at Handydads always enjoys these small fixes that make a big impact on the safety of a home.
Top 5 Mistakes
Homeowners often make the mistake of buying a cover that is exactly the same size as the well opening without accounting for any overhang. Another common error is using standard wood screws that will eventually rust and fail in the damp soil environment. Some people forget to verify that the cover can be easily removed from the inside in case of an emergency egress situation. Failing to clean the edge of the well before applying sealant will lead to a poor bond and eventual water leaks. Finally, many people overlook the importance of checking the slope of the ground around the well to ensure water flows away from the home.
Tool and Material Recommendations
We highly recommend selecting a sloped polycarbonate cover because it naturally sheds water away from your foundation. For the mounting hardware you should look for kits that include nylon anchors and stainless steel screws to ensure long term durability. A high quality 100 percent silicone caulk is the best choice for sealing the edges because it remains flexible through temperature changes. If you have a larger egress window you should choose a reinforced cover that is rated to support the weight of a person for extra safety. Handydads suggests purchasing a cover with UV protection to prevent the material from yellowing or becoming brittle after years of sun exposure.
Quick Tips and Hacks
If you are working with an older metal well you can use a hammer to straighten out any bent flanges before you begin the installation. For a more aesthetic look you should choose a clear silicone that matches the color of your foundation or the window well rim. You can also place a few heavy stones inside the well before covering it to provide a natural look and discourage burrowing pests. If your well is unusually deep consider adding a layer of gravel at the bottom to improve drainage before you seal the top. At Handydads we suggest cleaning the cover with a soft cloth and mild soap to avoid scratching the surface and maintain its clarity.