
Improving your kitchen storage capacity is a great way to make daily cooking much more enjoyable for the entire family. Handydads recommends starting with pull out cabinet organizers because they eliminate the need to crawl into dark corners to find heavy pots. These sliding shelves bring everything right to your fingertips with a simple tug. You will find that organizing your kitchen becomes much easier once you have high quality hardware installed. This project is perfect for homeowners who want a high impact upgrade without spending a lot of time or money on a full renovation.
Project Snapshot
This project is designed to help you maximize every square inch of your existing base cabinets. Most homeowners can complete this installation in about two hours if they have the right tools ready to go. You do not need professional carpentry skills to achieve a high end look that functions perfectly every time. Handydads suggests choosing a heavy duty steel organizer that can handle the weight of your heaviest kitchen appliances. It is a rewarding DIY task that provides immediate functional benefits for your home organization efforts.
Tools and Materials
You will need a few basic tools that most DIY enthusiasts already have in their home workshop. A cordless drill with a variety of bits is essential for making pilot holes and driving the mounting screws. You also need a reliable measuring tape to ensure your tracks are centered and clear of any obstructions. A pencil and a small level will help you mark the exact placement of the hardware before you start drilling. Finally, make sure you have the pull out drawer kit and the specific screws provided by the manufacturer for the best results.
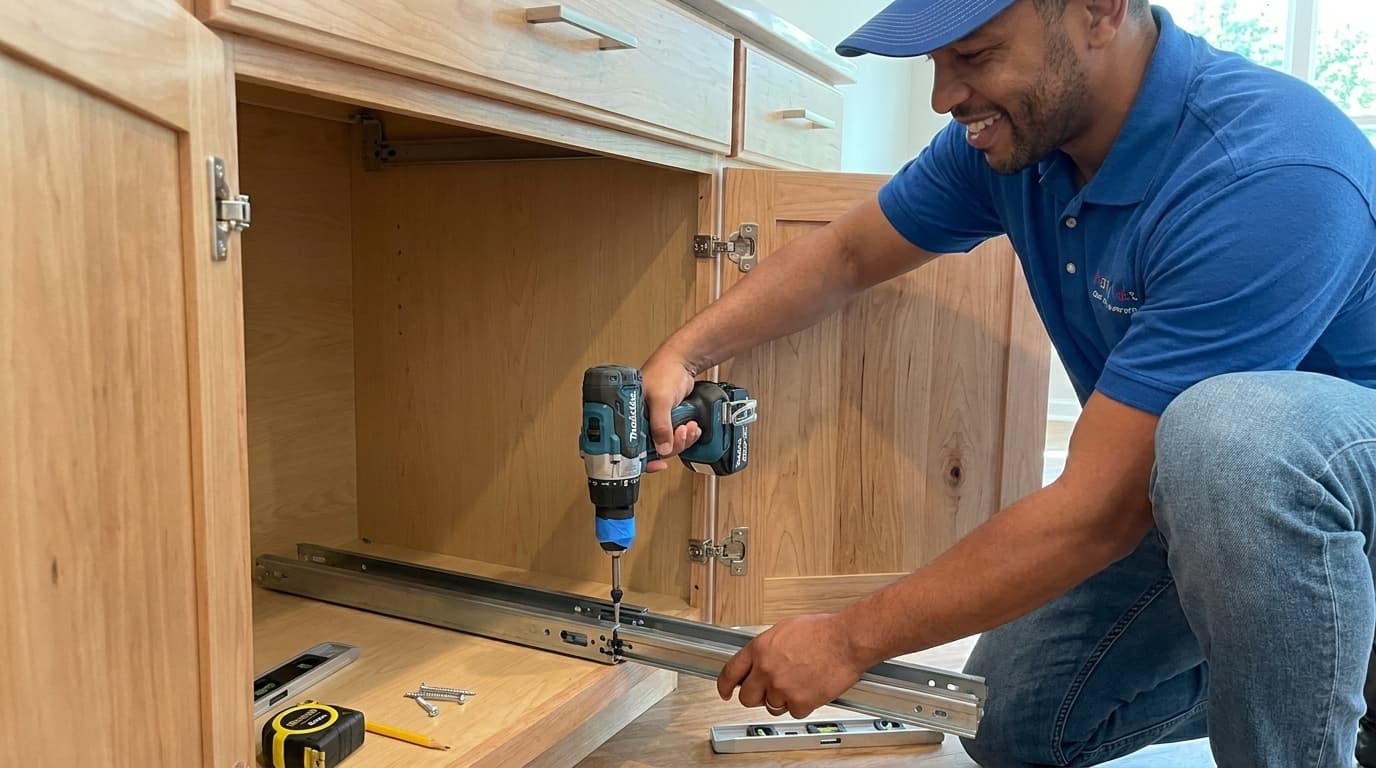
Step-by-Step Instructions
The first step is to completely clear out the cabinet and clean the base surface so you have a fresh workspace. You must measure the interior width and depth accurately while also checking the clearance of the open cabinet door. Place the base tracks inside the cabinet to test the fit and ensure they do not hit the door hinges when sliding out. Mark the screw holes with a pencil once you are satisfied with the alignment of the tracks on the cabinet floor. Drill small pilot holes at your marks to prevent the wood from splitting when you drive the permanent screws in. Use the provided screws to secure the metal tracks firmly to the floor of the cabinet while checking that everything stays level throughout the process.
From the Toolbox
Handydads once visited a home where the owner had stacked cast iron pans in a deep corner cabinet for years. They were so heavy that the owner simply stopped using them because reaching back there was too difficult for their back. We installed a heavy duty double tier sliding rack that could hold fifty pounds of weight easily. The transformation was immediate and the homeowner was thrilled to finally use their favorite cookware again without any physical strain. It reminded us that small organizational changes often provide the most significant daily relief in a busy household.
Top 5 Mistakes
Avoiding common errors will save you a lot of frustration during this quick kitchen upgrade project. First, many people fail to measure the width of the actual cabinet opening which is often narrower than the interior space. Second, you should be careful not to use screws that are too long because they will damage the underside of your cabinet. Third, installing the tracks at an uneven angle is another frequent mistake that leads to a drawer that drifts open. Finally, Handydads suggests checking for hinge clearance and weighing your items to ensure you do not exceed the hardware limits.
Tool and Material Recommendations
Selecting the right hardware is the most important part of ensuring your new organizer lasts for a long time. Handydads recommends choosing heavy duty steel racks that feature ball bearing slides for a premium feel and smooth operation. You should look for units that offer a high weight capacity if you plan on storing heavy appliances or canned goods. It is also helpful to find kits that provide a paper template to simplify the layout process on the cabinet floor. Investing in high quality materials now will prevent you from having to replace broken hardware in the near future.
Quick Tips and Hacks
Using a simple spacer block made from scrap wood can help you keep the tracks perfectly parallel without constant measuring. You might need to add a thin shim if your cabinet floor is slightly uneven to ensure the drawer glides perfectly. Handydads suggests applying a small amount of blue painter's tape to your drill bit to mark the correct depth for pilot holes. This trick prevents you from accidentally drilling all the way through the bottom of your cabinet base during installation. Always test the sliding motion several times before you put your heavy pots and pans back into the new organizer.