
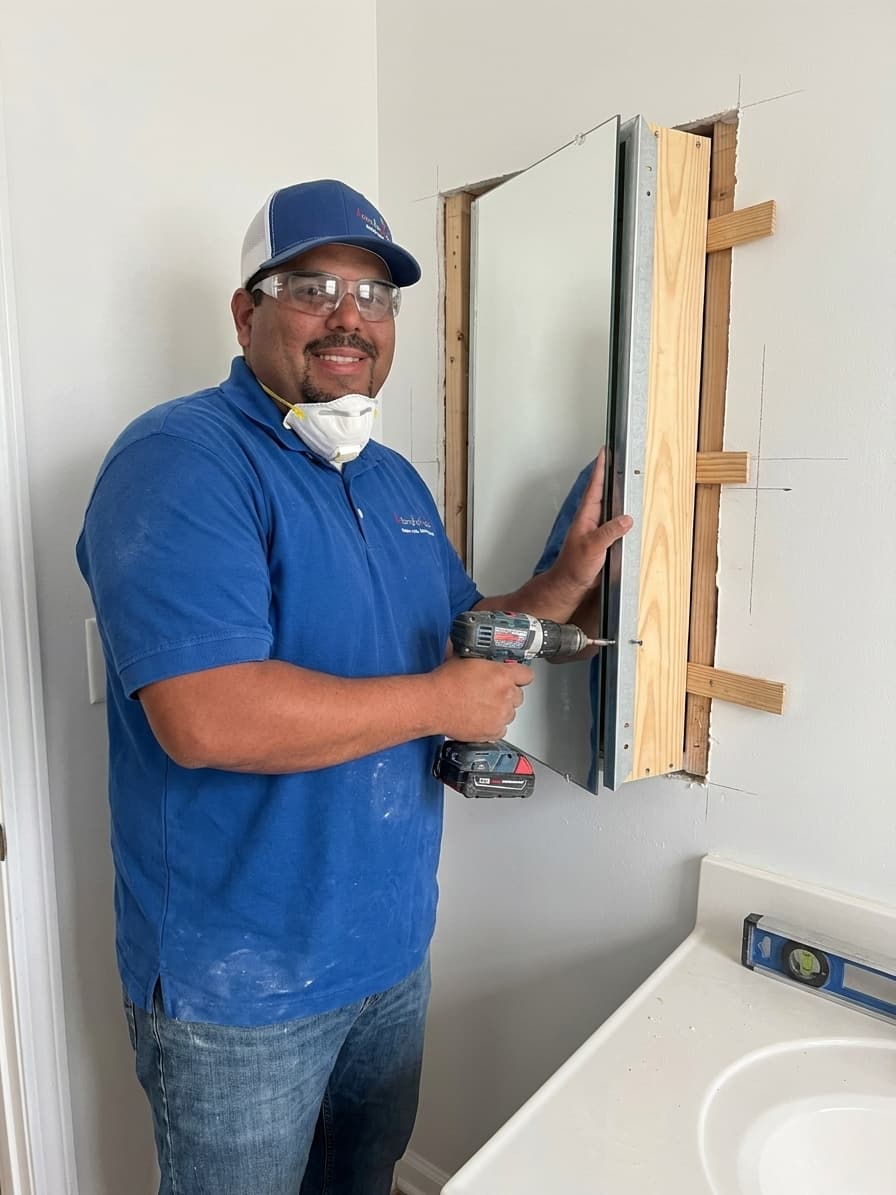
A cluttered bathroom vanity can make your morning routine feel stressful and disorganized. Handydads understands that maximizing every square inch of your home is vital for a functional living space. Installing a recessed medicine cabinet is one of the most effective ways to add storage without taking up physical room in the bathroom. This project involves cutting into your wall to nestle the cabinet between the wooden studs for a flush appearance. Our guide will walk you through the entire process to ensure your new storage unit is level and secure.
Project Snapshot
This project is rated as a moderate DIY task that requires some basic knowledge of wall construction and framing. Most homeowners can complete the installation in about three to four hours from start to finish. You will be working with common hand tools and a power drill to secure the unit into place. Handydads recommends having a helper nearby to hold the cabinet while you verify that it is level. Successfully completing this task will provide a professional and integrated look that surface mounted shelf units cannot match.
Tools and Materials
You will need a variety of standard home improvement tools to get the job done correctly. A reliable stud finder is the most important item to ensure you choose a safe location for the hole. You also need a drywall saw for making precise cuts and a cordless drill for driving the mounting screws. Wood shims are necessary to help square the cabinet if your wall studs are slightly out of alignment. Do not forget to wear safety goggles and a dust mask while cutting into the drywall material.
Step-by-Step Instructions
Start by choosing the perfect height for your mirror based on the eye level of the primary users in your home. Use your stud finder to locate two adjacent studs and mark the center of the wall space where you want the cabinet to sit. Trace the back of the cabinet onto the wall with a pencil while using a level to keep the lines perfectly straight. Carefully cut along your marks using a drywall saw and remove the piece of wall to reveal the interior cavity. Slide the cabinet into the hole and use wood shims to ensure it sits perfectly level before driving screws through the side flanges into the studs.
From the Toolbox
I once visited a homeowner who was convinced their small powder room was simply too cramped for any modern upgrades. They were tired of knocking over cologne bottles every time they reached for the hand soap on the tiny pedestal sink. Handydads suggested a recessed cabinet to take advantage of the empty space inside the wall cavity. After we finished the installation, the homeowner was amazed at how much larger the room felt without the visual clutter. It is incredible how a small change can completely transform the daily experience of using a primary living space.
Top 5 Mistakes
Many people forget to check for electrical wires or plumbing pipes before they start cutting into the drywall. Another common error is failing to use a level which results in a lopsided mirror that looks unprofessional. Some homeowners skip the use of wood shims and end up warping the cabinet frame by over-tightening the mounting screws. It is also a mistake to choose a cabinet that is too deep for your wall studs which usually require a four inch depth. Finally, failing to paint the raw edges of the cut drywall can lead to a messy appearance around the cabinet trim.
Tool and Material Recommendations
Handydads suggests purchasing a cabinet with adjustable glass shelves to accommodate items of various heights and sizes. Look for a model that features a soft-close hinge to prevent the mirror from slamming and causing damage over time. A high quality magnetic stud finder is often more reliable than electronic versions for finding the exact center of a wooden beam. We also recommend using a vacuum with a HEPA filter to clean up the drywall dust as you work to keep your home clean. Investing in a high-torque cordless drill will make driving the structural screws into the studs a much easier task.
Quick Tips and Hacks
Apply a layer of blue painters tape over your pencil marks before cutting to prevent the drywall paper from tearing. If you encounter a stud in the middle of your desired location, you may need to build a small header and footer for structural support. You can use a small hand mirror to look inside the wall cavity before you make your final large cuts. Always check the swing of the door to ensure it will not hit any lights or nearby towel bars when opened. If the cabinet feels loose, adding a small bead of construction adhesive behind the trim can provide extra stability.