
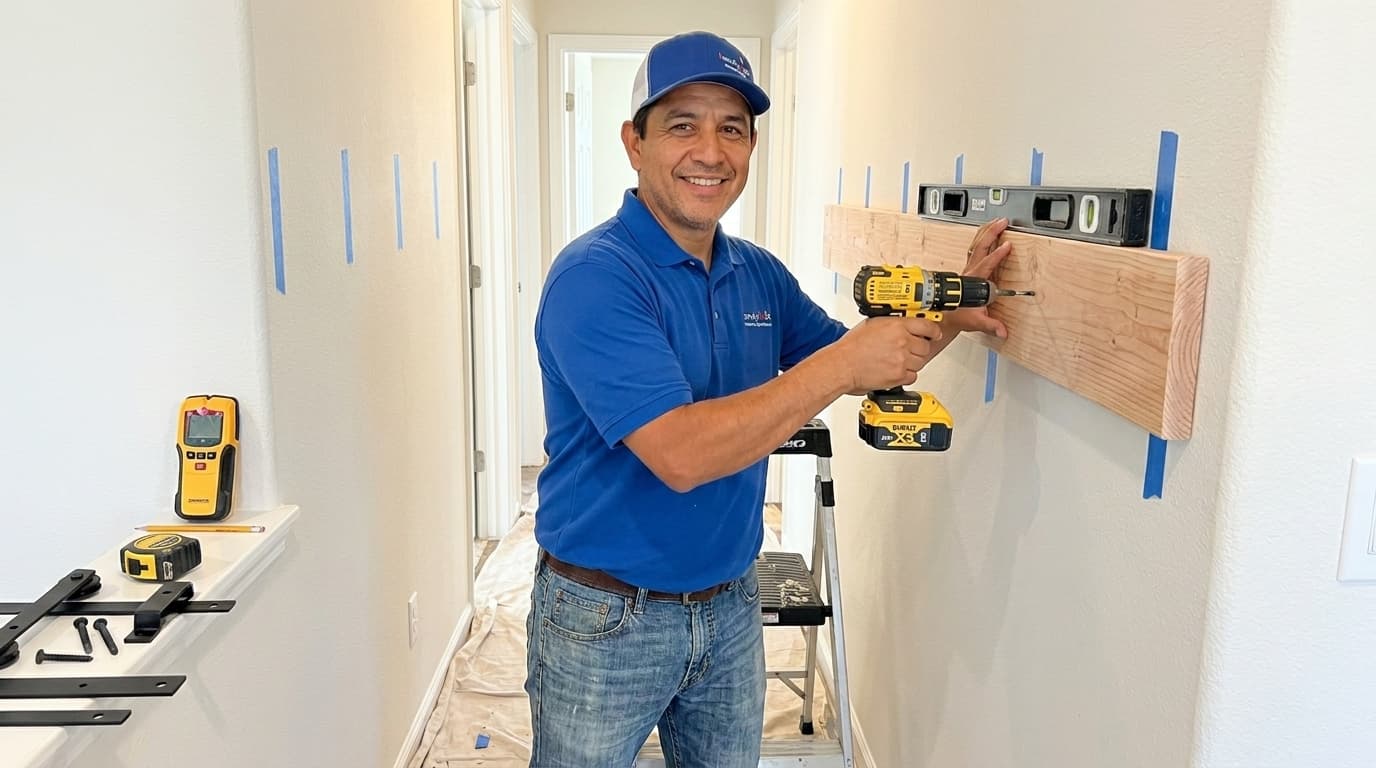
Upgrading your interior doors with a sliding barn door is a fantastic way to save space while adding a touch of rustic charm to any room. Unlike traditional swinging doors that require a wide arc for clearance, these sliders move horizontally along the wall to maximize your usable floor area. Handydads recommends this project for homeowners who want to transform a pantry, bedroom, or home office with a stylish architectural element. The installation process is straightforward if you have the right tools and a solid understanding of how to find your wall studs. Once you finish this project, you will notice an immediate difference in both the functionality and aesthetic appeal of your living space.
Project Snapshot
This project is a moderate undertaking that provides a high level of visual impact for any room in your house. You should plan to spend about half a day on the installation if you are working alone. Handydads classifies this as an intermediate project because it requires accurate measuring and the use of power tools. You will need a clear workspace and a sturdy ladder to reach the upper sections of the wall. Having a helper available to lift the heavy door slab will make the final steps much safer and easier.
Tools and Materials
Gathering all your supplies beforehand will help you maintain a steady workflow without unnecessary trips to the hardware store. You will need a combination of heavy-duty mounting hardware and precision measuring tools to get the job done correctly. Handydads recommends checking the weight rating of your hardware kit against the actual weight of your door slab. It is also helpful to have a clean drop cloth to protect your floors during the drilling and mounting process. Here is a comprehensive list of everything you will need to complete this barn door installation.
- Sliding barn door hardware kit
- Solid core interior door slab
- 1x6 wood header board
- Power drill and drill bits
- 4 foot spirit level
- Digital stud finder
- Measuring tape and pencil
- Structural wood screws
Step-by-Step Instructions
Step 1: Measuring and Layout Measuring the space is the most critical part of the entire installation process. You need to ensure there is enough wall space next to the opening for the door to slide completely clear of the entrance. Handydads suggests measuring twice to verify that no light switches or outlets will be blocked when the door is in the open position. You should also check that your floor is level so the door does not roll on its own. Taking these initial steps will prevent major headaches once the heavy hardware is already mounted.
Step 2: Header Board Installation Installing a header board is often necessary if your wall studs do not align perfectly with the pre-drilled holes in your metal track. This board provides a solid mounting surface and creates enough clearance for the door to clear any existing door trim. You should use a high-quality piece of lumber that is the same thickness as your trim for a professional look. Secure the header board into at least three wall studs using structural wood screws to handle the weight. Handydads always recommends painting or staining this board to match your door or wall before you attach it to the studs.
Step 3: Mounting the Metal Track Mounting the metal track requires precision and a long level to ensure the door operates smoothly. Hold the track against the header board and mark the locations for the mounting bolts according to the height of your door. You must account for the height of the rollers and the small gap needed between the door and the floor. Drill pilot holes into the header board to prevent the wood from splitting during the final installation. Handydads suggests having a second person hold the track while you tighten the bolts to keep everything perfectly straight.
Step 4: Preparing the Door Slab Preparing the door involves attaching the roller hardware and the floor guide channel. Follow the manufacturer-s instructions to position the rollers at the correct distance from the door edges. You will likely need to drill holes through the door to secure the mounting bolts for the roller straps. Make sure the rollers are vertically aligned so the door hangs straight once it is placed on the track. Handydads also recommends installing the handle at a comfortable height before the door is actually hung on the wall.
Step 5: Hanging the Door and Safety Checks Hanging the door is the most rewarding part of the project but requires careful lifting. Lift the door onto the track and test the sliding motion to ensure it moves freely without catching. Install the anti-jump disks on top of the door to prevent it from ever jumping off the track during use. You must also install the floor guide to keep the bottom of the door from swinging outward when it is moved. Handydads advises checking the door stops at both ends of the track to make sure the door stays exactly where you want it.
From the Toolbox
I remember helping a neighbor install their first barn door in a tight hallway leading to their laundry room. They were worried that the heavy wood door would pull the drywall right off the studs because of the weight distribution. We spent extra time ensuring the header board was secured with heavy duty lag bolts directly into the framing. Handydads always emphasizes that the prep work is more important than the final hanging phase. When we finally slid the door into place, it moved as smooth as silk and stayed perfectly level. Seeing their excitement over the extra space we saved made the afternoon of measuring and leveling completely worth the effort.
Top 5 Mistakes
Avoiding common pitfalls is essential for a successful installation that lasts for many years. Many homeowners rush through the planning phase and encounter issues that are difficult to correct later. Handydads has seen many projects stall because of simple oversights in measurement or hardware choice. By being aware of these frequent errors, you can ensure your door functions perfectly from day one. Here are the most common mistakes people make when installing a sliding barn door in their homes.
- Forgetting to account for the thickness of the door trim when mounting the track.
- Mounting the heavy metal track into drywall alone without a header board or studs.
- Not using a long spirit level which leads to the door sliding open or shut on its own.
- Choosing a track that is too short to allow the door to fully clear the opening.
- Neglecting to install the bottom floor guide which causes the door to wobble.
Tool and Material Recommendations
Choosing the right products will impact the longevity and aesthetic appeal of your new sliding door system. High-quality hardware not only looks better but also handles the daily wear and tear of a busy household much more effectively. Handydads prefers using solid materials that offer both strength and a smooth mechanical operation. We have tested various brands and styles to find the ones that provide the best balance of value and performance. Below are our top picks for the tools and materials you should consider for this specific project.
- Heavy duty black matte steel hardware kits for a timeless look.
- Solid knotty alder door slabs for a beautiful natural wood grain.
- Professional grade impact drivers for driving structural screws into studs.
- Digital stud finders with center-finding technology for better accuracy.
- Soft close adapters that prevent the door from slamming against the stops.
Quick Tips and Hacks
Implementing a few professional secrets can turn a good project into a great one with minimal extra effort. These small adjustments often make the difference between a noisy door and one that glides silently. Handydads has gathered these techniques from years of experience in the field to help you achieve a pro-grade finish. Most of these hacks require only basic household items or just a few extra minutes of your time. Consider these tips as you finalize your installation to get the most out of your new hardware.
- Use painter-s tape on the wall to mark your stud locations to avoid pencil marks.
- Rub a small amount of paraffin wax on the track for a completely silent operation.
- Use a piece of cardboard as a spacer when installing the floor guide for perfect clearance.
- Always pre-drill holes in the door slab to prevent the wood from splitting.
- Check the plumb of the wall before starting your layout to adjust for any leaning.