
Handydads knows that home security is a top priority for modern homeowners looking to simplify their lives. Upgrading your traditional deadbolt to a smart keyless entry system provides convenience and peace of mind without the need for physical keys. This project is a great way to enter the world of home automation while adding a sleek aesthetic to your front door. You will find that the installation process is surprisingly straightforward and can be completed in under an hour with basic tools. Once installed you can grant temporary access to guests or service providers with just a few taps on your smartphone.
Project Snapshot
This project is rated at an easy to moderate difficulty level and typically takes about thirty to sixty minutes to complete. You will find that the impact on your home security and daily convenience is very high once the system is active. The primary skills required for this job involve basic tool use and a small amount of low voltage wiring connection. You only need a few common household tools to get the job done and see immediate results. Handydads considers this one of the most rewarding quick upgrades you can perform on your home exterior.
Tools and Materials
You will need a Phillips head screwdriver to handle most of the assembly and hardware installation for this project. A tape measure is essential for checking the backset and ensuring the new hardware fits the existing door preparation. The smart lock kit itself usually includes the exterior keypad and the interior motor assembly along with all necessary mounting hardware. You should also have four high quality AA batteries ready to power the unit once the mechanical installation is complete. Finally a wood chisel might be necessary if you need to slightly enlarge the strike plate mortise for a perfect fit.
Step-by-Step Instructions
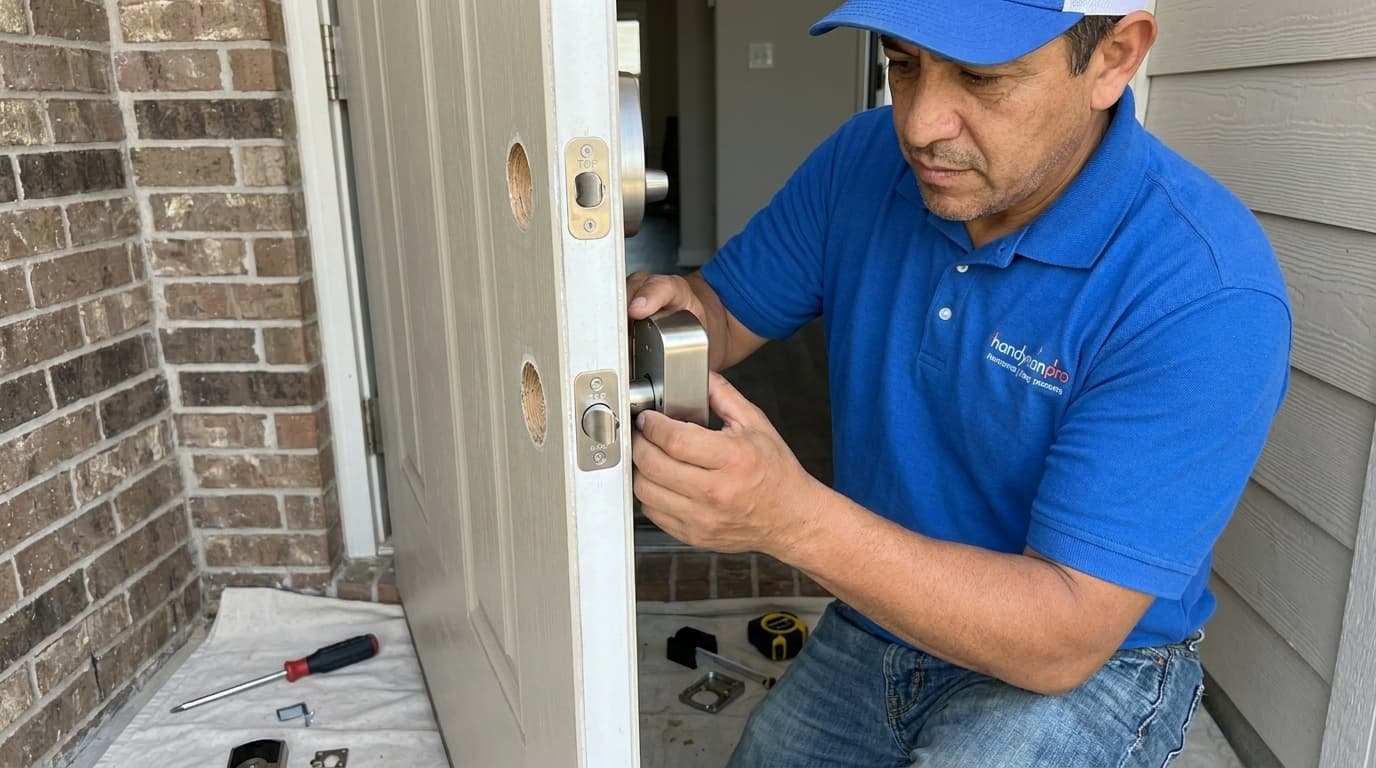
To begin your project you must first remove the existing deadbolt and strike plate from your door using a manual screwdriver. Carefully pull the two halves of the old lock apart and set them aside while ensuring you do not damage the door finish. Next you should slide the new latch into the hole on the edge of the door and make sure the word top is facing upward. Secure the latch with the provided screws but do not tighten them completely until you verify that the bolt moves freely. After the latch is in place you can feed the data cable under the latch and through the door to connect the exterior keypad. Finally you will attach the interior mounting plate and connect the electronic wires before securing the back cover and testing the motorized bolt. Once the hardware is installed you can proceed to the mobile application setup to pair the lock with your home network.
From the Toolbox
I remember a client who called Handydads after he locked himself out of his house for the third time in a single month during his morning jog. He was tired of hiding keys under fake rocks and worrying about whether he had remembered to double check the deadbolt before leaving. We suggested a smart lock with an auto lock feature so he never had to second guess his home security again. After the installation he was thrilled to find that he could unlock the door using his watch as he walked up the driveway. It completely changed his daily routine and gave him the freedom to stop carrying a bulky keyring everywhere he went.
Top 5 Mistakes
One common error is using a power drill which can easily strip the small screws or damage the internal electronics of the smart lock. Many people also fail to check the alignment of the strike plate which causes the motorized bolt to jam and drain the batteries quickly. It is also a mistake to ignore the cable management during the interior assembly process because a pinched wire will result in a total system failure. Homeowners often forget to update the firmware immediately after installation which can lead to security vulnerabilities or connectivity issues with the mobile app. Finally you should never skip the step of testing the manual thumb turn from the inside to ensure you can always exit the home during an emergency.
Tool and Material Recommendations
Handydads recommends choosing a smart lock that features a physical key override for added reliability during electronic malfunctions. We suggest using premium lithium batteries if you live in a climate that experiences extreme temperature swings throughout the year. For the installation a multi-bit screwdriver is a great choice because it allows you to switch between different screw sizes without searching through your toolbox. If you need to make adjustments to your door frame a sharp wood chisel and a small hammer are the best tools for the job. Finally we recommend using a brand name lock that offers a robust mobile application with two-factor authentication for the highest level of digital security.
Quick Tips and Hacks
You should always keep a fresh set of high quality alkaline batteries on hand because smart locks can be power hungry during cold weather. It is a good idea to create a unique entry code for every family member so you can track who enters the home and at what time. If your door is older you might need to sand down the frame slightly to ensure the bolt slides into the hole without any physical resistance. Always keep one physical backup key hidden in a secure location or with a trusted neighbor just in case the electronics ever fail. You can integrate your new lock with other smart home devices like cameras or lights to create a comprehensive security perimeter for your family.