
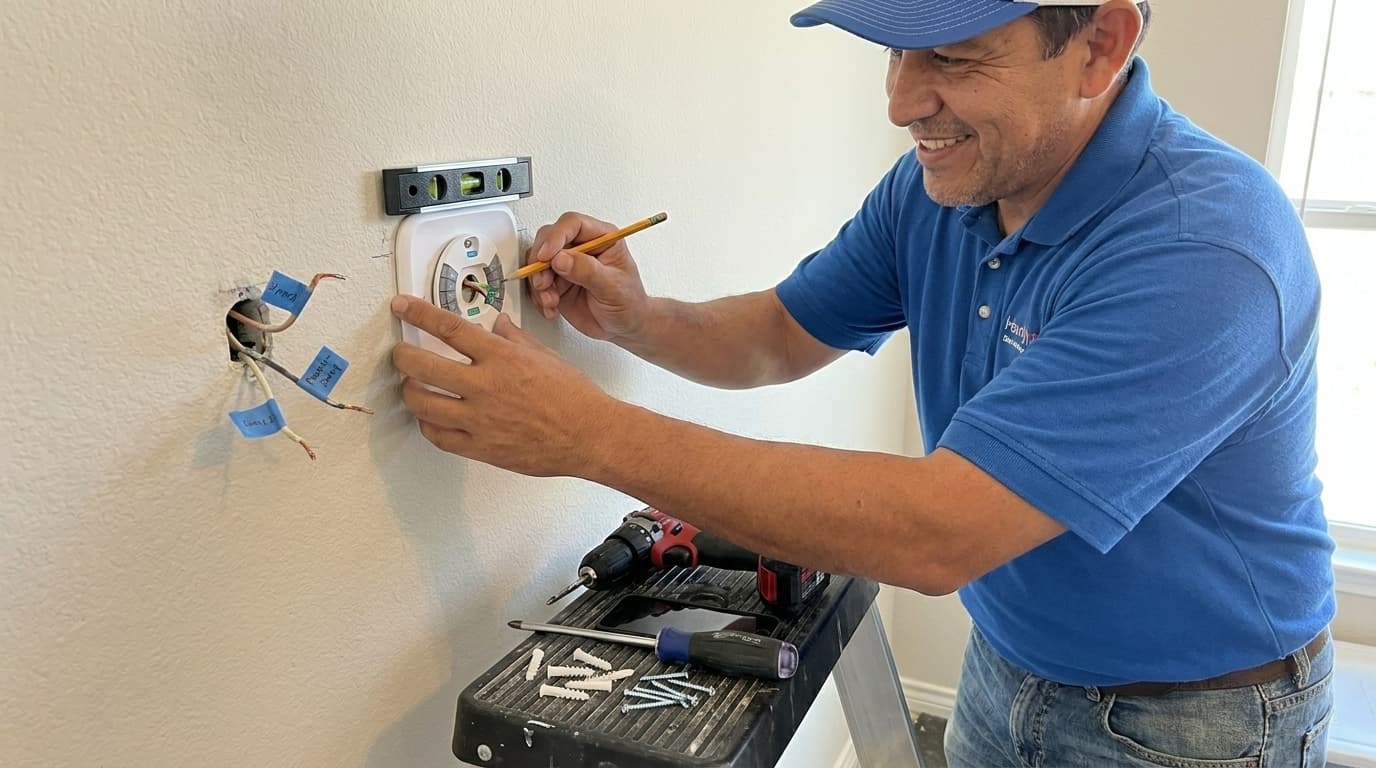
Upgrading your home with a smart thermostat is a fantastic way to enhance your daily comfort while reducing utility costs. Handydads recommends this project for anyone looking to modernize their living space with minimal effort. A smart device allows you to set complex schedules that adapt to your lifestyle automatically. Most modern units also offer remote access so you can adjust the temperature from anywhere in the world. This guide will walk you through every necessary step to ensure a successful and safe installation.
Project Snapshot
- Time Required: 1 hour
- Difficulty: Intermediate
- Tools Needed: Screwdriver, drill, level, smartphone
Tools and Materials
- Smart thermostat kit
- Phillips head screwdriver
- Flat head screwdriver
- Power drill with small bits
- Drywall anchors and screws
- Painter's tape for labeling
- Digital camera or smartphone
Step-by-Step Instructions
You must start by locating your electrical panel and switching off the breaker for your HVAC system. This is a critical safety step that prevents any electrical shorts or personal injury during the process. Verify that the power is truly off by trying to adjust the current thermostat settings. If the display remains blank or the system does not kick on, you are ready to proceed. Handydads always prioritizes safety above all else when performing any electrical tasks in the home.
Carefully remove the faceplate of your old thermostat to expose the internal wiring connections. Use the labels or stickers provided with your new device to mark each wire based on the terminal letter it is currently attached to. Do not rely solely on the color of the wires because they can often be non-standard or misleading. Taking a clear photograph of the original wiring setup is a very helpful backup plan for your records. This ensures you can always reference the original configuration if you run into any confusion during the new installation.
Once everything is labeled, disconnect the wires and unscrew the old base plate from the wall. You should wrap the wires around a pencil or use painter's tape to prevent them from falling back into the wall cavity. If the wires disappear into the wall, it can be very difficult to retrieve them without cutting a larger hole. Inspect the wall for any damage or unpainted areas that were hidden by the old unit. You may want to patch or touch up the paint before moving forward with the new hardware.
Position the new base plate against the wall and use a small level to ensure it is perfectly straight. Mark the locations for the mounting holes with a pencil before you begin any drilling. If you are not hitting a stud, you must use the provided drywall anchors to ensure a secure fit. Carefully pull the HVAC wires through the center opening of the base plate while holding it in place. Drive the screws into the anchors or studs until the base plate is firmly attached to the wall.
Insert each labeled wire into the corresponding terminal on the new smart thermostat base. Most modern units use push-in terminals that do not require you to wrap the wire around a screw. Ensure that the copper portion of the wire is fully inserted and that there is no loose insulation blocking the contact. Give each wire a gentle tug to verify that it is locked securely into the terminal block. Double-check your labels against the manufacturer's diagram one last time before you snap the thermostat display onto the base.
Return to your electrical panel and switch the breaker back to the on position to restore power. The thermostat display should light up and guide you through the initial on-screen setup process. You will typically need to connect the device to your home Wi-Fi network using a dedicated mobile app. Follow the prompts to configure your heating and cooling preferences based on your daily routine. Test the system by turning on the heat or air conditioning to ensure everything is functioning as expected.
From the Toolbox
I once helped a homeowner who was convinced their HVAC system had failed entirely during a cold snap. Upon arrival, I noticed they had recently tried to install a smart thermostat without checking for a C-wire. We had to install a power extender kit at the furnace to provide the necessary constant power to the unit. Once the wiring was corrected, the system sprang to life and worked perfectly with their smartphone. It was a great reminder that even small details in wiring can make a huge difference in functionality.
Top 5 Mistakes
- Forgetting to turn off the power at the breaker panel.
- Neglecting to label the wires before disconnecting the old unit.
- Allowing wires to fall back into the wall cavity during the swap.
- Failing to use a level which results in a crooked wall display.
- Ignoring the requirement for a C-wire or common wire for power.
Tool and Material Recommendations
- Smart Thermostat: Look for models with high energy star ratings.
- Precision Screwdriver Set: Useful for small terminal screws on older units.
- Drywall Anchors: Heavy-duty plastic anchors provide the best support.
- Cordless Drill: A lightweight 12V drill is perfect for this indoor task.
Quick Tips and Hacks
Always take a photo of the old wiring before you touch a single screw. If your new thermostat is smaller than the old one, use a decorative wall plate to hide unpainted areas. Keep the old thermostat for a few weeks just in case you need to troubleshoot the new system. Check your local utility company website for rebates on smart thermostat purchases. Ensure your Wi-Fi signal is strong at the installation site to prevent connectivity issues.