
Upgrading your home security starts at the front door with a modern smart video doorbell system. These devices provide a clear view of your entryway and allow you to interact with visitors even when you are away from home. At Handydads we believe that every homeowner should feel empowered to tackle these small electrical upgrades to enhance their daily peace of mind. Installing a hardwired version ensures that you never have to worry about charging batteries or losing connectivity during critical moments. This guide will walk you through the entire process of mounting the device and connecting it to your existing doorbell wiring for a seamless experience.
Project Snapshot
This project is rated as easy to moderate and can usually be completed by most homeowners in about one hour of dedicated time. You will be working with low voltage electrical wires which makes it a safe entry point for those new to electrical work around the house. The main goal is to replace your existing mechanical button with a sophisticated camera system that provides real time alerts to your phone. By following this guide you will improve your entryway security and add a modern convenience that your family will use every single day. Handydads believes this is one of the most rewarding small upgrades you can perform to modernize your living space.
Tools and Materials
To complete this installation you will need a smart video doorbell kit which typically includes the mounting bracket and security screws. You should also have a power drill with various bits and a Phillips head screwdriver to handle the mounting and terminal connections. A pair of wire strippers is useful if your existing wires are damaged and need to be trimmed back for a fresh connection to the device. You might also need a voltage tester or multimeter to verify the power coming from your doorbell transformer is adequate for the new unit. Handydads suggests having some painter tape and a pencil nearby to help with marking holes and securing wires during the process.
Step-by-Step Instructions
Before you begin the physical installation you must ensure that your current doorbell transformer provides enough voltage for the new smart device. Most modern video doorbells require a transformer that provides between 16 and 24 volts to function correctly without power interruptions. You can check this by looking at the transformer itself or using a digital multimeter at the doorbell location. If your voltage is too low you may need to replace the transformer located near your electrical panel or inside a closet. Handydads suggests performing this check before mounting the new device to avoid troubleshooting issues later in the afternoon.
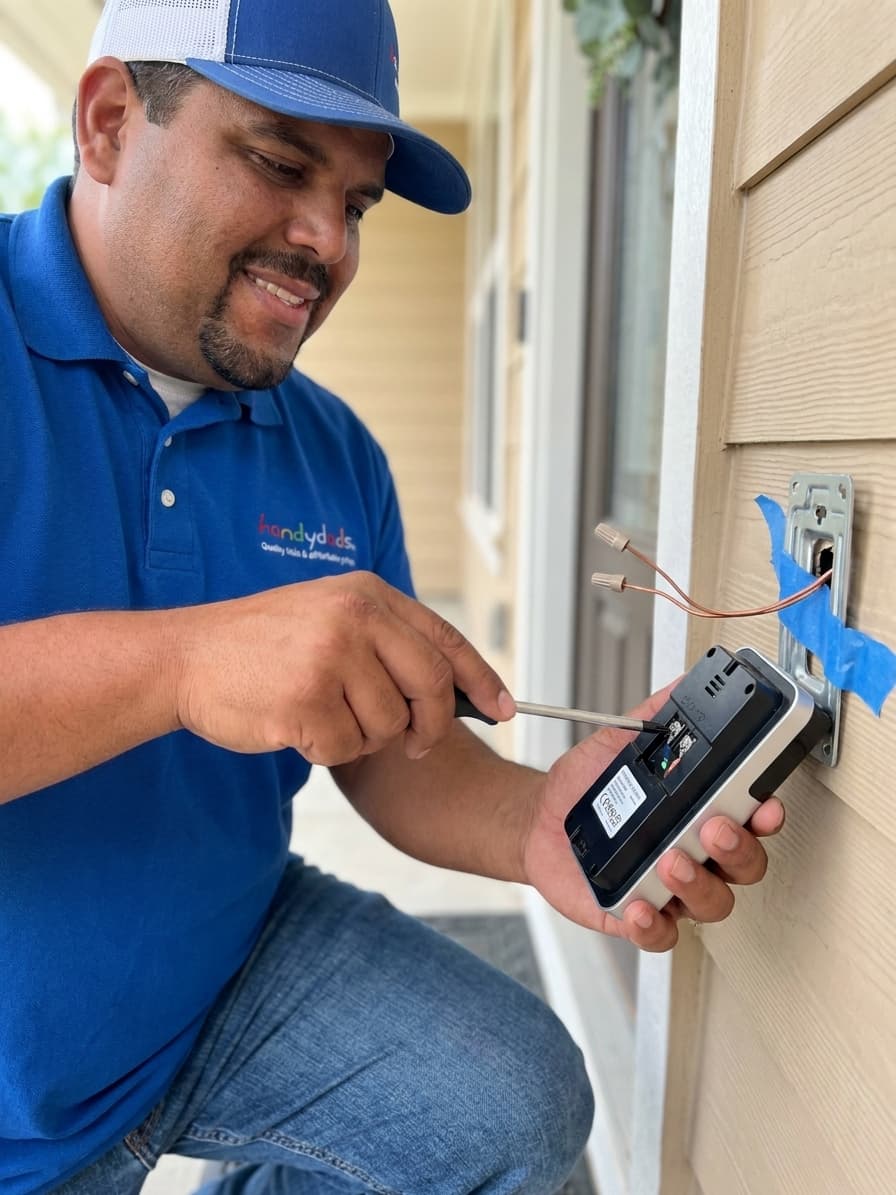
Once the power is verified you can start by turning off the power at the main breaker box to ensure your safety throughout the process. You can verify the power is off by pressing the existing doorbell button to see if the chime still rings inside the house. Unscrew the old doorbell button from the wall and gently pull it away to reveal the two low voltage wires connected to the back. Use a piece of painter tape to secure these wires to the siding so they do not fall back into the wall cavity where they are hard to reach. Handydads recommends taking a quick photo of the wires before you disconnect them for a helpful reference later.
Place the new mounting bracket against the wall and use a small level to ensure it is perfectly straight before marking your drill holes with a pencil. If you are mounting on brick or stone you will need to use a masonry bit and the included wall anchors for a secure fit that lasts. Drill your holes carefully and insert the plastic anchors until they are flush with the surface of the wall. Position the bracket over the anchors and drive the mounting screws in until the bracket is firm and does not move when touched. Handydads suggests checking the level one more time after the screws are tight to ensure a professional look.
Connect the two existing wires to the terminals on the back of the smart doorbell or the mounting bracket by tightening the small screws provided in the kit. It does not matter which wire goes to which terminal since this is a low voltage alternating current system in most residential homes. Make sure the wires are tucked neatly into the wall or the back of the device so they do not get pinched during the final assembly. If the wires are too short you can use small wire extensions and wire nuts to give yourself more room to work comfortably. Handydads always checks that the connections are snug by giving the wires a very gentle tug before moving to the next step.
Snap the doorbell onto the bracket and tighten the security screw at the bottom of the device to prevent anyone from tampering with your new investment. Turn the power back on at the breaker and wait for the status light on the front of the doorbell to begin flashing in setup mode. Open the manufacturer app on your smartphone and follow the prompts to connect the camera to your local Wi-Fi network. You should test the camera view and the motion detection settings to ensure the doorbell covers the specific areas you want to monitor. Handydads recommends inviting other family members to the app account so everyone can see who is at the front door.
From the Toolbox
Last summer a client called Handydads because they were tired of missing package deliveries while working in their backyard. We spent about forty minutes setting up their new video doorbell and configuring the motion zones to ignore the street traffic. The homeowner was thrilled to see their phone light up when the mail carrier arrived just as we were finishing the job. It was a simple upgrade that completely changed how they managed their front door security. Seeing that instant relief on a customer face is why we love sharing these DIY guides with our community.
Top 5 Mistakes
Common errors like neglecting to check the Wi-Fi signal strength at the installation site can lead to a very frustrating user experience with constant lag. Many homeowners also forget to check the voltage requirements of the transformer which often leads to the device failing to charge its internal battery properly. Positioning the camera in a way that creates too much glare from the sun or a nearby porch light can significantly reduce the video quality at night. Another frequent mistake is failing to use the provided wall anchors on masonry surfaces which results in a loose and wobbly mounting bracket. Handydads wants to help you avoid these pitfalls so your home remains secure and your technology works perfectly from the very first day.
Tool and Material Recommendations
Having the right tools on hand like a digital multimeter allows you to confirm that the wiring is receiving the correct amount of power from the transformer. A high quality cordless drill with a variety of bits is essential for making clean holes in different types of siding like wood or vinyl. You should also have a set of precision screwdrivers because the terminal screws on these devices are often quite small and difficult to turn with standard tools. Using a small torpedo level ensures that your camera is perfectly vertical which helps with the motion detection accuracy and the overall look of the project. Handydads recommends gathering all these items on a clean workspace before you start working to keep the process organized.
Quick Tips and Hacks
Small adjustments like using an angled wedge kit can point the camera toward the walkway if your doorbell is located on a narrow side wall. You can also improve the night vision performance by ensuring there are no nearby obstructions like a large pillar that reflect infrared light back into the lens. It is often wise to set up a dedicated guest network on your router to keep your primary internet network more secure from external devices. Charging the internal battery fully before you start the hardwired installation ensures that the device stays powered during the initial software update process. Handydads likes to share these little tricks to ensure you get the most out of your home improvement projects with minimal stress.