
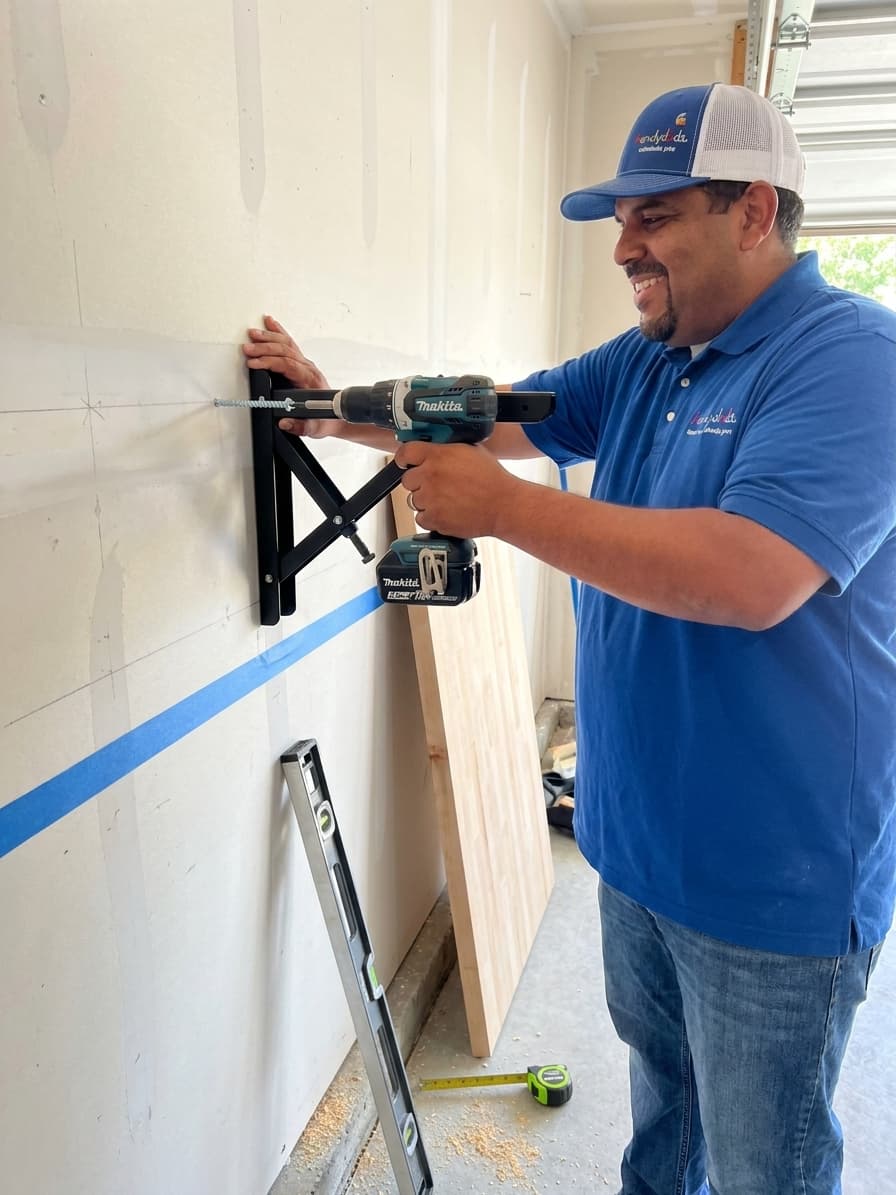
Many homeowners find that their garage or workshop space is limited by bulky furniture and stationary tables. A wall mounted folding workbench offers the perfect solution for those who need a sturdy work surface but also value their floor space. When the project is finished, the bench simply folds down against the wall to allow for vehicle parking or other activities. Handydads recommends this project for anyone looking to maximize their utility area without committing to a permanent footprint. This guide will walk you through the entire process from selecting the right wall studs to the final finishing touches on the wood surface.
Project Snapshot
- Time Required: 2 to 3 hours
- Difficulty Level: Intermediate
- Tools Needed: Drill, level, stud finder, saw
- Primary Materials: Wood top, folding brackets, lag screws
Tools and Materials
- Heavy duty folding shelf brackets
- Solid wood butcher block or plywood top
- Electronic stud finder
- Impact driver or power drill
- Wood screws and lag bolts
- Four foot spirit level
- Measuring tape and pencil
- Sandpaper and wood finish
Step-by-Step Instructions
Locate Studs: Use a stud finder to mark the locations of at least three vertical wall studs. This project requires a very strong connection to the framing of your home to support weight safely. Ensure the marks are level across the horizontal plane where you want the bench to sit before you start drilling. You should also check for any electrical wires or plumbing pipes that might be hidden behind the drywall. Marking the center of the stud is the most important part of this initial preparation phase to ensure maximum stability.
Mount Brackets: Hold your first folding bracket against the wall at the desired height and mark the pilot holes with a pencil. Use a power drill to create the holes and then secure the bracket with heavy duty lag screws or structural fasteners. Repeat this process for the remaining brackets while checking for level frequently to keep everything aligned across the wall. It is helpful to have an assistant hold the bracket in place while you drive the screws into the wood. Make sure the brackets are spaced evenly to provide the best support for the length of your wood top and anticipated load.
Prepare Surface: Measure and cut your solid wood or butcher block countertop to the desired dimensions for your specific workshop needs and available space. Sand the edges smooth to prevent splinters and apply a protective finish if you plan on using heavy liquids or chemicals. Place the top onto the brackets to ensure it sits flush against the wall surface without any visible gaps. Check the level one more time from front to back and side to side before you finalize the mounting position. Ensure that the wood is completely dry if you applied a stain or sealant before you move to the final attachment step.
Secure Top: From the underside of the folding brackets, drive short wood screws through the mounting holes and into the wood top. Be careful not to use screws that are longer than the thickness of your workbench material to avoid piercing the top surface. Test the folding mechanism several times to ensure it operates smoothly without binding or catching on the wall. You may need to adjust the tension on some brackets depending on the specific model you purchased for this installation. Once the bench is secure, clear off any leftover sawdust and prepare your tools for their new and efficient workspace.
From the Toolbox
Last summer a client called Handydads because their garage had become so cluttered they could no longer fit their car inside. We suggested installing a folding workbench to replace the massive rusted metal desk that sat in the middle of the floor. The transformation was immediate and provided them with a clean professional space to work on their hobby electronics. They were so impressed with the stability of the heavy duty brackets we used for the installation. Now they can pull their vehicle in every night and still have a functional shop during the weekend hours without any hassle.
Top 5 Mistakes
- Failing to hit wall studs which leads to the bench collapsing under heavy load.
- Installing the brackets at different heights which results in a slanted and unstable work surface.
- Using screws that are too short to provide adequate structural support for the weight of the bench.
- Neglecting to leave enough clearance for the bench to fold completely flat against the wall face.
- Forgetting to check for level during every single step of the hardware installation process.
Tool and Material Recommendations
- Steel folding brackets with a weight rating of at least 500 pounds
- 1.5 inch thick birch or maple butcher block for the work surface
- Magnetic stud finder for locating steel or wood framing members
- Torx head structural screws for superior grip and reduced stripping
- Water based polyurethane for a durable and fast drying wood finish
Quick Tips and Hacks
- Apply a thin coat of paste wax to the hinges to keep the movement silent and smooth.
- Add a magnetic tool strip to the wall just above the bench for easy access to screwdrivers.
- Use a piece of painters tape on the wall to mark your heights without leaving permanent marks.
- Install a small latch to keep the bench securely closed when it is in the folded position.
- Consider adding a power strip to the side of the bench for convenient tool charging while working.