
Installing a storm door is an excellent way to protect your main entry door from harsh weather elements throughout the seasons. This project provides an additional layer of insulation that helps maintain your home indoor temperature while reducing energy costs significantly. You will also enjoy the benefit of increased natural light and improved ventilation when the main door is open during pleasant weather. Handydads recommends this upgrade for homeowners who want to enhance their curb appeal while adding a security layer to their front entrance. Most modern storm doors are designed for DIY installation and come with comprehensive kits to simplify the entire assembly process.
Project Snapshot
This project typically takes a few hours to complete if you have all the necessary equipment ready at the start. You should expect to spend most of your time ensuring the frame is perfectly level and plumb before driving the final screws. A well installed door will swing smoothly and latch securely without any dragging or gaps along the perimeter. Handydads suggests having a partner nearby to help hold the door in place during the initial hanging phase. Completing this task successfully will give you peace of mind during the next heavy rainstorm or windy day.
Tools and Materials
To begin this installation you will need a reliable power drill with a variety of bits for pre drilling pilot holes. A high quality level is essential for ensuring that the door frame sits correctly within the existing opening without leaning. You may need a hacksaw to trim the metal z-bar components to fit the specific height of your door frame accurately. Handydads also suggests having a tube of exterior grade silicone caulk and a caulk gun for sealing the edges properly. Do not forget your safety glasses and gloves to protect yourself from metal shavings during the cutting process.
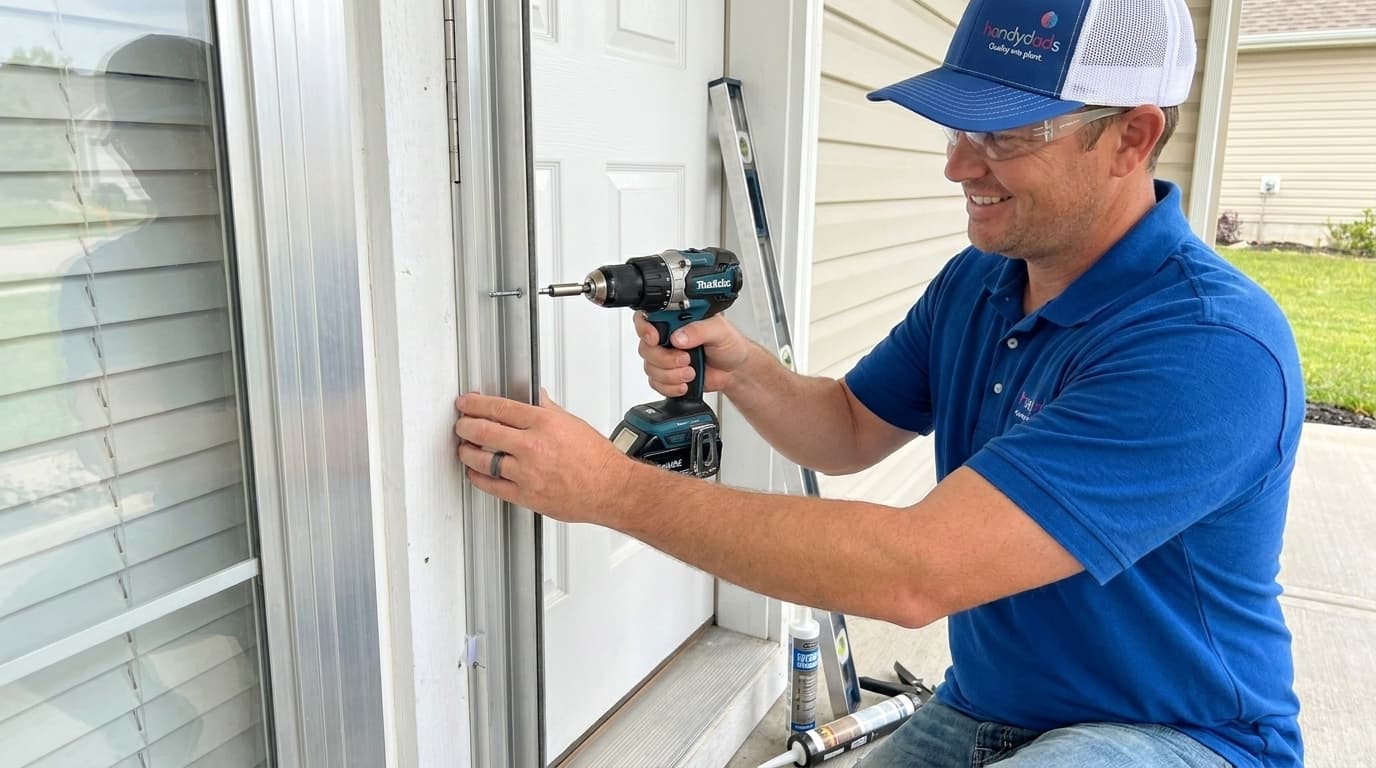
Step-by-Step Instructions
Start by measuring the height and width of your door opening at several points to ensure you have the correct size. Most storm doors are reversible so you must decide which side the hinges should be on for optimal functionality. Once you determine the swing you can begin by attaching the hinge side z-bar to the door itself according to the manufacturer instructions. Handydads recommends placing the door into the opening to check for a snug fit before you commit to any permanent screws. Secure the hinge rail to the door casing and then proceed to install the drip cap and the latch side rail.
From the Toolbox
I remember a specific Saturday afternoon when a client asked for help with a door that would not close during a light breeze. It turned out that the original installer had neglected to adjust the pneumatic closer which caused the door to fly open unexpectedly. We spent about ten minutes adjusting the tension screws and the difference was immediately apparent to the relieved homeowner. Handydads takes pride in these small adjustments because they make a massive difference in the daily usability of the home. It is always rewarding to see a simple mechanical fix provide such an immediate sense of home security and comfort.
Top 5 Mistakes
One of the most common errors is failing to measure the door opening multiple times before purchasing the hardware kit. Homeowners also frequently forget to check if the mounting surface is flat and free of rot which can lead to a loose installation. Another mistake involves over tightening the screws which can warp the aluminum frame and cause the glass to bind or crack. Handydads often sees people skip the step of installing the drip cap which leads to water leaking behind the frame over time. Finally many DIYers ignore the importance of adjusting the door closer speed which can result in the door slamming or not latching at all.
Tool and Material Recommendations
When choosing your materials look for a door with a heavy duty aluminum frame that can withstand high winds and frequent use. You should opt for a model that features interchangeable glass and screen panels if you live in a climate with distinct seasons. Handydads suggests using stainless steel screws for the installation to prevent rust streaks from forming on your exterior trim. High quality weather stripping is also a must-have to ensure a tight seal against drafts and small insects. Investing in a door with a multi-point locking system can provide an extra level of security for your family.
Quick Tips and Hacks
You can use small pieces of painters tape to mark where the screws should go before you start drilling into your door casing. If the door frame is slightly out of square you can use plastic shims to bridge the gap and create a level mounting surface. Handydads recommends applying a small amount of lubricant to the hinges immediately after installation to ensure a quiet and smooth operation. Using a magnetic bit holder on your drill will prevent you from dropping screws into the bushes or onto the porch floor. Always double check the clearance at the bottom of the door to make sure it will clear your welcome mat or any uneven flooring.