
Protecting your home from potential water damage is a vital part of maintaining a healthy living environment for your family. Handydads understands that a damp basement can lead to mold growth and structural integrity issues over time. By installing a high quality submersible sump pump, you are creating a reliable safety net for your property. This project is straightforward enough for most homeowners to handle with a few basic tools and some patience. We will guide you through every necessary step to ensure your installation is professional and effective.
Project Snapshot
This project generally takes about three to four hours to complete from start to finish. It requires a moderate level of DIY skill as you will be working with PVC plumbing and basic electrical connections. You should ensure that your sump pit is clean and free of debris before beginning the physical installation. A properly installed pump will automatically activate when water reaches a certain level in the basin. Regular testing of the system is recommended to confirm that everything is functioning as intended during the next big storm.
Tools and Materials
To begin this project, you will need a submersible sump pump that is rated for the size of your basin. You will also need a length of PVC pipe that matches the discharge outlet size of your new pump. A check valve is an essential component that prevents water from flowing back into the pit once the pump shuts off. Gather a hacksaw or PVC cutter, some purple primer, and PVC cement to secure all of your plumbing connections. Finally, make sure you have a drill with a small masonry bit for creating a relief hole in the discharge pipe.
Step-by-Step Instructions
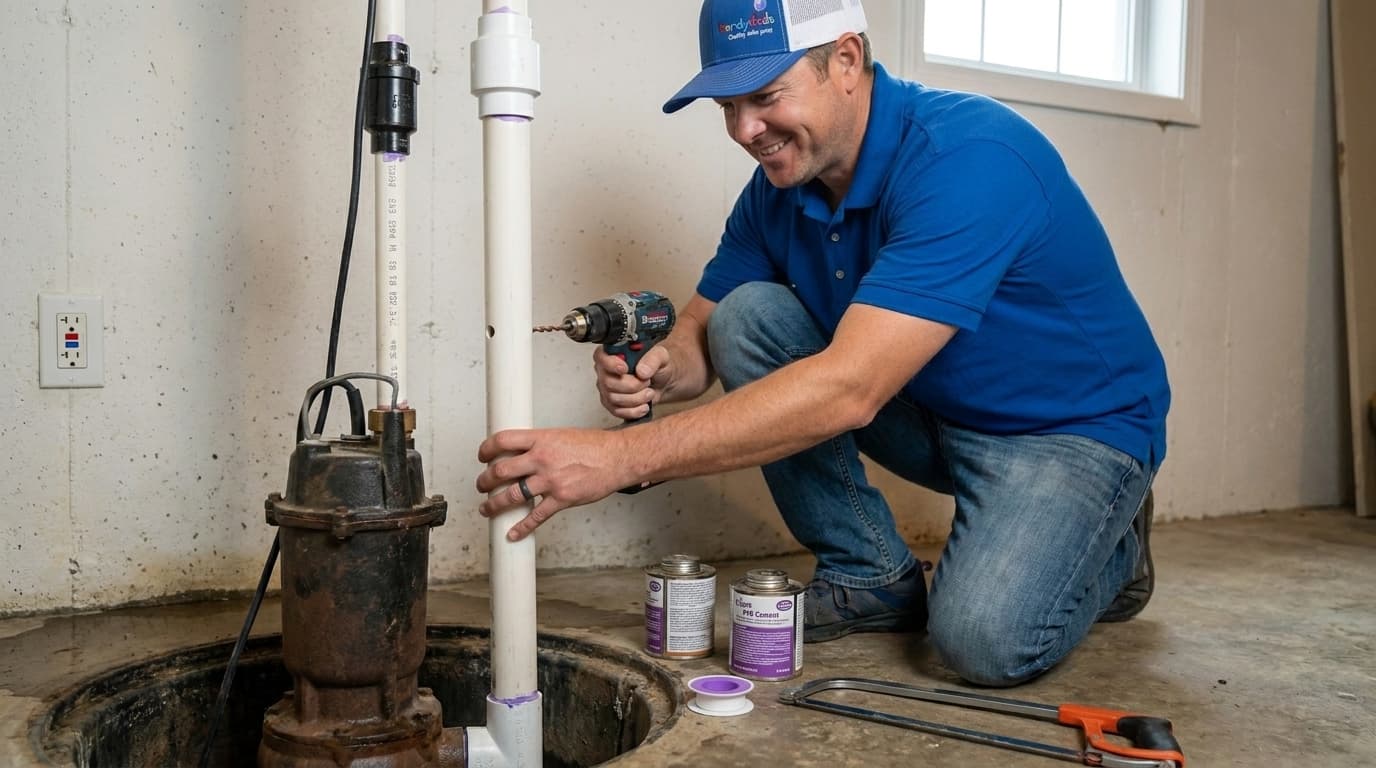
Start by disconnecting the power to your old pump and removing it from the basin so you have a clean workspace. Place the new submersible pump into the center of the pit while making sure it sits level on the bottom surface. Measure the distance from the pump outlet to the existing discharge line to determine the length of PVC pipe needed. Cut your PVC pipe to size and dry fit all the pieces including the check valve to ensure a perfect alignment. Apply primer and cement to the joints, then assemble the piping while making sure the check valve arrow points away from the pump. Drill a small three sixteenths inch weep hole in the pipe between the pump and the check valve to prevent air lock.
From the Toolbox
I remember a rainy Saturday when a neighbor called Handydads in a total panic because their basement was starting to take on water. They had an old pedestal pump that finally gave out after years of service in a very damp environment. We rushed over with a new submersible model and swapped the systems out in less than two hours. It was incredibly satisfying to see the water level drop quickly once the new unit kicked into gear. The homeowner was so relieved to avoid a costly cleanup and potentially losing their finished basement area.
Top 5 Mistakes
Many people forget to drill the weep hole which can cause the pump to air lock and fail to move any water. Another common error is failing to secure the check valve in the correct orientation which leads to water flowing back into the pit. Some installers place the pump too close to the basin wall where the float switch can get stuck in the on or off position. Neglecting to clean out the debris from the bottom of the pit can result in a clogged intake screen and a burnt out motor. Lastly, using an extension cord instead of a dedicated GFCI outlet can create a significant fire hazard in a wet environment.
Tool and Material Recommendations
When choosing a pump, Handydads suggests looking for a unit with a cast iron housing for better heat dissipation and longevity. A stainless steel impeller is also a great feature because it resists corrosion much better than plastic alternatives. For the check valve, a silent version is worth the extra investment because it eliminates the loud clunking sound when the pump cycles off. High quality PVC cement that is rated for pressurized systems will ensure that your joints never leak under the force of the pump. Always use a GFCI protected outlet to power your pump to ensure the highest level of safety for your home.
Quick Tips and Hacks
You can place a few bricks at the bottom of the pit to raise the pump slightly and prevent it from sucking up silt. Testing your pump every few months by pouring a five gallon bucket of water into the pit is a great way to ensure readiness. Wrap your PVC threads with teflon tape before screwing in the adapters to create a completely water tight seal. If you live in an area with frequent power outages, consider adding a battery backup system to your setup. Keeping a spare check valve on hand is a smart move since they are the most common failure point in these systems.