
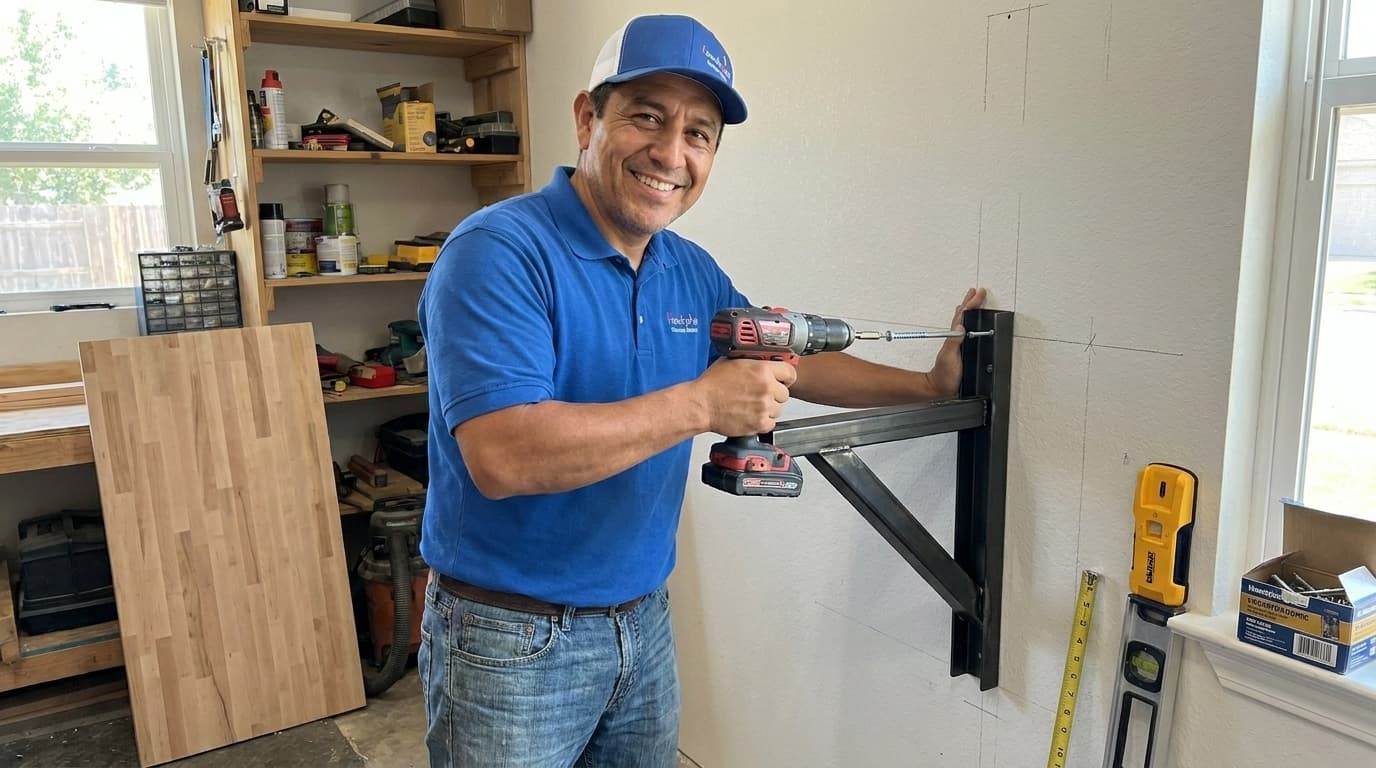
Many homeowners find that their garage space quickly becomes cluttered with tools and equipment leaving little room for actual projects. A wall mounted folding workbench offers the perfect solution for those who need a sturdy workspace without sacrificing valuable floor area permanently. This project allows you to have a full-sized work surface that simply tucks away against the wall when it is not in use. Handydads understands that maximizing utility in small spaces is a top priority for DIY enthusiasts and hobbyists alike. By following this guide you will learn how to securely mount a heavy-duty folding table that can handle your toughest tasks.
Project Snapshot
This project is designed for intermediate DIY enthusiasts who want to improve their workspace efficiency over a single afternoon. You should expect to spend approximately three hours on the installation from the initial measuring to the final testing phase. The overall impact on your garage organization will be significant because it provides a full-sized workspace that vanishes when not needed. Handydads rates this project as having a high utility value because the results are professional and extremely practical for any homeowner. No specialized plumbing or electrical skills are required to complete this task as it is primarily a structural and mechanical installation.
Tools and Materials
To complete this project successfully you will need to gather several essential tools and high-quality materials from your local hardware store. The main components include a sturdy wood tabletop, two heavy-duty folding brackets, and a box of heavy-duty lag screws for wall mounting. You will also need a power drill with a set of wood bits, a reliable stud finder, and a long carpenter level to ensure accuracy. Handydads suggests having a measuring tape and a pencil ready for marking your stud locations and bracket heights precisely. Finally, keep some sandpaper and a wood finish on hand to give your new workbench a professional and durable look.
Step-by-Step Instructions
Use a high-quality stud finder to identify the vertical framing members behind your garage drywall. Mark the center of each stud clearly with a pencil at the height you want your workbench to sit. Most standard workbenches are set at about thirty-six inches high for comfortable standing use. Ensure that the studs you choose are spaced correctly for the width of your folding brackets. Double-check your measurements with a level to make sure the marks are perfectly horizontal across the wall.
Hold the first heavy-duty bracket against the wall and align it with your stud marks. Drill pilot holes into the studs to prevent the wood from splitting when you drive in the large lag screws. Secure the bracket using the appropriate hardware and tighten it until it is flush against the wall surface. Repeat this process for the second bracket while constantly checking the alignment with your level. Handydads recommends using a helper to hold the brackets in place while you manage the drill and fasteners.
Select a sturdy piece of wood such as a thick butcher block or a double layer of high-grade plywood. Sand the edges and the surface thoroughly to remove any splinters or rough spots that could cause injury. Measure the distance between your mounted brackets to determine exactly where to attach the tabletop. Lay the tabletop face down on a clean flat surface to prepare for the bracket attachment process. You may want to pre-drill small holes in the underside of the wood to make the final assembly much smoother.
Lift the prepared tabletop onto the extended brackets and align it so that it is centered. Ensure that the back edge of the table has enough clearance to fold down without hitting the wall. Drive the wood screws through the bracket holes into the underside of the workbench top. Make sure the screws are short enough that they do not poke through the top of your work surface. Handydads suggests using at least four screws per bracket to provide maximum stability during heavy use.
Carefully release the locking mechanism on the brackets to see how the table folds toward the wall. It should swing smoothly without catching on any obstructions or rubbing against the drywall surface. Lift the table back into the horizontal position and listen for the satisfying click of the locks engaging. Apply some weight to the front edge of the bench to ensure it feels solid and does not wobble. Once you are satisfied with the movement you can add your favorite accessories to complete the station.
From the Toolbox
One time a client at Handydads had a garage so full they could barely walk through it. They really wanted a place to work on their vintage bicycle collection but thought they had no room left. We suggested a custom folding workbench that could be installed directly over their storage bins. Once it was finished they were amazed at how much functionality they gained without losing any parking space. It truly transformed their garage into a functional workshop environment.
Top 5 Mistakes
One of the most common errors is failing to anchor the brackets into solid wall studs which can lead to the workbench collapsing under pressure. Another frequent mistake involves using brackets that are not properly rated for the weight of the tabletop and the specific tools you plan to use. Many DIYers also struggle with installing the workbench at an incorrect height which often causes significant back strain during long projects. Neglecting to use a high-quality level during the installation process frequently results in an uneven and frustrating work surface for the user. Finally, choosing a tabletop material that is too thin or prone to warping when exposed to garage humidity can ruin the project over time.
Tool and Material Recommendations
Selecting the right materials is crucial for a successful project and we recommend using a 1.5-inch thick butcher block for the most durable surface. You should also look for heavy-duty locking hinges that are rated for at least five hundred pounds to ensure maximum safety and stability. For the fasteners, Handydads suggests using three-inch lag screws to provide a deep and secure bite into the wall studs. A digital level can also be extremely helpful for ensuring that your workbench is perfectly flat in both the open and closed positions. Lastly, consider adding a coat of high-quality polyurethane to protect the wood from oils, stains, and moisture common in a garage environment.
Quick Tips and Hacks
One great hack is to use a temporary ledger board screwed into the wall to support the weight of the bench while you align the brackets. You can also attach a magnetic tool strip to the front edge of the workbench to keep your most used screwdrivers and bits within easy reach. If you have limited lighting, try mounting a small battery powered LED light bar to the underside of the shelf above your new workspace. Handydads also recommends marking the floor with tape to indicate the swing path of the table so you never park your car too close to the wall. Finally, you can install a power strip directly onto the side of the tabletop to provide convenient electrical access for all your corded power tools.