
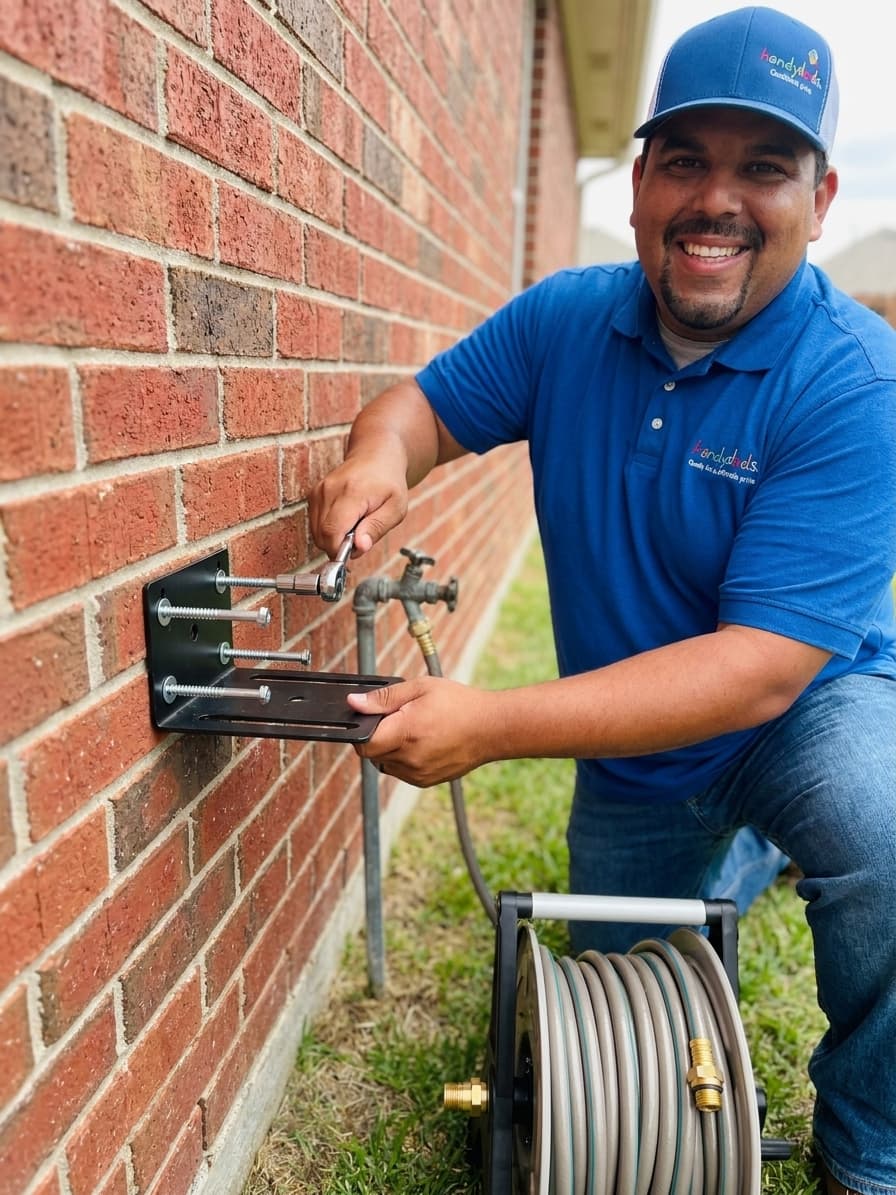
Tired of tripping over messy piles of garden hoses in your backyard? Installing a wall mounted retractable garden hose reel is a game changer for any homeowner who values organization. Handydads recommends this project because it protects your hose from sun damage and keeps your outdoor space looking tidy. The installation process is relatively straightforward and can be completed in under an hour with the right preparation. Once finished, you will enjoy the convenience of a hose that pulls out easily and retracts with a simple tug.
Project Snapshot
This project is an excellent weekend task for any homeowner looking to improve their outdoor efficiency. You should expect the installation to take approximately forty five minutes from start to finish. The skill level required is considered easy, making it perfect for beginners or busy parents. This upgrade significantly improves organization by keeping your garden hose off the ground and protected from the elements. Handydads highly recommends this installation for anyone who wants a cleaner and more functional backyard space.
Tools and Materials
You will need a few basic tools to ensure the installation goes smoothly and remains secure. Gather a power drill, a set of drill bits, a level, a pencil, and a socket wrench set before you begin. The materials required for this job include the retractable hose reel unit itself and the provided mounting hardware. You should also have a lead hose available to connect the reel intake to your exterior water spigot. Having all these items ready beforehand will prevent unnecessary trips to the hardware store during the project.
Step-by-Step Instructions
First, choose a location near an outdoor water spigot and ensure the mounting surface is sturdy and unobstructed. Hold the mounting bracket against the wall at a comfortable height and use a level to ensure the unit will hang straight. Mark the pilot hole locations through the bracket holes using a pencil for precise placement on the wall surface. Drill the pilot holes into the brick or siding using the appropriate drill bit size specified by the manufacturer for your hardware. Secure the bracket to the wall using the provided lag bolts and a socket wrench until it is tight and immovable. Slide the hose reel unit onto the mounting bracket and connect the lead hose to your water spigot to complete the project.
From the Toolbox
Last summer, a neighbor of mine spent hours untangling a knotted hose every time he wanted to water his prize winning tomatoes. I brought over my tools and we installed a Handydads approved retractable reel on his brick siding in no time. He was amazed at how much faster his gardening routine became without the constant struggle of coiling heavy rubber. It is those small upgrades that truly make home maintenance a joy rather than a chore. We finished the job just as the sun was setting and celebrated with a cold glass of lemonade. He now recommends this specific upgrade to every person on the block who mentions yard work.
Top 5 Mistakes
There are several common errors that homeowners make when attempting this outdoor project. Mounting the reel too far from the water source often puts unnecessary strain on the lead hose and connections. Failing to use a level during the bracket installation will result in the hose retracting unevenly or bunching up. Using the wrong type of drill bit for masonry walls can cause unsightly cracks or damage to your home exterior. Finally, overtightening the lag bolts can strip the anchors or the wall material itself, leading to a loose and dangerous mount.
Tool and Material Recommendations
A high quality hammer drill is essential if you are mounting the unit to brick or stone surfaces. Handydads suggests using stainless steel mounting hardware to prevent rust streaks from forming on your home siding. Always look for a hose reel that features a slow retraction mechanism for enhanced safety and controlled winding. A 50 foot or 100 foot hose capacity is usually sufficient for most standard residential yards and landscaping needs. Ensure the lead hose has heavy duty brass fittings for a long lasting and leak free connection to your spigot.
Quick Tips and Hacks
Apply a small amount of silicone sealant into the pilot holes before driving the bolts to prevent water intrusion into your walls. If you are mounting to vinyl siding, use a specialized mounting block to create a flat and stable surface for the bracket. Always drain the hose during the cold winter months to prevent ice expansion from cracking the internal plastic components. You can spray the swivel joint with a small amount of silicone lubricant once a year to keep it rotating smoothly. Marking the hose with a piece of colored tape five feet from the end helps you know exactly when to stop pulling.