
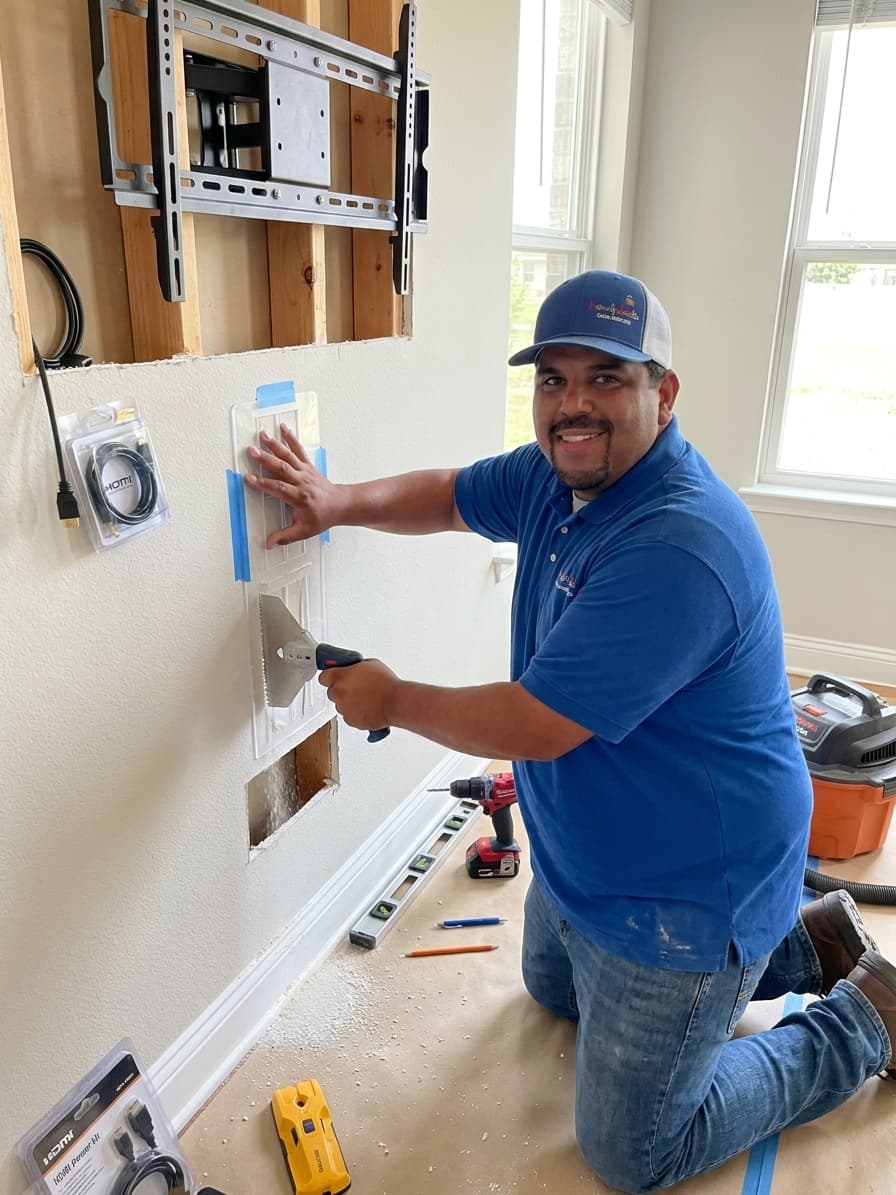
Handydads knows that a wall mounted television can transform any living space from cluttered to modern in just a few hours. This project is a fantastic way to clear up floor space and create a focal point for your family room or entertainment area. You will find that mounting a television requires careful planning and a few specific tools to ensure it remains secure and level on your wall. While the physical mounting is straightforward, the real secret to a professional look involves hiding those unsightly dangling wires behind the drywall. Handydads is here to guide you through every step of this process to make your home media setup look like it was done by a pro.
Project Snapshot
This project is rated as an intermediate task that requires a moderate level of comfort with power tools and basic wall construction. You should expect to spend approximately two to three hours from start to finish to complete the job properly. The utility of this project is extremely high because it saves floor space and improves the aesthetics of your room. Having an extra set of hands will make the lifting process much safer and easier for everyone involved. Handydads recommends reviewing all safety warnings for your specific television and mount before you begin.
Tools and Materials
Before you begin the installation process, you must gather all the necessary supplies to avoid interruptions mid-way through the project. You will need a reliable stud finder, a power drill with a set of bits, a level, and a socket set or wrench. The specific hardware for the job includes a TV wall mount kit, an in-wall cable management kit, and a drywall saw. Do not forget to have a screwdriver and a pencil handy for marking your measurements accurately on the wall surface. Having these items organized and ready will ensure the installation goes as smoothly as possible.
Step-by-Step Instructions
Locating the Studs: Use your stud finder to locate the vertical wooden supports in your wall where the TV will hang. Marking the center of each stud is critical for a secure installation that will hold the weight of your screen. Most television mounts require two studs to distribute the load evenly across the wall surface. Ensure there are no electrical wires or plumbing pipes behind the area where you plan to drill. Doing this work correctly ensures your expensive electronics stay safe and sound.
Mounting the Plate: Hold the wall plate against the wall at your desired height and use a level to ensure it is perfectly straight. Mark the pilot holes for the lag bolts and then drill the holes into the center of the studs you located earlier. Secure the wall plate using the provided hardware and double-check the levelness one last time before tightening everything down. This ensures that your screen does not look crooked once it is finally attached to the wall. A sturdy mount is the foundation of a great viewing experience for your family.
Attaching the Brackets: Attach the mounting brackets to the back of your television using the screws provided in the mounting kit. Be sure to use the correct length of screws to avoid damaging the internal components of your TV screen. These brackets will eventually hook onto the wall plate you just installed. Most kits come with various spacers to help the brackets fit perfectly on curved backs. Taking your time here prevents the brackets from rattling during loud movie scenes.
Hiding the Wires: Cut two holes in the drywall using the templates from your in-wall cable management kit. One hole should be located directly behind the TV and the other near the power outlet at the bottom of the wall. Pull your HDMI and power cables through the wall using the provided conduit or fish tape to keep them out of sight. This step is what separates a DIY job from a professional Handydads installation. You will appreciate the clean look every time you walk into the room.
Hanging the TV: With the help of a friend, lift the television and hook the brackets onto the wall plate securely. Check that the safety locks or screws are engaged so the TV cannot be accidentally knocked off the mount. Finally, plug in your hidden cables and enjoy your clean cable-free entertainment center. Take a moment to adjust the tilt or swivel if your mount allows for those movements. Having a second set of eyes helps ensure the screen is positioned exactly where you want it.
From the Toolbox
I remember helping a neighbor who tried to mount a massive seventy-five-inch television using only drywall anchors. He called Handydads in a panic when he heard the drywall cracking under the immense weight of the screen. We arrived just in time to catch the TV and move the mount to the actual studs for a permanent fix. It was a great reminder that even the strongest anchors are no match for the solid wood of a structural stud. Now his television is rock solid and he can watch movies without worrying about the wall collapsing.
Top 5 Mistakes
Even simple projects can go wrong if you do not pay close attention to the small details during the process. Many homeowners make the mistake of mounting the television much higher than is comfortable for regular viewing. Another common error is failing to use a level which results in a noticeably crooked screen that is difficult to ignore. Some people attempt to run standard power cords through the wall which can actually be a fire hazard and a code violation. Finally, missing the center of the stud can lead to a weak connection that might eventually cause the mount to pull away from the wall.
Tool and Material Recommendations
Selecting the right equipment is the first step toward achieving a professional result in your home. We recommend a high-quality magnetic stud finder that can penetrate deep into various wall types. For the power source, a cordless drill with a built-in level can save you a lot of frustration during the drilling phase. You should also look for an in-wall power extension kit that is specifically designed for code-compliant installation. Adding a few long HDMI cables and some Velcro ties will help keep everything organized behind the scenes.
Quick Tips and Hacks
There are several clever tricks that can make your television mounting project even more successful. Use blue painter's tape to mark the dimensions of the TV on the wall so you can visualize the final placement. Always have a second person assist with lifting large screens to prevent injury to yourself or damage to the device. Check the VESA pattern on the back of your TV to ensure your chosen mount is fully compatible. You can also vacuum the dust immediately after sawing into the drywall to keep the surrounding area perfectly clean. Labeling your cables before pulling them through the wall will save you a lot of time during the final setup.