
Under cabinet lighting is a fantastic way to upgrade the functionality and aesthetic of any kitchen space. The team at Handydads knows that proper task lighting can make meal preparation much safer and more enjoyable for everyone. Most modern LED kits are designed with the homeowner in mind and offer simple plug and play installations. By adding these lights, you create a layered lighting effect that makes your kitchen look high-end and professional. It is one of the most cost effective ways to improve the value and feel of your home interior.
Project Snapshot
Time: 2 hours Skill: Intermediate Value: High
Tools and Materials
- LED Tape Light Kit
- Alcohol Prep Pads
- Measuring Tape
- Multi-bit Screwdriver
- Small Power Drill
- Cord Concealers
Step-by-Step Instructions
Start by thoroughly cleaning the underside of your cabinets where the lights will be installed. Dust and grease can prevent the adhesive backing on the LED strips from sticking properly over time. Use a damp cloth followed by a quick wipe with isopropyl alcohol to ensure the surface is completely clean. Let the wood or laminate dry fully before you attempt to move on to the next step. A clean surface is the foundation of a long lasting and professional looking lighting installation.
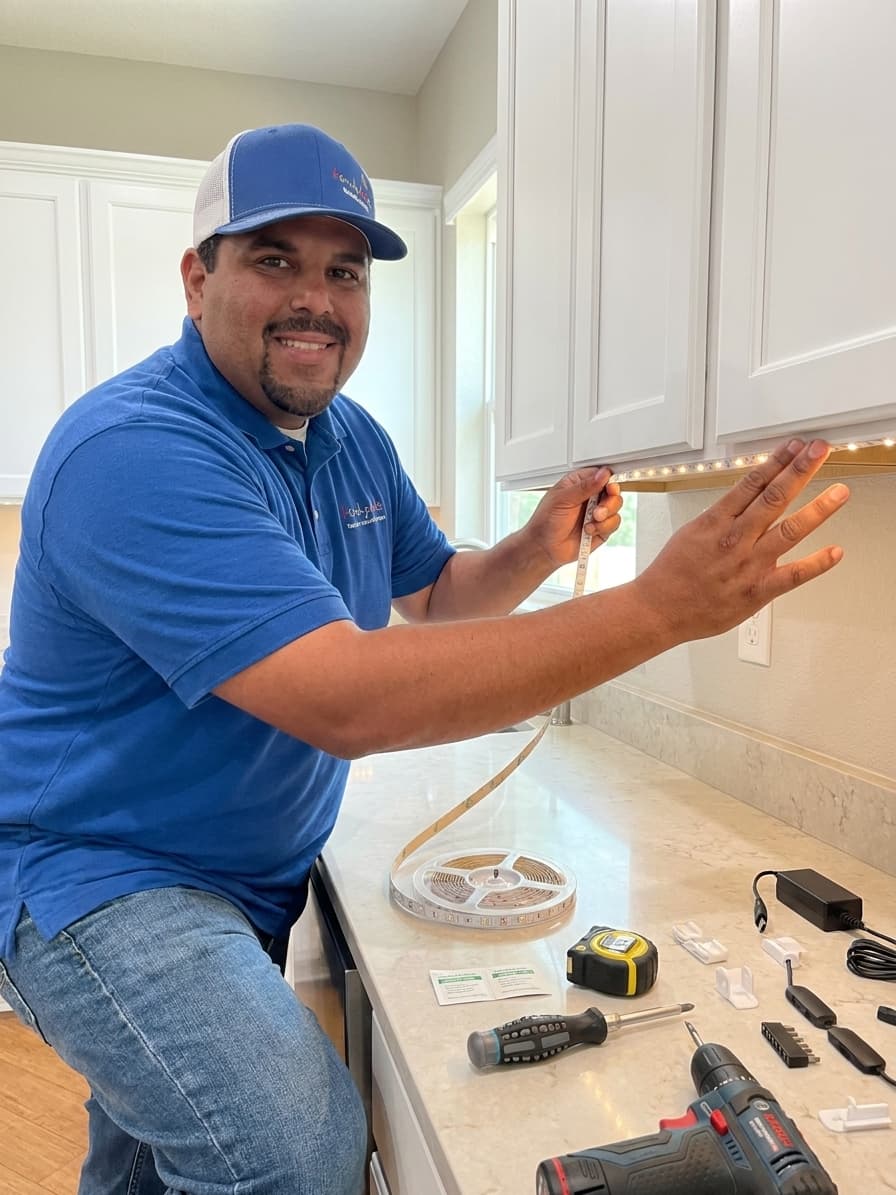
Carefully measure the length of each cabinet section to determine how much LED strip you will need for each area. Most LED strips have specific cut points marked with a pair of scissors where it is safe to trim them. Lay out your lighting components on the counter below the cabinets to visualize where the power source will go. Make sure that the power cord can easily reach an outlet without being stretched too thin or looking cluttered. Planning your layout ahead of time prevents mistakes and ensures you have enough materials to finish the job.
Once you have your plan in place, remove the adhesive backing and press the LED strips firmly into position. It is usually best to place the lights toward the front of the cabinet to provide the best light coverage for your countertops. Apply steady pressure for about thirty seconds along the entire length of the strip to ensure a strong bond. If your kit includes mounting clips, screw those into the cabinet frame to provide extra support for the lighting strips. Taking your time during this phase will prevent the lights from sagging or falling down later.
Now it is time to manage the wiring so that it remains hidden from view for a seamless appearance. Use small wire clips or adhesive cord managers to tuck the extra wire into the corners of the cabinet frames. You want to avoid any dangling wires that might get caught on kitchen appliances or look messy to guests. If you have to jump between cabinets, you may need to drill a very small hole through the cabinet side panels to pass the wire through. Handydads recommends using a wire concealer channel if the cords are visible in any specific areas.
Plug the power adapter into the wall and use the provided remote or switch to turn the lights on for the first time. Check the entire length of the installation to make sure there are no dead spots or loose connections in the sequence. If the lights flicker, double check that all of the connectors are pushed in tightly and securely. This is also a good time to adjust the position of any clips if you notice any uneven shadows on the countertop. Once everything looks perfect, you can enjoy the beautiful glow of your newly illuminated kitchen workspace.
From the Toolbox
One time we visited a client who had a very dark kitchen corner that felt unusable. The Handydads team suggested simple LED strips to bring the space back to life. After we finished the installation, the homeowner was shocked at how much larger the kitchen felt. It turned a shadowy prep area into the most used spot in the entire house. Lighting really is the secret ingredient for any successful home renovation project.
Top 5 Mistakes
- Neglecting to clean grease off the cabinets before applying the adhesive strips.
- Cutting the LED strips at the wrong locations and ruining the circuit.
- Installing the lights too close to the back wall which creates harsh shadows.
- Forgetting to measure the distance to the nearest electrical outlet before starting.
- Using a light temperature that is too blue or too yellow for the existing kitchen decor.
Tool and Material Recommendations
- LED Tape Light Kit
- Alcohol Prep Pads
- Cord Concealers
- Drill with small bits
- Multi-bit Screwdriver
Quick Tips and Hacks
Always test the light strip functionality before you peel the adhesive and stick it to the cabinet. Use a helper to hold the light in place while you step back to check the light distribution. If your cabinets have a lip, mount the lights just behind it to hide the actual bulbs from your line of sight. You can use a dimmable kit to transition the kitchen from a bright workspace to a soft nightlight. If the adhesive starts to fail over time, a small dab of clear silicone can help keep the strips in place.