
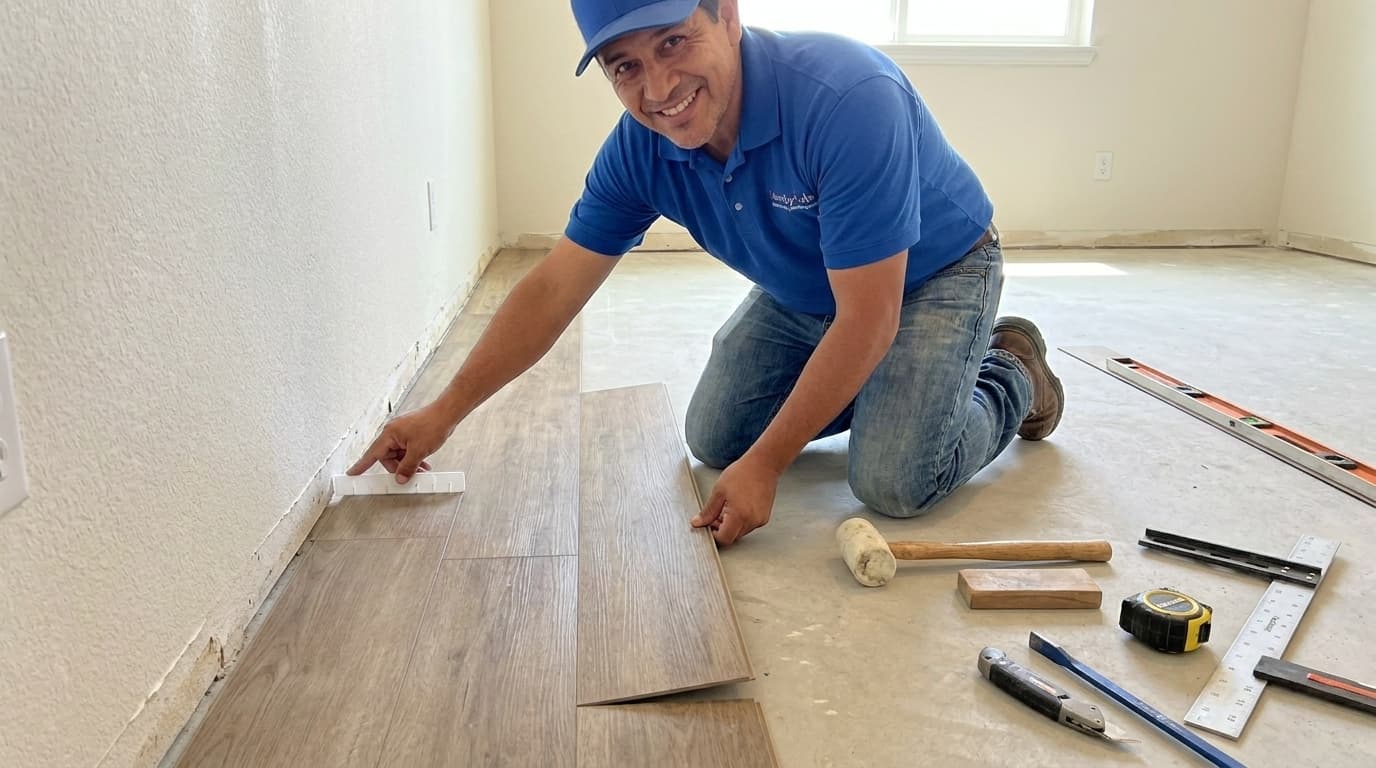
Handydads is here to guide you through one of the most transformative home improvement projects you can undertake. Upgrading your floors to luxury vinyl plank provides a durable and water resistant surface that looks just like real wood. This project is perfect for homeowners who want to improve the aesthetic value of their living space without the high cost of hardwood. You will find that modern click lock systems make this process much easier for the average person to manage. Once you complete this installation you will be amazed at how much larger and cleaner your room feels with a fresh floor.
Project Snapshot
The difficulty level for this luxury vinyl plank project is moderate and requires some patience with measuring. Most homeowners can complete a standard sized room within one to two days of work. You will need a basic set of hand tools and a clean workspace to ensure the best results. This project requires an intermediate skill level because of the precision needed for cutting around corners and door frames. The final result is a beautiful and waterproof floor that will last for many years with minimal maintenance.
Tools and Materials
You will need several boxes of luxury vinyl plank flooring and potentially a roll of underlayment if it is not already attached. The basic tool kit should include a rubber mallet and a tapping block along with a heavy duty pull bar. A sharp utility knife and a T square are essential for marking and cutting the planks to the correct size. Do not forget to have plenty of spacers on hand to maintain the required expansion gap along the walls. Finally you should have a level and a tape measure to ensure the subfloor is flat and your rows are straight.
Step-by-Step Instructions
You must start by preparing the subfloor to be completely clean and free of any old adhesive or debris. Use a level to check for high or low spots across the entire surface area of the room. If you find low spots you should fill them with a self leveling compound to create a flat base. High spots can be sanded down if you are working with a wood subfloor or ground down on concrete. Once the floor is level you should vacuum the entire space to ensure no grit interferes with the planks.
Begin by laying out your first row along the longest wall while using spacers to maintain an expansion gap. Click the planks together on the short ends and use a tapping block to ensure the joints are fully seated. When you reach the end of the row you will need to cut the final plank to fit the remaining space. Use the leftover piece from that cut to start your next row as long as it is at least six inches long. This technique creates a staggered pattern that provides structural integrity and a natural look to the floor.
Continue this process across the room while making sure that each row is locked tightly into the previous one. You may need to use the pull bar for the final row to ensure there are no gaps between the planks and the wall. Be careful to measure carefully around any door jambs or floor vents to ensure a clean finish. Once the entire floor is laid you can remove the spacers and install your baseboards or quarter round molding. This will hide the expansion gap and give the room a finished professional appearance.
From the Toolbox
I remember one Saturday morning when a client called Handydads because they were struggling with a crooked floor installation. They had started in the middle of the room without checking if the walls were square and ended up with a massive gap at the finish. We spent the afternoon pulling up the planks and teaching them how to use spacers and starting lines. By the time we finished the room looked like a professional showroom floor. It just goes to show that taking the time to measure twice always pays off in the end.
Top 5 Mistakes
One of the most common errors is failing to acclimate the vinyl planks to the room temperature for forty-eight hours before you begin. Another frequent mistake involves neglecting the expansion gap around the perimeter which causes the floor to buckle during seasonal changes. Homeowners often forget to stagger the seams properly which weakens the overall locking system of the planks. It is also a mistake to install the material over an uneven subfloor because it leads to clicking sounds and eventual board failure. Finally many people use too much force with a hammer and accidentally break the tongues and grooves of the planks.
Tool and Material Recommendations
We recommend choosing a high quality utility knife with a comfortable grip to handle the many cuts required for this project. You should also look for luxury vinyl planks that feature a thick wear layer to protect against scratches and daily foot traffic. A dedicated flooring installation kit is a great investment because it includes the necessary spacers and tapping blocks. It is wise to purchase a heavy duty pull bar for those difficult areas near doorways where a mallet cannot reach. Finally make sure you have a reliable tape measure and a T square to ensure all your measurements are precise.
Quick Tips and Hacks
You should pull planks from several different boxes at once to mix the patterns and avoid color blocking in one area. If you find it difficult to snap the planks together try using a small amount of lubricant on the tongue of the board. A miter saw can be used for faster and cleaner cuts if you are working in a large room with many straight lines. Use a vacuum frequently during the process to keep the grooves clear of any dust that might prevent a tight click. If you are installing in a bathroom you can apply a tiny bead of clear silicone to the edges for extra water protection.