
A functioning garbage disposal is an essential component of any modern kitchen because it makes cleaning up after meals much easier. When your current unit starts leaking or making strange noises, it might be time to consider a full replacement. Choosing the right disposal involves looking at the horsepower and the overall size of the unit to ensure it fits under your sink. Handydads recommends taking a proactive approach by replacing an old unit before it causes significant water damage to your cabinetry. This guide will walk you through the entire process of swapping out an old disposal for a brand new one with confidence and ease.
Project Snapshot
Replacing a garbage disposal is a project that most homeowners can handle within a couple of hours if they have the right guidance. You will be working with both plumbing and electrical components, so it is important to be comfortable with basic home repairs. Handydads suggests reading the manufacturers instructions thoroughly before you begin the physical work of the installation. This task requires a bit of physical strength because you will likely be lying on your back while holding the heavy unit in place. By the end of this project, you will have a more efficient kitchen and the satisfaction of completing a major repair yourself.
Tools and Materials
You will need a new garbage disposal unit, plumbers putty, a screwdriver, and a pair of channel lock pliers. A hammer and a specialized disposal wrench can also be very helpful for tightening the mounting ring. Handydads emphasizes that having a bucket and some old towels nearby is necessary to catch any residual water from the pipes. Ensure you have wire nuts and electrical tape if your new unit does not come with a pre-installed power cord. Always verify that you have all the necessary components before you start taking your old sink assembly apart.
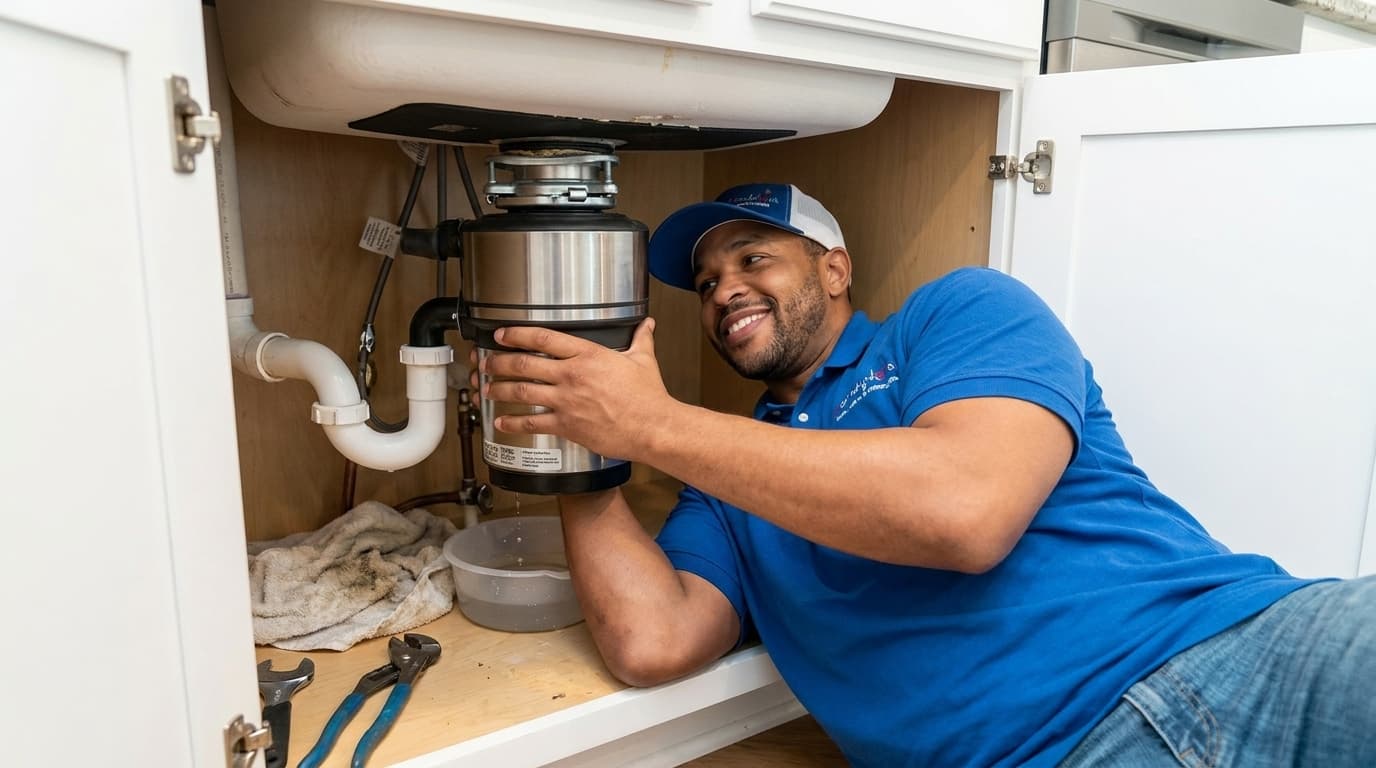
Step-by-Step Instructions
First, turn off the power at the circuit breaker and disconnect the drain pipes from the old disposal using your pliers. Next, loosen the mounting assembly and carefully lower the old unit away from the sink flange to remove it completely. Clean the sink drain hole thoroughly and apply a fresh bead of plumbers putty around the new sink flange before pressing it into place. Attach the mounting bracket and the snap ring to the underside of the sink while someone else holds the flange from above. Finally, lift the new disposal into place, lock it onto the mounting ring, and reconnect the drain lines and electrical wiring carefully.
From the Toolbox
I once visited a client who had tried to install their own disposal but forgot to remove the dishwasher knockout plug first. Their dishwasher started backing up into the sink because the water had nowhere to go after a heavy cycle. It was a simple mistake that many people make when they are rushing through the final steps of the installation process. Handydads loves these types of stories because they serve as a great reminder to pay attention to the smallest details. After I popped out the plastic plug for them, the whole system worked perfectly and the kitchen was back in action.
Top 5 Mistakes
One common mistake is forgetting to remove the knockout plug for the dishwasher drain line which causes drainage issues. Another error is not using enough plumbers putty, which can lead to slow leaks around the sink flange over time. Handydads often sees people over-tightening the mounting bolts, which can actually warp the sink or damage the mounting assembly. Many homeowners also fail to check for leaks under the sink while the disposal is running for the first time. Finally, using an undersized unit for a large family often leads to frequent clogs and premature motor failure in the future.
Tool and Material Recommendations
Choosing a high-quality disposal with stainless steel grinding components will ensure that your unit lasts for many years to come. Handydads suggests looking for models with at least three-quarters horsepower if you plan on grinding a variety of food scraps regularly. A good set of tongue-and-groove pliers is an investment that will help you with many other plumbing projects around the house. High-quality plumbers putty is essential for creating a waterproof seal that will not dry out or crack prematurely. Consider purchasing a unit with a pre-installed power cord to save yourself the hassle of wiring the unit manually during the install.
Quick Tips and Hacks
To keep your disposal smelling fresh, you can grind up small pieces of lemon or orange peel once a week. Running cold water while the disposal is in operation helps to solidify grease so that it can be chopped up and flushed away. Handydads suggests using a wooden spoon to clear jams instead of sticking your hands or metal tools down into the grinding chamber. You can also drop a few ice cubes into the disposal to help clean the blades and knock off any stuck food particles. Always make sure the unit is completely off and unplugged before you attempt to do any maintenance or cleaning inside the hopper.