
Maintaining a beautiful backyard often starts with ensuring your perimeter structures are in top shape. A sagging wooden gate is one of the most common issues homeowners face after a few seasons of weathering. Not only does a dragging gate look unsightly, but it also places undue stress on the hinges and the gate post itself. Handydads understands that a functional gate is essential for both security and the overall aesthetic of your outdoor living space. By following this guide, you can restore your gate to its original glory and ensure it swings smoothly for years to come.
Project Snapshot
This project involves identifying why your gate is drooping and applying a structural fix to square it up again. Most sagging occurs due to gravity pulling on the outer corner or the wood shifting over time. You will learn how to install an anti-sag gate kit or reinforce the corners with braces. Handydads recommends setting aside about two hours for this task depending on the severity of the sag. It is a rewarding DIY project that prevents the need for a complete gate replacement.
Tools and Materials
You will need a few basic tools to get the job done right. Gather a power drill with various bits, a level, a hammer, and a tape measure before you begin. For materials, pick up a gate anti-sag cable kit or heavy duty corner braces. Make sure you have outdoor rated wood screws that are long enough to grip but not so long they poke through the wood. Handydads suggests having a few wooden shims handy to help hold the gate in position while you work.
Step-by-Step Instructions
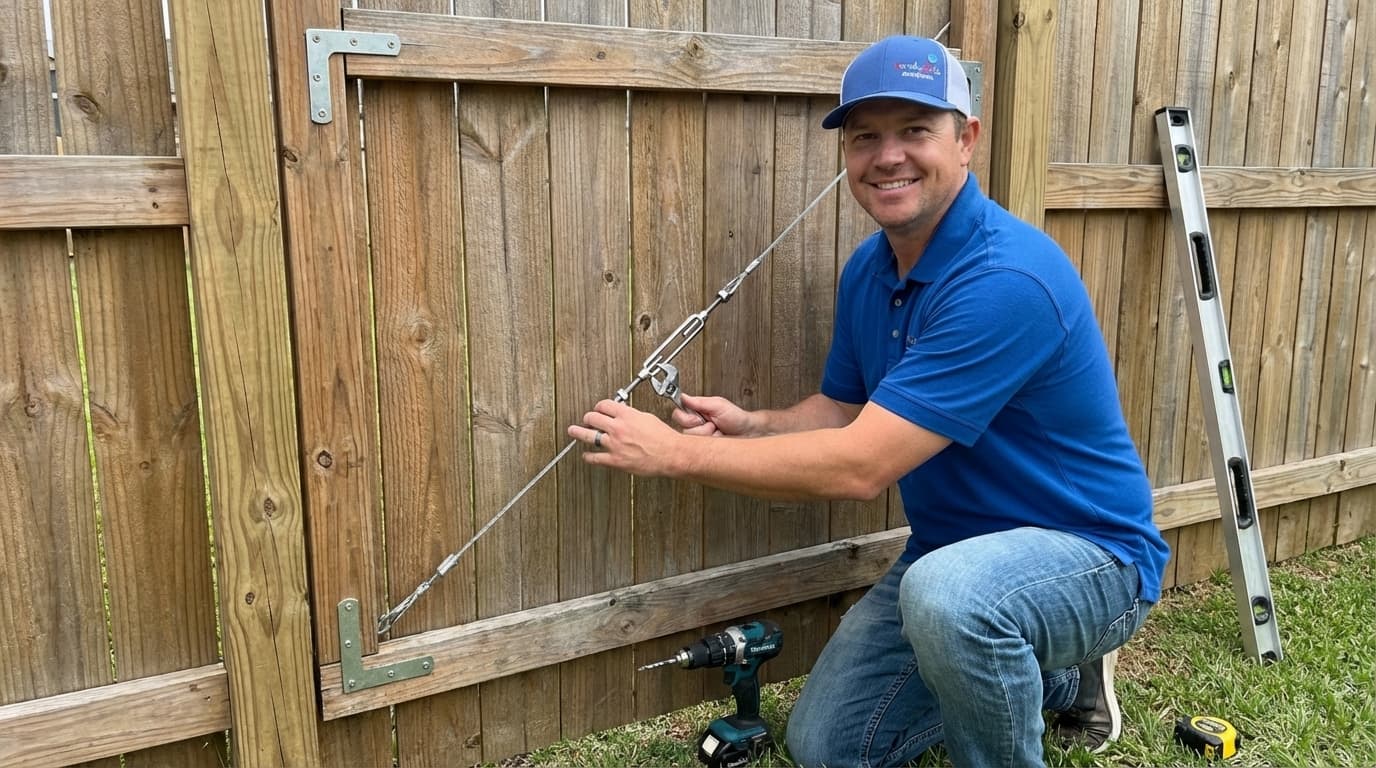
Begin by inspecting the hinges to ensure they are not bent or pulling away from the wood. If the hinges are loose, tighten the screws or replace them with longer ones to reach solid wood. Next, lift the sagging side of the gate and place a block or shims underneath it until the gate is perfectly level. Once the gate is held in the correct position, attach the corner brackets or the anti-sag cable kit according to the manufacturer instructions. If using a cable kit, attach the top bracket to the hinge side and the bottom bracket to the sagging side. Tighten the turnbuckle on the cable until the tension holds the gate at the correct angle without the shims.
From the Toolbox
Last summer, a neighbor asked Handydads to look at a gate that had been dragging for three years. The bottom rail was almost sanded down from rubbing against the concrete driveway every single day. We used a simple cable kit and about twenty minutes of labor to pull that gate back into a perfect square. The homeowner was shocked that such a loud and annoying problem could be fixed with just a few turns of a wrench. It reminded us that small maintenance tasks can save a lot of hardware from failing prematurely.
Top 5 Mistakes
Many people forget to check if the gate post itself is leaning before they try to fix the gate. Using indoor screws that will rust and snap is another common error that Handydads sees often. Some homeowners try to lift the gate by hand while screwing, which usually leads to an unlevel result. Forgetting to pre-drill holes can cause the old wood of the gate to split instantly. Lastly, over-tightening a cable kit can actually warp the gate in the opposite direction if you are not careful.
Tool and Material Recommendations
A high quality cordless drill is your best friend for driving screws into pressure treated lumber. Look for a stainless steel anti-sag gate kit because it will resist rust much better than galvanized options. Handydads recommends using a four foot level to ensure the top rail of your gate is truly horizontal. If your screws are stripping, consider using star drive or Torx head screws for better grip. High quality exterior wood glue can also be added to joint repairs for extra structural integrity.
Quick Tips and Hacks
Rub a bit of bar soap on your screw threads to make them drive into hard wood more easily. If the screw holes are stripped, stick a few toothpicks coated in wood glue into the hole before re-driving the screw. Handydads suggests using a car jack to lift a heavy gate into the level position if you are working alone. Check your gate hinges for lubrication once a year to prevent them from binding and pulling on the wood. Always paint or seal any new wood you add to the gate to match the existing finish.